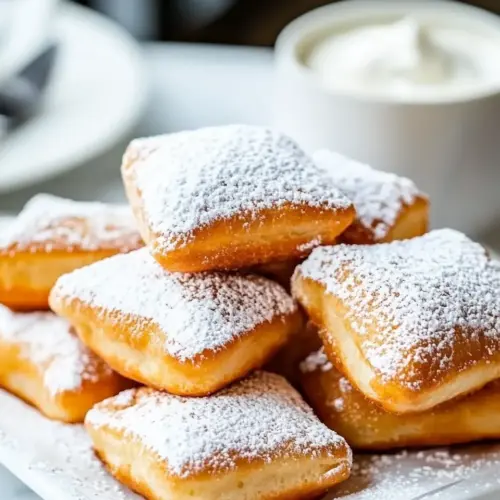
Homemade Beignets
Homemade Beignets deliver warm, airy, crispy pockets dusted in confectioners’ sugar, offering a classic, easy to love treat. This recipe yields pillowy centers and golden exteriors, perfect for brunch or a sweet gathering, and it’s an approachable way to make a bakery style pastry at home.
Equipment
- Dutch Oven
- Pizza Cutter
Ingredients
- 1 1/2 cups lukewarm water Hydrate and activate the yeast while providing a warm base for dough development; lukewarm temperature helps dissolve sugar and yeast for proper fermentation. Use as the primary liquid to achieve the intended dough consistency and encourage gluten formation during mixing and kneading.
- 1/2 cup granulated sugar Sweeten the dough and feed the yeast to boost fermentation; granulated sugar contributes to browning and flavor in the beignets. Dissolve thoroughly in the water to ensure even distribution and consistent rise throughout the dough.
- 1 envelope active dry yeast Leaven the dough by producing carbon dioxide during fermentation; active dry yeast creates light, airy beignets when properly proofed. Sprinkle or dissolve into the warm liquid to check for foam and ensure yeast viability before combining with dry ingredients.
- 2 eggs, slightly beaten Enrich the dough with fat and structure by incorporating proteins and moisture; slightly beaten eggs add tenderness and help bind ingredients. Beat gently to combine yolks and whites for an even texture and to improve dough elasticity.
- 1 1/4 teaspoons salt Season the dough and balance flavors while aiding in gluten strength regulation; salt controls yeast activity and enhances overall taste. Measure carefully to avoid inhibiting fermentation, and add with dry ingredients for even dispersion.
- 1 cup evaporated milk Add richness and a creamy note to the dough while contributing additional fat and milk solids; evaporated milk intensifies flavor and alters texture. Warm slightly to match dough temperature and incorporate smoothly for consistent hydration.
- 7 cups bread flour Provide the main structure and bulk for the dough; bread flour supplies higher protein to develop strong gluten needed for chewy, airy beignets. Sift or measure accurately to maintain proper flour-to-liquid ratios and achieve the expected dough firmness.
- 1/4 cups shortening Introduce solid fat to create tenderness and flakiness in the dough; shortening helps produce a delicate interior by coating flour proteins. Cut in or blend until distributed evenly to prevent overly dense spots and ensure uniform texture.
- Vegetable oil Supply the frying medium and control frying temperature for proper puffing and browning; vegetable oil should be neutral-flavored and heated to the correct temperature. Maintain consistent oil temperature to avoid greasy beignets and ensure rapid expansion when frying.
- 3 cups confectioners’ sugar Finish the beignets with a sweet, powdery coating that enhances visual appeal and flavor; confectioners’ sugar adheres well to warm doughnuts and melts slightly on the surface. Dust generously after frying to achieve the classic presentation and a pleasant sweetness.
Instructions
- Mix water, sugar, and yeast in a large bowl and let sit 10 minutes.: You should notice a faint yeasty, sweet aroma and tiny foam forming on the surface within about ten minutes, signaling active fermentation. This step ensures the active dry yeast is alive and ready to leaven the dough, and it sets the tone for a sturdy rise later. If no bubbles appear check the water temperature and yeast freshness as common causes for failure. Avoid adding salt at this stage, since it can inhibit yeast activity.
- In a medium bowl, whisk the eggs, salt, and evaporated milk together.: The mixture will look smooth and slightly glossy, and you may detect a mild milky scent from the evaporated milk . This combination builds richness and helps the dough hydrate evenly, which improves tenderness. A common mistake is to under-whisk, leaving bits of uneven yolk that affect texture, so whisk until uniform but not frothy.
- Add egg mixture to yeast mixture and mix.: Expect an immediate softening of the yeast mixture, with steam rising slightly if your liquids were warm. Stirring these together distributes flavors and begins gluten formation. If the mixture feels too wet, resist the urge to add extra flour right away; allow a few minutes for absorption. Overmixing at this point can toughen the final product.
- Stir in 3 cups of bread flour. (A wooden spoon is good for stirring.): As you fold in the first portion of bread flour , the texture will shift from soupy to tacky, and you might hear a faint scraping sound as the dough pulls away from the bowl. This measured addition helps you control hydration, giving the dough the chance to form bonds gradually. Adding all the flour at once risks a dense, dry dough, so portioning matters.
- Add shortening and stir it in. Stir in remaining flour.: When you work the shortening into the dough, it will create small, lubricated layers that contribute to tenderness. The dough should become more cohesive as you incorporate the remaining bread flour . If the shortening lumps, warm it slightly in your hands until it blends smoothly. Avoid overworking the dough here, which can develop too much gluten and make beignets tough.
- Place dough on a lightly floured surface and knead until smooth.: Kneading brings the dough to a silky, elastic state and you will feel it change under your palms, becoming springy and less sticky. The sound of the flour rubbing will lessen as gluten develops. A common pitfall is kneading too long, producing a tight dough that resists puffing; aim for elastic and smooth, not overly firm.
- Coat a large bowl with oil, place dough in bowl and cover with plastic wrap.: Toss a thin film of vegetable oil in the bowl so the dough can expand without sticking, and sealing it with plastic helps retain humidity. The enclosed environment encourages even rising and prevents a dry crust. If you skip the coating the dough may cling and tear during rise, impacting texture.
- Let rise at least 2 hours or place in refrigerator overnight.: During this time the aroma becomes mildly fermented and the dough roughly doubles in size, with visible bubbles underneath the surface. A slow, overnight chill will deepen flavor and develop better structure, while a two hour rise is quicker for same day service. Avoid rushing with high heat, which can cause uneven fermentation and off flavors.
- Pour about 3 inches of oil in a Dutch oven and heat to 350 degrees.: The oil should shimmer but not smoke; you will hear a faint sizzle when a small scrap of dough is tested. Maintaining a steady 350 degrees yields a crisp exterior and cooked center. Too low a temperature will make the beignets greasy, and too high will brown the outside before the middle cooks.
- Roll dough to 1/4-inch thickness and cut 2-inch squares. (This is easy to do with a pizza cutter.): Rolling to a uniform 1/4-inch thickness gives consistent puff and frying time, and cutting into 2-inch squares ensures even cooking. A pizza cutter makes clean edges and speeds the process. If pieces vary in size you will get mismatched frying results, so aim for uniformity.
- Working about 4 at a time, place in oil and fry, flipping continuously until they are golden brown.: When frying, listen for a lively sizzle and watch the surface turn an even golden brown; flipping keeps both sides uniform. The aroma will be rich and toasty as the exterior caramelizes. Avoid overcrowding which drops oil temperature and yields soggy beignets; keep batches small for consistent results.
- Test one to make sure it is cooked through. Drain on paper towels and coat with powdered sugar.: Cut a test beignet to check for a fully cooked interior, which should be soft, airy, and free of raw dough. Drain briefly on paper towels to remove excess oil then toss in confectioners’ sugar while still warm so the sugar adheres and slightly melts into the surface. A common error is leaving them too long on the towel, which cools them and reduces sugar adhesion, so dust while warm.
Notes
- Proof the yeast properly - Always proof your active dry yeast in lukewarm water with a pinch of granulated sugar to confirm activity; if no foam appears, replace the yeast to avoid flat dough.
- Measure flour by weight if possible - For consistent results use a scale for the bread flour, because cup measures can vary and affect dough hydration and texture.
- Chill for flavor depth - Letting the dough rest overnight in the refrigerator develops a richer flavor profile and makes shaping easier the next day.
- Maintain oil temperature - Use a thermometer to keep the vegetable oil at a steady 350 degrees, avoiding greasy or burnt beignets caused by temperature swings.
- Sift confectioners’ sugar - Sifting confectioners’ sugar before dusting prevents clumps and yields a smoother, more attractive finish on warm beignets.