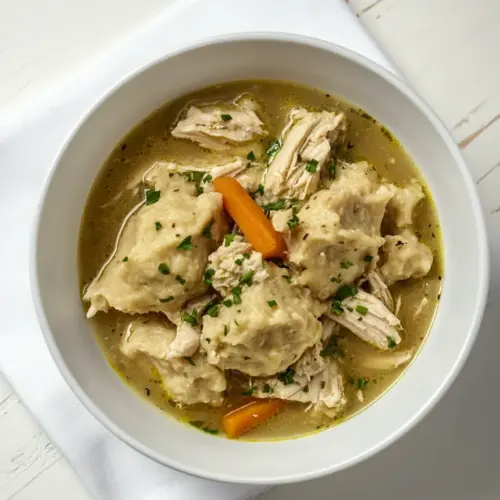
Healthy Slow Cooker Chicken and Dumplings
Healthy Slow Cooker Chicken and Dumplings brings creamy, comforting broth and tender chicken together with wholesome whole wheat dumplings for an easy weeknight dinner. This lightened classic stays soulful and satisfying while using lean protein and vegetables for balanced nourishment. Perfect for chilly nights and busy schedules, it is an accessible family meal you will want to make again and again.
Equipment
- Slow Cooker
- Mixing Bowl
- Forks
- Spoon
Ingredients
- 6 cups chicken broth low-sodium Provides a savory liquid base that simmers gently to cook chicken and meld flavors; choose low-sodium to control overall saltiness and allow seasoning adjustments. Adds moisture to prevent drying and helps form a flavorful broth for the dumplings to poach in. Warms and carries aromatics throughout the slow cooker for a comforting soup-like texture.
- 2 boneless and skinless chicken breasts Contributes lean protein that becomes tender when slow-cooked and shredded or chopped; boneless and skinless cuts reduce added fat for a healthier dish. Absorbs the surrounding broth flavors and herbs while remaining moist due to the long, gentle cooking process. Serves as the primary protein component that makes the meal filling and balanced.
- 1/2 cup peas frozen is best Offers a pop of color and sweet flavor while providing nutritional fiber and vitamins; frozen peas are convenient and hold texture well when added near the end of cooking. Releases gentle starches that slightly thicken the broth without overpowering other vegetables. Complements the chicken with mild sweetness and a pleasant bite.
- 1/2 cup carrots peeled and diced small Adds natural sweetness and body to the stew while breaking down slightly for a tender mouthfeel; peeling and dicing small ensures even cooking and texture throughout. Contributes beta-carotene and fiber, enhancing the dish's nutritional profile. Helps thicken and enrich the broth as the starches release during slow cooking.
- 1 yellow onion diced small Provides a savory aromatic backbone with slightly sweet and pungent notes when diced small and sautéed or simmered in the broth. Enhances overall depth of flavor and pairs well with herbs and garlic to build complexity. Softens during slow cooking and melds seamlessly into the finished texture.
- 1/2 cup celery diced small Contributes crisp, subtle vegetal flavor and aromatic freshness when diced small; celery's natural salts amplify savory notes in the broth. Adds a textural contrast to tender chicken and soft dumplings while imparting fiber and micronutrients. Breaks down slightly to help flavor distribution throughout the pot.
- 3 garlic cloves minced Delivers concentrated pungent and savory notes when minced, brightening the overall profile and pairing strongly with herbs and onion. Releases essential oils that infuse the broth with depth and complexity during gentle simmering. Small amount balances sweetness from vegetables and enhances umami.
- 2 teaspoons dried thyme not ground Imparts warm, slightly minty and earthy flavor that blends with other herbs to create a classic poultry seasoning profile; dried thyme withstands long cooking. Contributes aromatic complexity that infuses the broth and complements chicken without overpowering. Stable in slow cooking, releasing flavor slowly for balanced seasoning.
- 2 teaspoons dried basil Adds sweet, slightly peppery herbal notes that marry with thyme and sage for a rounded herbaceous base; dried basil holds up well during slow simmering. Enhances Mediterranean-influenced flavors and provides subtle aromatic lift to the broth and dumplings. Works especially well with tomatoes or acidic components if present.
- 1 teaspoon ground dried sage Provides an earthy, slightly peppery and savory note typical of poultry-focused recipes; ground dried sage contributes traditional warmth to chicken dishes. Helps create a comforting, savory profile that echoes classic chicken-and-dumplings seasoning. Blends into the broth to season both meat and dumplings evenly.
- 3 tablespoons butter cold, cubed Provides rich mouthfeel and a tenderizing fat that enhances dumpling texture when cut cold into flour; cold, cubed butter creates flaky pockets. Contributes subtle dairy richness that improves overall palatability and helps bind dumpling dough when incorporated. Melts into the mixture to enrich both broth and dumplings.
- 1 cup whole-wheat flour Forms the structural base of the dumplings, supplying gluten and body when combined with milk and fat; whole-wheat flour increases fiber and nutritional value compared to refined flour. Offers a nuttier flavor and denser texture that pairs well with savory ingredients. Works with baking powder and liquids to create tender, wholesome dumplings.
- 1 teaspoon baking powder Provides leavening to the dumpling dough so pieces puff and become light rather than dense; baking powder reacts with wet ingredients when mixed. Ensures dumplings rise slightly while poaching atop the simmering broth for a tender interior. Balances whole-wheat flour's density to deliver softer texture.
- 1/2 teaspoon garlic powder Contributes a subtle savory garlic note to the dumpling dough or overall seasoning, augmenting fresh garlic without overpowering. Enhances overall flavor cohesion by reinforcing the garlic aroma throughout the dish. Adds a mild, dried form of garlic that is shelf-stable and evenly distributed in the batter.
- 1/2 teaspoon onion powder Adds a concentrated savory onion flavor to the dough or seasoning blend, complementing fresh onion used in the slow cooker. Helps develop a rounded, layered aromatic profile when combined with other powdered seasonings. Provides consistent, distributed onion taste in small quantities.
- 1/3 cups skim milk more if needed Supplies liquid to hydrate the dumpling dough and determine its consistency; skim milk keeps the recipe lower in fat while providing necessary moisture and some protein. Allows adjustment for dough texture—add more if mixture seems dry—to achieve tender dumplings. Contributes light dairy flavor that enriches the batter without heaviness.
Instructions
- Place the chicken broth, chicken breast, peas, carrots, onion, celery, garlic, thyme, basil, and sage in slow cooker. Cook on high for 4 hours or on low for 6 hours.: As the ingredients mingle, you will notice the raw, sharp scent of the onion and garlic mellowing into a sweeter aroma, and the herbs start to perfume the liquid; this slow melding is essential to building a deep, layered broth. The visual cue is a gentle steam rising from the cooker and the vegetables beginning to lose their bright, raw colors, turning more translucent, which shows flavor extraction. A common mistake is overcrowding the cooker, which prevents even heat circulation, so give the ingredients a little space. Also avoid using a pre salted broth with additional salt, because sodium concentrates as the liquid reduces. When stirring at this early stage, use a gentle hand, you do not want to shred the chicken yet, keep it intact so it cooks evenly.
- If you have been cooking the soup on low, change the temperature of the slow cooker to high. In a large mixing bowl, combine the butter, flour, baking powder, garlic powder, and onion powder. Mix well, cutting the butter into the dry ingredients until the mixture looks like fine crumbs. Gradually add the skim milk until a thick (and slightly sticky) batter forms. Note: the entire amount of milk might not be used or more could be needed.: Over hours, the textures and smells shift from raw to roasted sweetness, even though nothing is actually roasted; the long, steady heat softens the chicken fibers until they fall apart with a fork, and the broth darkens slightly as flavors concentrate. You will hear an almost inaudible simmer, and occasionally you may see small bubbles at the edges, indicating steady heat. One trick I use is to resist opening the lid frequently, because each lift lets heat escape and lengthens cooking time. A mistake people make is assuming higher heat equals faster depth of flavor, but the low, long cook extracts collagen and richness you do not get on quick cycles, so patience is rewarded.
- Remove the chicken from the slow cooker and shred. Return it to the slow cooker and stir. Drop the batter into the hot soup by the spoon full, about 1 tablespoon of batter per dumpling. Do not make the dumplings too small or they will dissolve into the soup. Cover and cook for 20 to 30 minutes or until the dumplings are cooked through.: Switching to high raises the internal temperature so the dumplings can steam properly when added, and you will notice the broth respond by developing a light surface shimmer, signaling it is hot enough. Sensory cues include a more pronounced herb aroma and a slight increase in steam. The reason this matters is dumplings need a vigorous but gentle steam to set without dissolving, and a too cool liquid yields gummy dumplings. Avoid the error of adding dumplings to lukewarm broth, which leads to undercooked centers; instead ensure a sustained higher heat for the final phase.
- In a large mixing bowl, combine the butter, flour, baking powder, garlic powder, and onion powder: As you cut the cubed cold butter into the dry ingredients, aim for a coarse, crumbly texture reminiscent of fine crumbs; this tactile step creates small pockets of fat that melt during cooking and give the dumplings tenderness. You will feel resistance as the butter breaks into pea sized and smaller pieces, and the mixture will have a sandy feel when ready. A typical mistake is letting the butter warm too much in your hands, which yields a greasy batter, so work quickly and chill the butter if your kitchen is warm. The why is simple, those little butter pockets are what make dumplings tender and not dense.
- Mix well, cutting the butter into the dry ingredients until the mixture looks like fine crumbs: When the mixture resembles fine crumbs, the aroma of the dry spices will become more apparent and the texture should be uniform; this is the moment to add the liquid. The crumbly texture ensures even distribution of fat and leavening, and prevents dense, flat dumplings. A common pitfall is under cutting the butter, which leaves large chunks and uneven cooking. Keep the mixture cool and take your time to reach a consistent crumb stage.
- Gradually add the skim milk until a thick (and slightly sticky) batter forms. Note: the entire amount of milk might not be used or more could be needed : As you pour and fold in the skim milk , the mixture will change from dusty to tacky, and you will see it come together into a cohesive, slightly sticky batter that holds a spoonful shape. The tactile cue is that it clings to the spoon but drops in a mound when nudged. The reason for adding milk gradually is to avoid overhydrating, which can make dumplings dense; conversely, too little liquid yields dry, crumbly dumplings that resist bonding. If the batter seems too wet, rest it briefly while you prep the cooker, because it will bind slightly. Avoid overmixing, which activates gluten and toughens the dumplings, instead fold until just combined.
- Remove the chicken from the slow cooker and shred: When you lift the chicken out, it should be fork tender and give way with minimal resistance; shredding releases juices and provides uniform pieces that distribute through the soup. The sound is a soft tearing rather than a wet, sticky pull, and the visual is strands rather than chunks. Save any juices that cling to the plate and stir them back into the broth for extra flavor. A common mistake is shredding too finely, which can make the texture gummy; aim for medium strands that remain distinct in the bowl.
- Return it to the slow cooker and stir: As the shredded chicken folds into the hot broth, you will see the liquid momentarily thin and then reemulsify, and the aroma becomes savory and rounded. Stirring also integrates any reserved juices, ensuring an even protein distribution. Avoid vigorous stirring which can break down vegetables and create cloudy broth, instead use a gentle fold to keep pieces intact. This step is crucial because even distribution of chicken ensures every spoonful has protein and texture.
- Drop the batter into the hot soup by the spoon full, about 1 tablespoon of batter per dumpling: When you drop each spoonful, it will hold its shape briefly before settling and absorbing steam; they should be slightly larger than a marble to avoid dissolving. As they sit, you will notice a subtle lightening of the broth near each dumpling as starches leach out, then they become pillowy as they cook. The key is consistent sizing, because small dumplings can disintegrate while large ones may stay doughy inside. A typical error is making them too small, so aim for that tablespoon size and space them slightly to allow even cooking.
- Do not make the dumplings too small or they will dissolve into the soup: Dumplings of proper size maintain shape and texture, and as they steam you can watch their surfaces firm while the interior stays tender; this visual is a great indicator of success. If you see lots of small particles in the broth, that signals dissolved dumplings and a loss of texture. The fix is to combine slightly larger batter portions next time and ensure the broth is fully at high heat so they set quickly. Remember that the dumplings will expand a bit as they cook, so size them accordingly.
- Cover and cook for 20 to 30 minutes or until the dumplings are cooked through: During this final period, steam will circulate and set the dumplings while the aroma shifts toward a homey, full bodied finish; you may hear a soft, steady hiss as steam escapes from the lid. The visual cue is that the dumplings look plump and slightly matte rather than glossy, and a toothpick inserted should come out clean from the center. Avoid lifting the lid to check too often, which releases steam and extends cooking time; trust the clock and check once toward the end. When done, the dumplings will be tender, and the broth will have a warm, rounded flavor that ties everything together.
Notes
- Add extra vegetables If you have more carrots or celery on hand, increase their quantity to boost fiber and color, but keep the dice small so they cook evenly in the slow cooker.
- Adjust herb intensity If you prefer a brighter herb profile, stir in a touch more dried thyme or basil toward the end so the flavors stay vibrant rather than muted by long cooking.
- Milk swap for texture If the batter feels too stiff, add a splash more skim milk a teaspoon at a time until it reaches a thick but slightly sticky consistency that holds together when spooned.
- Make ahead prep You can combine the dry dumpling ingredients in a zip top bag and refrigerate until ready; add cold cubed butter just before mixing to keep the crumbly texture.
- Serving temperature Let the finished soup rest five minutes off heat so flavors settle and dumplings firm slightly, giving a better mouthfeel when served.