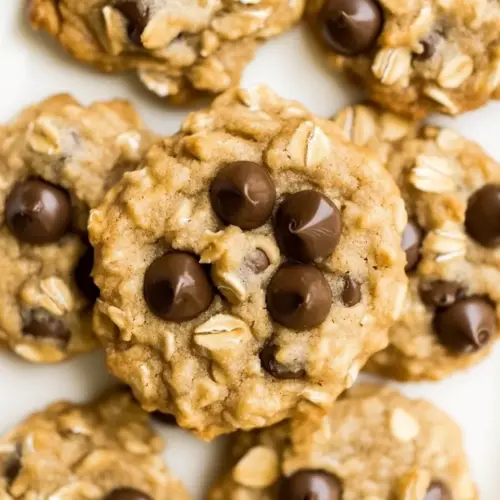
Healthy Oatmeal Cookies
Healthy Oatmeal Cookies are chewy, lightly sweet, and satisfyingly nutty, making them an easy snack or treat. With wholesome ingredients like rolled oats, oat flour, and almond butter or cashew butter, they bake into golden edged cookies with a soft center. Perfect for easy weeknight baking or meal prep, they are approachable and worth making again.
Equipment
- Oven
- Mixing Bowl
- Baking Sheet
- Spatula
Ingredients
- 3/4 cups pelt flour or oat flour (90 g) (or try these Keto Cookies) Provide a gluten-free flour base that gives structure and chewiness to the cookies while absorbing liquids; use pelt or oat flour measured accurately for consistent texture and replaceable by similar flours if needed.
- 1/2 cup rolled oats (45 g) Contribute hearty texture and mild oat flavor while adding chew and visual interest; fold in gently to preserve some whole-oat tooth and balance moisture.
- 3/4 cup coconut sugar (100 g) Add natural sweetness and a caramel-like depth that sweetens without refining white sugar; adjust slightly to taste and ensure even distribution for uniform sweetness.
- 1/3 cup chocolate chips or raisins or add-ins of choice (40 g) Provide bursts of sweetness and contrasting texture that complement the oats; choose chocolate chips, raisins, or other mix-ins and fold in at the end to avoid melting or clumping.
- 1/2 tsp baking soda Act as a leavening agent to help the cookies spread and rise a bit, creating a lighter crumb; measure precisely to prevent soapy or metallic aftertastes.
- 1/4 tsp salt Enhance overall flavor by balancing sweetness and bringing out other spices; use a small amount to improve taste without making the cookie salty.
- 1/3 cup almond butter or cashew butter (80 g) (regular butter also works) Bind and add richness while supplying a subtle nutty flavor and healthy fats; choose almond or cashew butter for creaminess, or use regular butter if preferred for different texture.
- 2 tbsp water (30 g) Adjust dough consistency and help hydrate dry ingredients for a cohesive dough; add gradually to reach the desired softness without making the mixture too wet.
- 1/4 tsp pure vanilla extract Provide warm aromatic notes and enhance sweetness perception with a small amount of pure vanilla; use real extract for best flavor clarity.
- 1/4 tsp ground cinnamon (optional) Offer warm, fragrant spice that complements oats and nuts when used; include cinnamon optionally to deepen flavor and add subtle complexity.
Instructions
- To make the healthy oatmeal cookies, start by preheating the oven to 325 F. If your nut butter is not already easy to stir, gently warm it in the microwave or in a small pan on the stove until thin and runny. Stir dry ingredients in a large bowl, then mix in remaining ingredients. The dough will be dry at first but will form a cookie dough texture after about a minute. So keep stirring and breaking up all clumps of nut butter. For best results, do not add more liquid. Roll into cookie dough balls, and place the balls on two greased baking sheets. Leave space between each ball because they will spread as they cook. Bake on the center rack of the oven for 10 minutes. Let cool before handling, during which time the cookies firm up considerably.: Warm air and a hint of heat help set the dough properly, producing that desirable edge crispness while the center remains chewy. As the oven comes up to temperature you will notice a steady, dry warmth; this signals even baking and prevents overly rapid spreading. The preheat also primes the oven so the cookies begin rising immediately on contact, contributing to the right texture. A common mistake is placing cookies into a cold oven, which yields unevenly baked, dense results, so be sure your oven reads a reliable steady temperature before inserting pans.
- If your nut butter is not already easy to stir, gently warm it in the microwave or in a small pan on the stove until thin and runny: The tactile transformation of the almond butter or cashew butter is important because a runnier texture blends more uniformly with the dry ingredients, preventing clumps. Gently warming will release a soft nutty aroma and make stirring effortless, but avoid overheating, as that can separate oils and change mouthfeel. Stir it to a glossy, pourable state and you will see it blend into the dough smoothly. A pitfall is overheating which creates an oily layer, so warm only in short, cautious bursts.
- Stir dry ingredients in a large bowl: When you mix the pelt flour or oat flour , rolled oats , coconut sugar , baking soda , and salt , you will sense a dry, grittier texture that forms the backbone of the cookie. This step distributes the leavening and seasoning evenly, which is why it matters for consistent rise and flavor. Stir until the color and texture look uniform with tiny specks of oats visible throughout. Avoid under mixing the dry base, which can cause pockets of baking soda or salt and uneven taste.
- Then mix in remaining ingredients: As you combine the warmed nut butter, water , pure vanilla extract , and optional ground cinnamon , the dough will gradually transform. You'll notice the nut butter coating the oats, and the mixture taking on a slightly glossy sheen. This step is where the dough begins to cohere, and you should aim for a texture that holds together when pressed. Overworking the mixture can lead to denser cookies, so blend until just incorporated, and then pause to check the texture.
- The dough will be dry at first but will form a cookie dough texture after about a minute: Expect a short period of stubborn dryness, then a satisfying shift as the ingredients hydrate and bind. When the dough reaches the right stage, it will hold together when squeezed and show a uniform color and speckled look from the oats and any add ins. The transformation is tactile and reassuring, and you will hear less scraping as the dough cleans the sides of the bowl. Be careful not to add extra liquid prematurely, which can make the cookies spread too thin during baking.
- So keep stirring and breaking up all clumps of nut butter: Working through clumps is crucial so that every bite has an even distribution of nutty richness. Use a spatula to press and smear any thick spots until the mixture looks cohesive and slightly glossy. This produces consistent texture and avoids pockets of oily or under incorporated nut butter. A common misstep is leaving large clumps which bake into oily indentations, so take the extra minute to smooth them out.
- For best results, do not add more liquid: Restraint here helps maintain the ideal density and chew. The dough will firm as it cools, so adding more water usually produces cookies that spread excessively and become flat. If your environment is very dry, you may be tempted to add more moisture, but resist that urge and instead check the dough after a minute of mixing to reassess. Too much liquid is irreversible at this stage and leads to disappointing texture.
- Roll into cookie dough balls, and place the balls on two greased baking sheets: Forming uniform balls ensures even baking and similar chew across the batch. As you roll, you will feel the dough compress and smooth out, and the surface should have a soft sheen from the nut butter. Space the balls evenly so air circulates and they can spread predictably. A typical mistake is crowding the sheet which produces merged cookies and uneven baking, so leave adequate space between each ball.
- Leave space between each ball because they will spread as they cook: During the first few minutes of baking you will see the edges relax and the centers puff slightly, then the spread will settle into a nice round shape. That visual cue tells you the cookies are progressing correctly, and you will notice a gentle browning at the edges when they are almost done. If you place the balls too close, they will fuse and create an irregularly baked mass, so anticipate spread when arranging them.
- Bake on the center rack of the oven for 10 minutes: As they bake, the kitchen will fill with a warm, toasty aroma and the edges will take on a faint golden tone. The center will still seem soft when you remove them, but they continue to set as they cool, firming into the right chew. Baking on the center rack ensures even heat exposure and avoids burnt bottoms or undercooked tops. A common error is overbaking for a firmer cookie, but that reduces chew and dries them out, so trust the timing and visual cues.
- Let cool before handling, during which time the cookies firm up considerably: Cooling is a quiet but essential finishing step, because residual heat carries on cooking the cookies slightly, leading to the ideal texture. When you touch them after five to ten minutes, you will find a balance between a tender center and slightly crisp edges. If you try to move them too early they may break apart, so patience rewards you with intact, attractive cookies. Avoid stacking while still warm, which traps steam and makes them lose crispness.
Notes
- Fruit sweetened option: Try the banana based fruit sweetened cookies by replacing the coconut sugar and part of the water with mashed ripe banana, which adds natural sweetness and moisture. Mash thoroughly and reduce added water to avoid overly loose dough. Expect a softer, denser cookie with a pronounced banana aroma and slightly darker crumb. This change works well if you want fewer processed sweeteners, though the texture will be more cake like. Chill the dough briefly if it becomes too soft to form balls.
- Mix ins matter: Swap or vary the chocolate chips or raisins for toasted nuts, seeds, or a mix of dried fruit to change texture and flavor. Toasting nuts beforehand brings out their oils and enhances their crunch, and seeds add a pleasant contrast to the chew of oats. Add no more than the listed amount to avoid structural issues, and toss any add ins with a teaspoon of flour so they do not sink during baking.
- Flavor boosts: Add a pinch more ground cinnamon or a very small pinch of nutmeg to deepen the spice profile without overwhelming the oats. Spices are powerful, so small increments go a long way. Stir them into the dry ingredients to ensure even distribution and to prevent clumping pockets of spice in the finished cookie.
- Texture tweaks: For a chewier result, use old fashioned rolled oats as listed, and gently press each dough ball after placing on the sheet to encourage even spread. For a slightly crisper cookie, flatten the balls more and bake a minute or two longer, keeping a close eye on color. Remember that cooling also firms cookies, so rely on both baking time and cooling for your desired finish.
- Storage and freezing: Freeze baked cookies on a tray until solid, then transfer to a sealed container for up to three months. To refresh, warm briefly in a low oven or microwave for a few seconds to restore chew. For freezing unbaked dough, shape into balls and freeze on a tray before bagging, then bake from frozen with an extra minute or two added to the bake time.