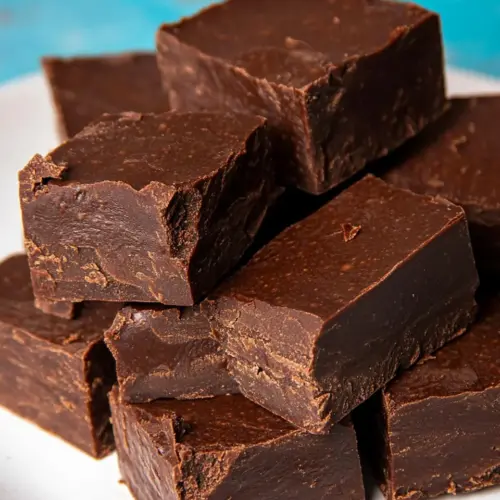
Healthy Chocolate Fudge
Healthy Chocolate Fudge is a creamy, easy no bake treat that combines rich cocoa powder with wholesome fats and natural sweeteners for a satisfyingly chocolatey snack. This simple recipe yields indulgent squares that are great for quick desserts or snack prep, perfect for anyone seeking a cleaner, homemade chocolate fix.
Equipment
- Food Processor
- 8x8 pan
- Parchment Paper
Ingredients
- 1/2 cup cocoa powder Provides deep chocolate flavor and rich color while contributing a slightly bitter backbone that balances sweetness; sifts or whisk to remove lumps and ensure smooth texture in the fudge batter. Adds cocoa solids which help set the fudge when chilled and intensify overall chocolate intensity.
- 1 cup coconut butter or almond butter Offers creamy fat and body to create a smooth, spreadable texture; melts easily and emulsifies with wet ingredients to produce a rich mouthfeel. Supplies subtle nutty or coconut notes depending on choice, boosting richness without dairy.
- 2 ripe bananas or additional cup coconut butter Adds natural sweetness and moisture when mashed, helping to bind and thicken the mixture while reducing reliance on added sugars; choose ripe bananas for easier blending and smoother texture. Alternatively increases fat content and creaminess when replaced with more coconut or almond butter for a firmer, richer fudge.
- 4 tbsp pure maple syrup or honey, or stevia to taste Sweetens and loosens the mixture to make it pourable and to balance the cocoa bitterness; maple syrup or honey contribute distinct flavor notes while stevia provides zero-calorie sweetness. Controls final sweetness intensity and influences set firmness depending on amount used.
- 1/4 tsp salt Enhances overall flavor by balancing sweetness and highlighting chocolate notes; dissolves into the mixture to subtly sharpen taste. Helps round out flavors so the fudge tastes more complex rather than flat.
- 1/2 tsp pure vanilla extract (optional) Adds a warm, aromatic note when included, lifting the flavor profile and enhancing perception of sweetness; a small amount is sufficient to avoid overpowering the chocolate. Can be omitted without affecting basic structure but improves overall depth.
- 1 pinch cinnamon or other optional add ins like chia seeds, shredded coconut, chopped walnuts, or mini chocolate chips Introduces optional spice or texture contrast depending on choice, providing cinnamon warmth or crunchy additions like seeds, coconut, nuts, or mini chips. Allows customization for extra flavor and mouthfeel variations while keeping base recipe intact.
Instructions
- Make sure the bananas are overripe (at least partially brown) and the coconut butter is soft before starting. Blend all ingredients in a food processor until completely smooth. If not using banana, increase sweetener as desired. Spread into an 8×8 pan lined with parchment or wax paper. Refrigerate or freeze until firm, then cut as desired. Refrigerate leftovers, or freeze for up to a month and thaw before serving.: The first sensory clue you will notice is the sweet, fermented scent from bananas when they are ready, which ensures natural sweetness and a creamy texture. Soft coconut butter should feel pliable to the touch and spreadable, not rock hard, which helps the motor of your processor pull everything together with a smooth glide. Why this matters, the ripeness and softness guarantee a cohesive mixture that will emulsify evenly, preventing lumps or graininess. A common mistake is using underripe bananas , which yield less sugar and a firmer, less cohesive blend, so plan ahead and let fruit ripen on the counter.
- Blend all ingredients in a food processor until completely smooth: As you blend, listen for a steady, even whir, and watch the texture change from coarse to glossy. The smell will evolve into warm chocolate notes, and the mixture should become uniformly glossy with no streaks of dry cocoa powder . This technique matters because thorough blending ensures the fats in the coconut butter coat the cocoa particles, producing a silky mouthfeel. One troubleshooting tip is to stop occasionally and scrape the bowl to reincorporate any unmixed pockets, which prevents dry patches. Avoid over processing to the point oils separate, which happens if the motor overheats.
- If not using banana increase sweetener as desired: When you skip the natural sweetness from bananas , the aroma will shift and feel less fruity, so you will rely on your chosen sweetener to round bitterness. Taste the blended base and add maple syrup or honey incrementally, letting the flavor settle between additions, because a small change can quickly swing the balance. This matters for final mouthfeel and sweetness perception. A common error is adding too much sweetener at once; it is easier to add than to remove, so proceed in small steps and chill a spoonful to judge the finished result.
- Spread into an 8×8 pan lined with parchment or wax paper: The visual cue you want is an even glossy surface without air gaps or thick ridges, which tells you the mixture is level and will set uniformly. Use a spatula to press the batter into corners, and tap the pan gently on the counter to pop air bubbles, which helps prevent pockets in the final texture. This step matters because an even thickness ensures predictable chilling time and uniform slicing. Avoid leaving the mixture mounded in the center, which creates uneven edges that set harder than the middle.
- Refrigerate or freeze until firm then cut as desired: You will notice the aroma becoming more subdued as the fat solidifies, and the surface will lose shine and feel firm to the touch when it is ready. Refrigeration gives a firmer yet slightly yielding texture, while freezing speeds the process and yields a very firm bite. This chilling step is crucial because it allows the fats to crystallize and the structure to set, producing clean slices. A typical mistake is attempting to cut too soon, which creates squashed edges and sticky crumbs; wait until the piece resists an indentation before slicing.
- Refrigerate leftovers or freeze for up to a month and thaw before serving: Proper storage preserves texture and flavor; keep the fudge in an airtight container to prevent it from absorbing fridge odors, and separate layers with parchment for easy serving. When you thaw from frozen, allow a short tempering time at room temperature so the texture softens and the flavors bloom. This matters because abrupt reheating or leaving the pieces out too long can make them overly soft or oily. A common pitfall is storing in direct sunlight or next to strong smelling foods which can alter the delicate flavor profile.
Notes
- Swap nut butters If you use almond butter instead of coconut butter, expect a slightly nuttier aroma and a creamier, less coconut forward finish, which some people prefer for a milder chocolate profile.
- Banana alternative When omitting bananas, increase the nut butter to maintain structure and add 1 to 2 tablespoons more sweetener, tasting as you go, since bananas contribute both moisture and sugar.
- Adjust sweetness Start with less maple syrup or honey than you think, blend and taste, then add more if needed, because chilling mutes perceived sweetness slightly.
- Add texture sparingly Include a small handful of chopped walnuts or shredded coconut to introduce contrast, but avoid overloading the batter which can prevent uniform setting.
- Use quality cocoa Simple upgrades like a better unsweetened cocoa powder will intensify chocolate depth without changing technique, giving more nuanced flavor with no extra steps.
- Chill methods For quickest set, use the freezer for 20 to 30 minutes, then move to the fridge to finish, this prevents overhardening and keeps a pleasant bite.