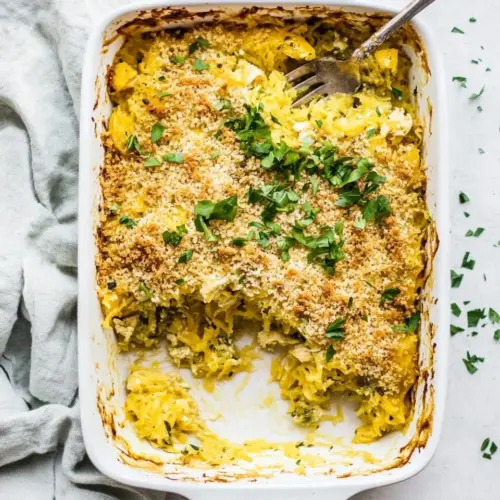
Healthy Chicken Noodle Casserole with Spaghetti Squash
Healthy Chicken Noodle Casserole with Spaghetti Squash blends creamy, silky dairy free sauce with tender shredded chicken and roasted spaghetti squash for an easy weeknight dinner. The dish is comforting yet lighter than traditional casseroles, featuring a crunchy cracker topping and bright parsley finish, making it perfect for family meals or meal prep.
Equipment
- Oven
- Large Baking Sheet
- Medium Pot
- Large deep frying pan
- Large baking dish
- Mixing Bowl
Ingredients
- 2 spaghetti squash medium, halved with the seeds scraped out (about 2 1/2 pounds each) Halved and scraped to create noodle-like strands when roasted, providing a low-carb base and mild, slightly sweet flavor to the casserole. Acts as the primary vegetable component that soaks up creamy sauce and seasonings while offering a tender, fibrous texture. Roasting concentrates natural sugars and adds a lightly caramelized note that complements savory chicken.
- 2 teaspoons olive oil Drizzled over squash halves before roasting to promote browning and prevent sticking while adding a subtle fruity richness. Enhances mouthfeel in the casserole and helps crisp the exposed squash flesh for better texture contrast. Also used in sautéing aromatics to impart gentle, healthy fat.
- Salt Added sparingly during cooking to season components and balance flavors, providing essential mineral taste enhancement. Used at multiple stages to ensure the dish is evenly seasoned from the squash to the chicken and sauce. Helps amplify other aromatics without overpowering delicate coconut and almond milks.
- 1 pound raw chicken breast cut into chunks Cut into chunks to provide lean protein and hearty texture throughout the casserole, absorbing seasonings and sauce for cohesive bites. Cooked until tender and slightly browned to contribute savory depth and satisfying chew. Also supports the nutritional profile with high-quality protein.
- 1/2 teaspoons ea salt Sprinkled during chicken seasoning to enhance savory profile and support overall balance with saltiness. Provides a measured, consistent seasoning amount to avoid over-salting the dish. Works in concert with other spices to bring out natural chicken flavors.
- 1/2 cup gluten- and dairy-free cracker crushed (I used Lance Gluten-Free Original) Crushed into coarse crumbs to provide a crunchy topping or binder that offers textural contrast and gluten-free compliance. Sprinkled over the casserole before baking to create a golden, crisp finish that helps retain moisture beneath. Adds subtle savory, toasty flavor depending on the cracker used.
- Fresh parsley minced (for garnish) Minced and scattered over the finished casserole to add fresh, bright herbal aroma and a pop of color. Acts as a finishing garnish that lightens the dish and complements richer coconut-based sauce components. Enhances perceived freshness and provides a mild herbaceous note.
- 1 tablespoon olive oil Used as cooking fat for sautéing onions and celery, contributing a smooth, balanced oiliness without overpowering other flavors. Helps create a favorable base for the sauce by gently softening aromatics and transferring heat evenly. Also contributes to overall mouthfeel in the casserole.
- 1 cup onion diced Diced and sautéed to establish savory aromatics that build the flavor foundation, offering sweetness and body to the sauce. Softened until translucent to release natural sugars and integrate with celery and spices for depth. Contributes bulk and texture to each casserole portion.
- 1/2 cup celery thinly sliced Thinly sliced and cooked with onions to provide a subtle vegetal crunch and aromatic complexity. Softens during cooking and contributes cellulose that helps thicken the finished texture slightly. Adds delicate savory-sweet notes that harmonize with chicken and seasonings.
- 1 cup + 1 tablespoon full-fat coconut milk divided Divided to create a creamy, dairy-free base for the sauce that provides richness, tenderness, and slight coconut sweetness. Incorporated in portions to ensure smooth consistency and to mimic full-fat dairy cream, binding the casserole components. Also contributes to a silky mouthfeel and assists with browning during baking.
- 1 cup + 1 tablespoon unsweetened almond milk divided Divided to dilute and lighten the coconut milk while maintaining creaminess, providing a neutral, nutty background that carries flavors. Used to adjust sauce viscosity and maintain a balanced, dairy-free profile while supporting the creamy texture. Helps create a smooth, cohesive sauce when combined with starch.
- 1 teaspoons ea salt Measured to add consistent salty seasoning across layers, enhancing savory notes in both filling and sauce. Used along with other spices to ensure depth and balance without overwhelming the delicate milks. Provides a baseline seasoning that complements both chicken and vegetables.
- 1 teaspoon onion powder Added as a dried seasoning to reinforce savory onion flavor without moisture, boosting umami and rounded depth. Blends easily into the sauce and helps amplify the sautéed onion's natural sweetness. Works well in tandem with garlic powder and parsley for balanced seasoning.
- 1 teaspoon garlic powder Sprinkled to impart concentrated garlic flavor in a dry, shelf-stable form, enhancing savory depth throughout the casserole. Disperses uniformly in the sauce and seasoning mix to avoid raw garlic sharpness while providing consistent aroma. Complements the chicken and milder aromatics effectively.
- 1 teaspoon ground parsley Used as a dried herb to contribute gentle earthy, herbal notes that brighten the overall profile and tie flavors together. Incorporated into the seasoning mix to provide subtle green herbiness without overpowering the coconut and almond milks. Enhances perceived freshness when combined with parsley garnish.
- 1/4 teaspoon pepper Added sparingly to provide a mild heat and counterbalance sweetness, bringing subtle spice and complexity to the dish. Helps define the casserole's flavor contours and prevents it from tasting flat. Balances creamy elements and supports other seasonings.
- 2 tablespoons tapioca starch Mixed into the sauce as a gluten-free thickening agent that creates a glossy, clingy texture and stabilizes the creamy base. Dissolves to form a smooth binder that prevents separation of milks and liquids during baking. Ensures the casserole holds together and yields a satisfying, cohesive spoonful.
Instructions
- Preheat your oven to 400°F and line a large baking sheet with tinfoil or parchment paper.: The warm, dry heat of a properly preheated oven creates even roasting, which encourages the squash to caramelize and become tender. As the oven comes up to temperature you may smell a faint toasty scent when the air hits the pan, a good sign the oven is ready. A common error is not allowing the oven to fully preheat, which can yield unevenly roasted squash with some sections still firm; give it time to reach a steady 400°F for consistent results.
- Rub the oil on the insides of the spaghetti squash halves and sprinkle with salt. Roast, cut-side down, until fork-tender, about 40 minutes to 1 hour. Set aside to cool.: Rubbing in oil helps the surface of the squash brown and prevents it from drying while roasting. You will notice a slight shimmer on the flesh, and after roasting the edges will develop a gentle golden tint. If you over oil, the flesh can become greasy rather than caramelized, so use just enough to coat.
- Once cooled, bring a medium pot of salted water to a boil. Add the chicken and cook until no longer pink inside, about 12-16 minutes. Set aside to cool.: As the squash roasts you will hear a quiet settling of the oven and later smell a gentle sweetness as sugars caramelize. A fork should slide in easily and the flesh will separate into strands when scraped. Under roasting leads to stringy, undercooked squash that resists shredding, so test with a fork toward the lower end of the time range and extend if needed.
- In a large, deep frying pan, heat up the olive oil on medium-high heat. Add in the onion and celery and cook, stirring frequently, until they begin to soften, about 3-4 minutes.: Allowing the roasted squash to cool slightly makes it safer to handle and helps the strands separate more cleanly. The steam will subside and the squash will firm up just enough to be manageable. Rushing this step can result in burns or a mess when you try to scrape it hot.
- Add 1 cup of each milk (reserving the rest for later) along with salt, garlic and onion powder, parsley, and pepper. Stir until well mixed, and bring to a boil.: Properly salted boiling water seasons the chicken as it poaches, enhancing its flavor from the inside out. You will see lively rolling bubbles and a mineral aroma when it's ready. If the water is not hot enough before adding the meat, the chicken might cook unevenly and become stringy.
- While you wait for it to boil, whisk the tapioca starch and the remaining 1 tablespoon of each milk together in a small bowl until smooth and lump-free.: Poaching yields tender, moist chicken that shreds easily, and you will observe small bubbles around the meat as it cooks. Use an instant read thermometer if unsure; the internal temperature should read safe and opaque. Overcooking dries the meat and makes shredding tougher, so remove it when it is just cooked through.
- One boiling, pour the tapioca starch mixture in (while constantly whisking so it doesn't clump up!) and boil for 3-4 minutes, whisking continuously, until it really begins to thicken.: Cooling the cooked chicken makes shredding easier and prevents steam from watering down the squash when combined. Once slightly cooled, the meat will yield to forks without tearing. Shredding hot meat can be awkward and tends to evaporate juices that you want to keep.
- Reduce the heat to medium and simmer, whisking frequently, until very thick (just a little thinner than condensed soup), about 10-12 minutes.: Heating the oil until it shimmers but does not smoke creates the perfect surface for sweating aromatics. The oil will take on a faint toasty scent, ready to carry flavors. Too high heat can scorch the onion and celery, producing bitter notes, so keep it controlled.
- Preheat your oven to 350°F.: As they cook you will hear gentle sizzling and smell the sweet vegetal aroma of softened onion. The goal is to coax sweetness without browning, which keeps the sauce smooth. Allowing them to brown too quickly can shift the flavor profile, so stir and adjust heat as needed.
- Scrape the spaghetti squash into a large kitchen towel. You should have about 8 packed cups. Wrap the squash in the towel and wring out as much moisture as possible, then place it into a large bowl.: When the milky mixture warms, it will release a cozy, savory perfume and the spices will bloom into the liquid, creating a flavorful base. The combined milks offer richness and balance, while the spices layer the taste. Adding cold milk too quickly to a hot pan can shock and curdle, so stir gently as you pour.
- Shred the chicken (you should have about 2 very packed cups) and add it into the bowl along with the remaining 1/2 tsp of salt.: Bringing the mixture to a boil activates the thickening power of the later added tapioca slurry and helps the flavors marry. You will see small rolling bubbles and a change in aroma as it starts to concentrate. Watch carefully, because once it boils it can foam and rise unexpectedly.
- Pour in the homemade condensed soup and mix everything together until well combined. (Using your hands can make this easier, even though it’s a bit messy!): A smooth slurry prevents clumps and promotes an even, glossy texture. The mixture should look silky and free of specks, ready to blend into the hot liquid. If you skip this smoothening step, you risk ending up with bits of starch in the finished sauce.
- Press the mixture firmly into a large baking dish. Sprinkle the crushed crackers on top, pressing them lightly into the surface of the casserole.: Constant whisking disperses the starch uniformly, preventing tiny gelatinous lumps and ensuring an even sheen. You will notice the sauce begin to thicken almost immediately, and the sound of gentle bubbling will change as the liquid gains body. Pouring too fast without whisking causes clumps that are hard to re-smooth.
- Bake until the casserole is bubbly, about 45 minutes.: This short, vigorous boil activates the full thickening power, transforming the sauce to a more viscous, condensed consistency. Keep whisking so the bottom does not scorch, and you will see the sauce cling to the whisk. Stopping too soon results in a thin sauce that will not bind the casserole.
- Let stand for 10-15 minutes to cool, then garnish with parsley and devour!: As it simmers the sauce will mellow and gain a silky sheen; the aroma becomes more integrated and less sharp. Frequent whisking prevents skin from forming and keeps the texture uniform. If you allow it to simmer dry, the sauce can become gluey rather than smooth, so monitor closely.
- Preheat your oven to 350°F: Dropping the oven temp from the initial roast setting prepares the space for a slow bake that melds flavors and crisps the topping without burning. You will hear the oven cycle quietly as it stabilizes. Skipping this can lead to overly browned crackers while the interior is still not bubbling.
- Scrape the spaghetti squash into a large kitchen towel: Using a towel helps absorb excess moisture released during roasting, so the casserole is not watery. As you scrape, the strands separate and look more like thin noodles. Be mindful, because the squash can still be hot; protect your hands from steam.
- You should have about 8 packed cups: Packing the strands into the measuring cup gives a realistic sense of volume the recipe expects, and this density ensures the casserole has substantial body. If you come up short, adjust expectations or roast an extra squash. Underestimating volume can lead to a dish with too much sauce and not enough structure.
- Wrap the squash in the towel and wring out as much moisture as possible, then place it into a large bowl: Squeezing removes excess water so the casserole does not become soggy, and you will notice the liquid release into the towel. The strands will feel firmer and easier to combine once drained. If you skip wringing, the finished bake can be watery and fail to set.
- Shred the chicken you should have about 2 very packed cups and add it into the bowl along with the remaining 1/2 tsp of salt: The shredded chicken mixes with the drained squash to create the main body of the casserole. Tossing in the final bit of salt ensures the protein is seasoned through. If the meat is not shredded finely enough, the texture can be uneven, so aim for uniform pieces.
- Pour in the homemade condensed soup and mix everything together until well combined: When mixed, the strands, meat, and thick sauce cling together telling you the filling is cohesive enough to hold shape. Use your hands for a tactile assessment if you like; it helps distribute ingredients evenly. Overmixing will compress the texture too much, leading to a dense casserole rather than a light bake.
- Press the mixture firmly into a large baking dish: Pressing creates a uniform surface so the topping bakes evenly and the casserole slices cleanly. You should feel the mixture compact but not mashed. Leaving it loosely packed can yield a crumbly bake that does not slice well.
- Sprinkle the crushed crackers on top, pressing them lightly into the surface of the casserole: The cracker layer gives a golden, crunchy contrast, and pressing them helps them adhere and brown into the surface. You should see a thin, even crust form as it starts to bake. Piling too thick a topping can prevent the interior from heating evenly.
- Bake until the casserole is bubbly, about 45 minutes: As it bakes you will hear a gentle bubbling and smell a toasty aroma from the topping, with edges turning golden. The bubbling indicates the sauce is hot and set. Taking it out too early can leave the center underdone and weepy, so ensure consistent bubbling across the dish.
- Let stand for 10 to 15 minutes to cool, then garnish with parsley and devour: Resting lets the casserole settle so it slices cleanly, and the steam will dissipate, concentrating flavors. Garnishing with fresh parsley adds color and a bright finish. Cutting in too soon will cause the filling to spill watery, so be patient.
Notes
- Swap topping textures - If you want a nuttier crunch, pulse the gluten free crackers with a handful of toasted seeds before sprinkling, which adds a different toast note and extra texture.
- Adjust creaminess levels - For a slightly lighter finish, reduce the full fat coconut milk by a tablespoon and make up the volume with the almond milk, preserving silk while cutting richness.
- Make ahead strategy - Assemble through the pressing step, then refrigerate up to one day before baking; bring to room temperature before baking to ensure even heating.
- Boost herb brightness - Fold half of the parsley into the filling before baking and reserve the rest for garnish, deepening herbal presence without overpowering.
- Storing leftovers - Cover tightly and refrigerate for up to four days, and reheat in a moderate oven to revive the topping rather than microwaving which can soften it.