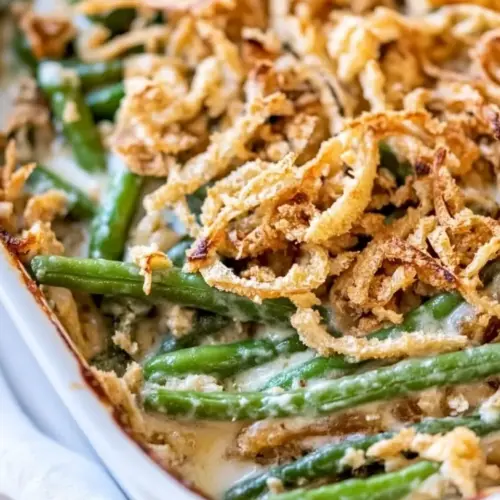
Green Bean Casserole
Green Bean Casserole is a creamy, savory side with tender green beans, a mushroom laden sauce, and a crispy fried onion topping. This easy weeknight or holiday side delivers comforting textures and rich flavor, making it a perfect easy weeknight dinner addition or a star on your Thanksgiving table. Make it ahead to save time and still impress guests.
Equipment
- Large Pot
- Large Skillet
- 3 quart baking dish
- Salad spinner
Ingredients
- 2 pounds fresh green beans rinsed and trimmed Rinse and trim to ensure tender, crisp-tender beans that cook evenly; provide the fresh vegetable base and bulk for the casserole and contribute bright color and texture contrast to the creamy sauce.
- 1 tablespoon kosher salt Season to help draw out moisture from vegetables and enhance overall flavor balance during blanching or final seasoning; provide saltiness that layers with other savory components for a well-rounded dish.
- 2 tablespoons extra virgin olive oil Sauté to build the aromatic foundation and add a subtle fruity, peppery richness; provide a healthier fat option that helps soften onions and mushrooms while contributing mouthfeel to the sauce.
- 1 small yellow onion diced Dice to release sweet, savory flavors when softened; create a flavorful base that melds into the cream sauce and complements the umami of mushrooms and garlic.
- 4 tablespoons unsalted butter divided Melt and divide to both sauté aromatics and enrich the sauce with a silky, rounded finish; contribute creamy richness, assist in browning, and help carry flavors throughout the casserole.
- 8 to 10 ounces mushrooms sliced, quartered or chopped Slice or chop to add earthy, umami depth and meaty texture; release savory juices when cooked that deepen the flavor of the sauce and complement the green beans.
- 1/2 teaspoon fine sea salt Season to enhance natural flavors and balance the dish; provide a neutral salty element that prevents the casserole from tasting flat while complementing other seasonings.
- 1/2 teaspoon freshly ground black pepper Season to add mild heat and aromatic complexity; introduce a background peppery note that brightens the creaminess without overpowering other ingredients.
- 2 cloves garlic minced Mince to release pungent, aromatic oils that infuse the dish with bright savory notes; complement and heighten the flavors of onions and mushrooms when cooked briefly.
- 2 tablespoons all purpose flour Thicken to create a smooth roux that binds the sauce, preventing separation and giving the casserole body; absorb and meld with the dairy and stock for a cohesive texture.
- 1/2 cup chicken stock low sodium Deglaze and add savory depth with concentrated flavor; balance the creaminess while providing a meaty undertone that enhances overall umami in the sauce.
- 2 cups half and half Enrich and create a luxurious, creamy sauce base that coats the beans and melds with the roux; lend a rich mouthfeel and subtle dairy sweetness to the casserole.
- 6 ounces fried onions I used French's Fried Onions Crisp topping to provide contrasting crunch and a familiar classic finish; offer salty, toasted flavors and textural contrast to the creamy bean and mushroom mixture.
Instructions
- Preheat oven to 375°F.: The heat should feel steady and even when the oven light goes on, with the rack positioned in the center to allow for uniform browning. Preheating ensures the casserole starts cooking immediately when it goes in, which helps the sauce bubble and the topping crisp. A common mistake is sliding the dish into a not fully heated oven, which can lead to uneven cooking and a soggy topping. If your oven runs hot or cold, use an oven thermometer to confirm the temperature.
- Bring a large pot of water to boil and salt generously. Add green beans and cook until bright green, about 3 to 4 minutes.: You want the water to roar at a steady boil so the beans cook quickly and evenly, retaining their vivid color and firm snap. Salting the water seasons the beans from the inside out. Listen for a gentle, rolling boil and watch for the beans to turn vibrant green, which signals they are done. Overcooking here will leave them limp and forgettable, so set a timer and test by tasting one for the right tender crispness.
- Transfer the green beans to an ice bath (just a large bowl of cold water and ice) and let sit for 3 minutes. Drain well and set aside. This may need to be done in batches depending on the size of your pot. (Pro tip: Place the green beans in a salad spinner to get rid of more water.): The ice bath stops the cooking instantly, locking in color and texture. You should hear a faint clinking as the beans hit the cold water, and after draining they should snap when bent. Using a salad spinner is a brilliant shortcut to remove excess water, which helps the sauce cling rather than slide off. A common error is skipping this step, which often leads to overcooked, dull beans.
- Meanwhile, in a large, deep skillet, heat the olive oil over medium heat. Add the chopped onions and cook until translucent, about 5 to 7 minutes.: The pan should shimmer gently when the oil is ready, and the onions will soften and give off a sweet aroma as they turn translucent. Stir occasionally to prevent any edges from browning too quickly. The goal is a gentle sweat so the natural sugars come forward without caramelization. If the heat is too high, the onions will brown unevenly and develop a bitter edge.
- Add two tablespoons of butter to the skillet and stir to melt. Add the mushrooms and season with salt and pepper. Cook the mushrooms, stirring occasionally, for 5 to 6 minutes until the mushrooms are brown and tender.: When the butter melts, it should sizzle softly, signaling the right temperature to add the mushrooms. As they cook down, you will hear a steady gentle sizzle and see them release then reabsorb their moisture, concentrating flavor and producing a rich, savory aroma. Stirring occasionally helps them brown uniformly. A frequent misstep is overcrowding the pan, which causes steaming instead of browning, leaving the mushrooms bland and watery.
- Stir in the garlic and continue cooking and stirring for another 1 to 2 minutes.: As the garlic hits the warm pan, it will perfume the mixture with a fragrant, savory note. You should smell its presence almost immediately, but watch closely because garlic can shift from fragrant to bitter quickly. Keep the heat moderate and stir constantly to avoid burning. If you notice a sharp, acrid smell, the garlic has begun to scorch and you should remove the pan from heat briefly to cool.
- Add another 2 tablespoons of butter to the skillet and sprinkle the flour over the top. Stir the flour into the mushroom mixture and cook for 2 to 3 minutes, stirring frequently.: The butter and flour should combine into a paste that smells slightly toasted, which removes the raw flour taste. Stirring continuously ensures a smooth roux that will thicken without lumps. You will notice the mixture take on a pale, golden hue as it cooks. Common trouble is adding liquid too quickly or not stirring enough, which can create lumps; whisk gently if needed to smooth them out.
- Slowly whisk in the chicken stock and half and half and bring mixture to a simmer, whisking often. Cook for 5 to 7 minutes or until sauce is thick and bubbly. Taste and season with salt and pepper if needed.: As you add the liquids, the pan will steam and the sauce will loosen, then gradually thicken as it reaches a gentle simmer. Whisking helps incorporate everything into a silky texture, and you should hear a low, steady bubbling as it cooks. The sauce is ready when it coats the back of a spoon and the aroma is rich and savory. If the sauce is thin, simmer a bit longer; if it becomes too thick, stir in a splash more stock. Over seasoning at this stage is a pitfall, so taste and adjust carefully.
- Add green beans and stir until coated. Keep mixture in the oven safe skillet or transfer to a 3 quart baking dish and bake for 25 minutes.: When the green beans hit the sauce, you will notice a glossy coating and a mingling of aromas. The beans should be evenly distributed, each strand covered in the creamy mushroom sauce. Transfer to an oven safe dish so the heat can gently finish the melding of flavors. In the oven, you will hear a soft bubbling and see the edges begin to set. A mistake to avoid is packing the dish too tightly, which prevents even baking and can cause an undercooked center.
- Remove from oven, top with fried onions and continue baking for another 5 to 10 minutes or until fried onions are golden.: After the initial bake, the casserole will be hot and bubbling; adding the fried onions and returning it to the oven crisps them to a beautiful golden brown. Watch closely in the final minutes, as the topping can go from perfect to overly dark quickly. The finished look is bubbling edges with a deeply toasted, crunchy topping. A common oversight is not letting the casserole rest for a few minutes before serving, which helps set the sauce slightly and makes serving cleaner.
- Serve immediately and enjoy!: The final dish should present a warm, bubbling surface and a crunchy, golden top. Serve while still hot so the contrast between creamy sauce and crisp onions is at its peak. Letting it sit too long will soften the topping and dull the textures, so aim to plate soon after it comes out. If you must wait, briefly reheat in a hot oven to refresh the crunch.
Notes
- Make ahead strategy Assemble the casserole up to the baking step and store tightly covered in the refrigerator for 1 to 2 days, then let it sit at room temperature for 30 minutes before baking. Add the fried onions near the end and extend baking by 5 to 10 minutes if the dish is cold going into the oven.
- Freezing tips To freeze before baking, assemble without the fried onions and freeze for up to 2 months in an airtight container. Thaw overnight in the refrigerator and let rest at room temperature before baking. For freezing after baking, cool completely, freeze up to 3 months, then reheat in the oven until warmed through.
- Texture rescue If your sauce seems thin after baking, return the dish to the oven uncovered for a few minutes to reduce excess moisture, or stir a teaspoon of flour mixed with cold water off heat and simmer briefly to thicken. Avoid adding raw flour directly to a hot sauce, which can create lumps.
- Salt control Use low sodium chicken stock and unsalted butter so you can season to taste at the end. Taste the sauce before baking, since flavors concentrate during cooking and baking.
- Extra crunch For an even crispier top, add half of the fried onions partway through the bake and reserve the rest to sprinkle on just before serving, which preserves both browned flavor and fresh crunch.