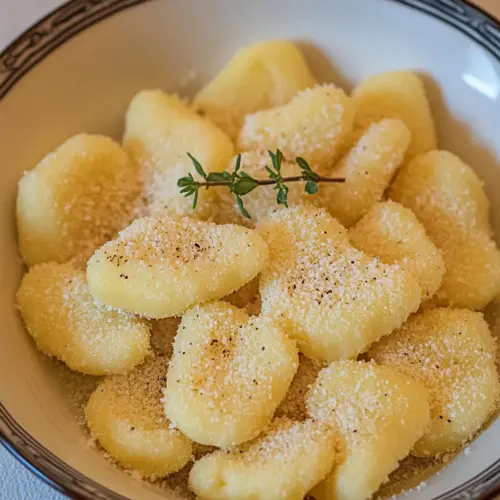
Gnocchi Alla Romana
Gnocchi Alla Romana is creamy semolina pillows baked until golden and slightly crisp, offering a rich, comforting texture with nutty Parmigiano Reggiano cheese. This easy weeknight dinner brings elegant flavors with minimal fuss, perfect for sharing with family. Try it when you want a cozy, crowd pleasing dish that feels special without complicated steps.
Equipment
- Ovenproof dish
- Saucepan
- Wooden Spoon
- Parchment Paper
- Cookie Cutter
Ingredients
- 4 cups whole milk Heat and enrich the mixture as the primary liquid; provides creaminess and helps cook the semolina into a thick porridge when gently simmered. Adds richness and a mild dairy sweetness that balances the savory cheese and butter in the finished gnocchi alla Romana. Whole milk also contributes to a tender, smooth texture and helps the dough set as it cools.
- 2 teaspoons salt Season and enhance overall flavor by drawing out and balancing the dairy and semolina; dissolves into the milk for even seasoning. Helps bring forward savory notes in the cheese and butter, ensuring the final dish is properly seasoned. Salt also affects protein interactions in the semolina mixture, subtly influencing texture.
- 1.5 cups semolina flour Thicken and form the base of the gnocchi by swelling and absorbing the hot milk to create a dense, creamy polenta-like dough. Provides the starchy structure that sets when cooled and can be cut into rounds for baking. Semolina contributes a slightly nutty flavor and a pleasantly coarse, yet tender mouthfeel.
- 5 tablespoons butter, melted plus extra for greasing Enrich and add silkiness to the dough and finished gratin; melted butter is mixed into the hot semolina to impart richness and help with moisture. Extra butter is used for greasing the baking dish to prevent sticking and promote a golden, crisped surface during baking. Butter also helps carry and meld the flavors of cheese and eggs throughout the layers.
- 1 cup Parmigiano Reggiano cheese Season and add savory, umami-rich character while contributing to structure; finely grated Parmigiano Reggiano is folded into the semolina mixture. Provides a salty, nutty depth and helps bind the dough when combined with eggs and cooled. Cheese also gratinates on top for a flavorful, browned crust during baking.
- 2 large eggs, lightly beaten Bind and enrich the dough while contributing to silkiness and structure; lightly beaten eggs are incorporated into the slightly cooled semolina to help the mixture set. Eggs add protein that firms the gnocchi when chilled, making it easier to cut and hold shape during baking. They also contribute to a richer taste and smoother texture in the finished dish.
Instructions
- Preheat the oven to 400 F. Grease an ovenproof dish with butter.: As you preheat, notice the immediate warmth that fills your kitchen, and ensure your oven reaches a steady 400 F so the top crisps quickly. A well greased dish prevents sticking, and the scent of warm butter signals readiness. If the oven temperature fluctuates, the top may brown unevenly, so use an oven thermometer if yours runs hot or cool.
- Pour the milk into a pan, add the salt, and bring to a boil. As soon as the milk simmers, add the semolina flour while whisking constantly with a long wooden spoon to prevent lumps from forming.: You'll hear a gentle simmer then small popping as the milk nears a boil, and the aroma becomes slightly sweet. Adding the semolina flour in a steady stream while whisking avoids clumps. The whisking creates a smooth, glossy slurry; if you stop stirring, you risk gritty pockets, so keep a steady arm and a calm rhythm.
- When all the flour has been incorporated, keep cooking and stirring with the wooden spoon reaching to the bottom of the pan. About 10 minutes. The semolina is cooked when it sticks heavily to the spoon and comes away clean from the sides of the pan.: During this stage you will feel the mixture thicken and tug on the spoon, and the sound goes from thin to a soft dragging as the semolina firms. This development of texture is crucial for a set that is not gooey. A common error is undercooking, which yields a loose center, so keep stirring until it clings and the pan sides are clean.
- Let cool slightly, then stir in half of the butter, half of the Parmigiano, and both eggs. Mix until all is well incorporated.: The heat will still be present, so let the mixture cool enough to avoid scrambling the eggs . As you fold in the melted butter and grated Parmigiano Reggiano cheese , you will notice a glossy sheen and an uplift in aroma. Stir gently but thoroughly to achieve a uniform, silky batter. If you add the eggs too soon while it is scalding, you risk curdling, so patience here pays off.
- Pour the semolina over parchment paper and spread the mixture out to 1/2 inch thick with a damp knife or wet spatula.: Spreading the warm semolina onto parchment allows it to cool in an even layer, and the damp tool helps create a smooth surface. You should feel a slight resistance as you smooth, and the surface will lose some gloss as it cools. If the layer is uneven, the rounds will bake inconsistently, so aim for an even 1/2 inch thickness for uniform texture.
- Stamp out the 2-inch rounds with a cookie cutter and place a layer of those rounds in the prepared ovenproof dish, slightly overlapping one another.: Cutting rounds is almost meditative, and the semolina should yield clean edges. Arrange them snugly in the dish so they support each other and create layers that hold moisture. If you leave large gaps, the exposed edges will brown too quickly and dry out, so overlapping is both aesthetic and practical.
- Brush the rounds with the remaining butter and sprinkle with the remaining 1/2 cup Parmigiano. (This dish can be prepared up to this point a few days ahead, covered, and refrigerated): Brushing with melted butter helps the tops develop a golden crust, and the final dusting of Parmigiano Reggiano cheese creates the toasted, savory finish. If refrigerating, cover tightly to prevent drying. One pitfall is brushing cold rounds without warming the butter , which can chill the surface and inhibit browning, so aim for warm butter when you brush.
- Bake in the middle rack of the oven until the gnocchi has a golden color. 10-15 minutes. Let stand 5 minutes before serving.: In the oven you will hear a gentle hush and then see the top transform, bubbling lightly and turning a comfortable golden brown. The aroma becomes nutty and toasty, and the edges crisp slightly. Letting it rest for 5 minutes allows residual heat to settle, making slices cleaner and the texture more cohesive. Avoid opening the oven repeatedly, as that steals heat and lengthens baking time.
Notes
- Use full fat milk for the creamiest, richest base, which enhances the mouthfeel and flavor of the finished gnocchi.
- Grate the Parmigiano Reggiano cheese finely so it melts smoothly into the semolina, yielding a uniform savory depth without gritty pockets.
- Don’t rush the cooking of the semolina; the ten minute simmer develops the right texture and prevents a grainy or gummy center.
- Brush with warm butter before baking to encourage browning and a glossy finish, which elevates both appearance and taste.
- Make ahead to save time by assembling the rounds and refrigerating, then bake when you are ready to serve for effortless timing with guests.