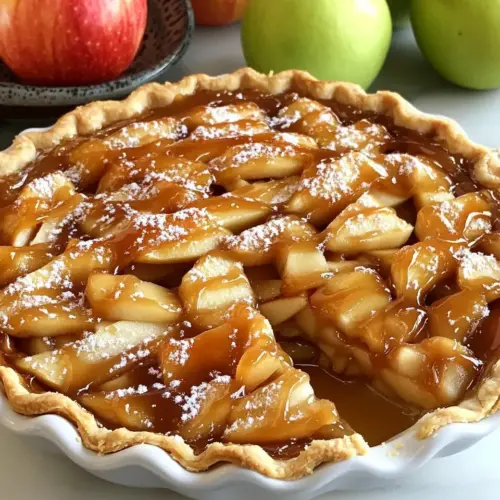
Gluten Free Dairy Free Salted Caramel Apple Pie
Gluten Free Dairy Free Salted Caramel Apple Pie blends tender almond meal crust, silky coconut caramel, and spiced apples for a creamy yet crisp dessert experience. This easy to follow recipe yields a pie with layered textures and warm, aromatic flavors, ideal for fall gatherings or an easy weeknight treat that feels celebratory. Make it to impress both guests and family with a comforting, allergy friendly classic.
Equipment
- 9 inch glass pie plate or tart pan
- Medium heavy bottomed saucepan
- Mixing Bowl
- Paper towel
Ingredients
- 2 cups almond meal Provide a nutty, gluten-free base and tender texture for the crust while contributing healthy fats and a slightly sweet, grain-like flavor to bind with other ingredients.
- 2 to 3 tablespoons coconut oil melted or butter, melted or Earth Balance Vegan butter, melted Melted to moisten and bind the crust components, adding richness and helping create a flaky, cohesive pastry when combined with the almond meal.
- 1 tablespoon maple syrup preferably grade B Add a delicate sweetness and subtle caramel notes while enhancing moisture and depth in the crust; works well to balance the nutty almond meal.
- 1/2 cup ucanator coconut palm sugar Sweeten the crust with a less refined sugar option that contributes caramel-like flavor and helps with browning and texture during baking.
- 2 1/2 teaspoons vanilla extract Enhance the overall flavor profile with warm, aromatic vanilla notes that complement the nutty crust and deepen the pie’s aroma.
- 1/2 teaspoon cinnamon Introduce warm spice to the crust for complexity and aroma, pairing well with the sweet and nutty elements of the pastry.
- 1/2 cup coconut milk canned – full fat Provide creaminess and richness to the caramel sauce, contributing body, silkiness, and a subtle coconut flavor important for dairy-free textures.
- 2 tablespoons coconut oil Melted to combine with the coconut milk and sugars to form a smooth caramel, adding richness and helping the filling set properly.
- 3/4 cup ucanator coconut palm sugar Sweeten the caramel sauce with a flavorful, less refined sugar that promotes deep caramelization and a rich, toffee-like taste.
- 2 tablespoons maple syrup grade B if possible Contribute additional sweetness and natural flavor depth to the caramel, also helping to thin the sauce slightly and enhance gloss.
- 1/4 teaspoon sea salt Balance sweetness and enhance flavors in the caramel with a touch of mineral-rich salt to deepen the overall taste profile.
- 1 teaspoon vanilla extract Add warm, floral sweetness to the caramel and fruit filling, elevating aroma and lending a cohesive flavor bridge between components.
- 4 apples such as Fuji (or for tarter pie, Granny Smith), peeled, cored, and thinly sliced Provide the main fruit body and texture for the pie filling, offering natural sweetness, structure, and a balance of tartness depending on variety.
- 2 lemons juiced Add brightness and acidity to prevent browning on the sliced apples, while enhancing overall tart-sweet balance and preserving texture.
- 1/4 cup light brown sugar or coconut palm sugar for a healthier alternative Provide additional sweetness and depth to the apple filling; can be swapped for a less refined sugar alternative to lower glycemic impact.
- 1 tablespoon cinnamon Introduce warming spice to the filling mixture to complement apples and brown sugar, enhancing classic pie flavor with aromatic depth.
- 1/8 teaspoon sea salt Add a subtle savory balance to the filling, cutting sweetness slightly and intensifying the other flavors for a well-rounded pie.
- 1 teaspoon vanilla extract Provide warm, sweet aromatic notes to the filling that tie together the caramel, apples, and spices while enhancing the pie’s overall fragrance.
Instructions
- Combine all of the ingredients in bowl. With fingertips, press the dough into a 9-inch glass pie plate or tart pan. Dough should be a bit sticky. Try and bring crust up sides gently. Bake the crust at 350 degrees F for 15 minutes. Allow to cool before adding the filling. (For NUT-FREE pie crust see **NOTE** at bottom of recipe): The first moment is tactile and aromatic, you will feel the slightly gritty texture of the almond meal meet the melted coconut oil and the sticky sweetness of maple syrup . Use your fingertips to press and feel that the mixture holds together when squeezed, indicating enough fat and moisture. If the mixture seems dry, add a scant pinch more maple syrup or a touch of melted coconut oil . Avoid overmixing with vigorous stirring, which can make the crust dense rather than tender. A common mistake here is adding too much liquid too quickly, which can turn the dough into a paste rather than a pressable crust.
- While crust is baking, stir together coconut milk, coconut oil, brown sugar, maple syrup, and salt in a medium heavy-bottomed saucepan. Whisk continuously and bring to a low boil over medium heat. Watch carefully – do not allow to burn! Reduce heat to medium-low and simmer gently for 3 minutes. Remove from heat and stir in vanilla extract.: When pressing the dough, you should hear a faint, soft scraping as the mixture spreads and settles into the pan. Press firmly along the base first, then coax the dough gently up the sides so it forms an even wall. The surface will be slightly tacky, but it should not slide. If it is overly greasy, the crust may separate during baking, so press and then chill for a few minutes to let the fats firm. The key why here is that a uniformly pressed crust ensures even baking and a neat rim, preventing collapse when the filling is added.
- Let cool for about 10 minutes.: The right stickiness means the crust will hold together after baking and slice cleanly. Touch the surface to confirm it has cohesion but does not puddle. If the dough is too dry, the crust can become crumbly and fall apart; if too sticky, it will steam instead of crisping. A short rest in the fridge will set the fats and improve texture, which is especially helpful if your kitchen is warm.
- While caramel is cooling, toss apple slices with the juice from the lemons. In medium bowl, mix together sugar, cinnamon, and sea salt. Drain apples on paper towel, then add to sugar/cinnamon mixture. Add vanilla and toss all together.: Use gentle pressure and an emery of patience to avoid thinning the rim too much. A thicker rim gives structural support and a pleasing golden edge. Press the crust about a quarter inch higher than the bottom edge to allow for slight shrinkage while baking. A frequent error is pushing too hard, which can create thin spots that brown faster and can burn.
- Once crust and caramel has cooled, drizzle 3 – 4 Tbsp of the cooled salted caramel sauce over the base of the crust. Then layer your apple filling evenly over the drizzle of caramel sauce. Lightly drizzle another 3 – 4 Tbsp of the salted caramel sauce over the top of the apples and bake in oven for 30 minutes. After 30 minutes, lightly place a piece of foil over the top of the pie, making sure the edges of the crust are under foil as well, and bake for 15 minutes more.: As the crust bakes, you will notice a faint nutty aroma and the edges turning a pale golden brown. This brief bake firms the crust so it can support the filling without becoming soggy. It also begins toasting the almond meal , producing deeper flavor. Keep an eye on it because almond based crusts can go from golden to overdone quickly; rotate the pan midway if your oven has hot spots.
- Drizzle any remaining caramel sauce over top of pie once it comes out of oven. Serve and enjoy!: Cooling lets the crust set, and you will feel the surface firm when you lightly tap it. If you add a hot filling too soon, steam can soften the crust and create a soggy bottom. Patience here preserves the crisp edge and gives the caramel a chance to set slightly so it does not immediately run into the crust.
- While crust is baking, stir together coconut milk, coconut oil, brown sugar, maple syrup, and salt in a medium heavy-bottomed saucepan: As these ingredients heat, the sugar will dissolve and the mixture will begin to steam, releasing rich, toasty notes. Use a heavy bottom to distribute heat evenly and prevent scorching, and whisk continuously to maintain a smooth texture. This continuous motion keeps sugar crystals from forming and ensures an even caramelization. If you stop stirring, the caramel may seize or burn, resulting in a grainy sauce instead of a glossy one.
- Whisk continuously and bring to a low boil over medium heat: The sound will shift to a gentle rolling boil and the mixture will take on a darker, amber tone. This stage concentrates the sugars and develops the deeper caramel flavor. Keep the heat steady, not too high, because intense heat can push the mixture past the point of caramelization and create bitter notes. Watching closely prevents this common error.
- Watch carefully e2 6 do not allow to burn: Smell is your early warning here; a pleasant toasted scent should deepen but never become acrid. If you smell burning, remove from heat immediately and consider starting over because burnt caramel will carry bitter flavors through the whole pie. The why is simple, controlled heat yields smooth, balanced caramel, while high heat ruins it quickly.
- Reduce heat to medium-low and simmer gently for 3 minutes: This gentle simmer allows the caramel to thicken and develop viscosity that will coat the back of a spoon. You will see the sauce cling and slow down when drizzled, which signals readiness. Rushing this step can leave a thin caramel that will not set, causing the pie to be overly runny after baking. A steady simmer ensures the sugars integrate and the sauce finishes glossy.
- Remove from heat and stir in vanilla extract: Adding vanilla extract off heat preserves its aromatic quality. As you stir, the caramel will take on a fragrant, rounded note that balances the intensity of the cooked sugars. If vanilla is added while boiling, its aroma can evaporate, reducing that final layer of flavor.
- Let cool for about 10 minutes: Cooling brings the caramel to a safer handling temperature and allows it to thicken slightly, making it easier to drizzle. You will notice a shift from runny to a more syrup like consistency. Pouring piping hot caramel onto the crust can cause separation or make the crust soggy, so this pause is practical and necessary.
- While caramel is cooling, toss apple slices with the juice from the lemons: The citrus juice will brighten the apple flavor and prevent browning, leaving the fruit looking fresh. Toss the slices until each is lightly coated, and you will sense a fragrant tartness that lifts the fruit. If you skip this, the apples may oxidize and take on a dull color and flavor.
- In medium bowl, mix together sugar, cinnamon, and sea salt: This dry mix seasons the fruit, creating a spiced, balanced base for the filling. The aroma of cinnamon will bloom as you work it into the apples, and the salt sharpens the sweetness. Ensure the sugar is evenly distributed to avoid pockets of over sweetness in the filling.
- Drain apples on paper towel, then add to sugar/cinnamon mixture: Draining removes excess lemon juice so the filling does not become watery. When you fold the apples into the sugar mix, you should hear a soft scrape as the sugar coats the fruit, and the mixture should glisten lightly. Too much moisture here will cause the pie to be soggy, so drain thoroughly.
- Add vanilla and toss all together: Adding vanilla extract to the apples ties the fruit and caramel flavors together, resulting in a harmonious filling. Toss until each slice is evenly coated and fragrant. Overmixing can bruise the apples, so be gentle to preserve their shape and texture.
- Once crust and caramel has cooled, drizzle 3 to 4 Tbsp of the cooled salted caramel sauce over the base of the crust: The first drizzle creates a caramel layer that melds with the crust as the pie bakes, offering pockets of concentrated sweetness. You should see a glossy ribbon of caramel spread slightly across the base. Using too much at this stage can make the bottom overly wet, so measure carefully.
- Then layer your apple filling evenly over the drizzle of caramel sauce: Layering the apples uniformly ensures even baking and a balanced bite. Arrange slices so they slightly overlap and fill the pan without piling too high. An even layer prevents the center from undercooking and the edges from overbrowning.
- Lightly drizzle another 3 to 4 Tbsp of the salted caramel sauce over the top of the apples and bake in oven for 30 minutes: As the pie bakes, you will hear a gentle bubbling and smell the caramelizing sugars and spiced fruit. The apples will soften and the top will take on a warm, golden tone. This initial bake sets the filling and integrates flavors. Keep an eye for excessive bubbling at the edges that can burn.
- After 30 minutes, lightly place a piece of foil over the top of the pie, making sure the edges of the crust are under foil as well, and bake for 15 minutes more: Covering with foil prevents the crust edges from over browning while allowing the center to finish cooking. The sound of gentle bubbling should continue under the foil, indicating that the filling is still cooking through. Remove the foil only if you need more browning, but be cautious because extended uncovered baking can dry the filling.
- Drizzle any remaining caramel sauce over top of pie once it comes out of oven: The final drizzle gives shine and an immediate flavor boost, and you will see the sauce pool slightly in crevices creating attractive highlights. Let the pie rest so the caramel sets and does not run off when sliced. A common error is slicing too soon; waiting improves slice integrity.
- Serve and enjoy: When plated, you will notice a pleasing contrast between the crisp crust edge, the tender apple layers, and the sticky, glossy caramel. The aroma will be warm with hints of cinnamon and toasted sugar. Serve slightly warm or at room temperature for the best texture. Avoid freezing immediately, as the caramel texture changes when frozen and thawed.
Notes
- Crust swap: For a nut free crust, follow the note by using crushed nut free, gluten free cookie crumbs mixed with brown sugar and coconut oil to mimic the original texture while keeping the pie accessible to nut free diets.
- Apple selection: Choose a mix of sweet and tart apples like Fuji and Granny Smith for complexity, which balances the richness of the salted caramel and prevents the filling from becoming overly cloying.
- Caramel consistency: If your caramel seems thin after cooling, gently reheate it over low heat while stirring, but avoid boiling again to prevent burning and separation of the fats.
- Make ahead: You can prepare the crust and caramel a day ahead, keeping the caramel chilled and the crust covered; assemble and bake the day you plan to serve for peak texture.
- Serving temp: This pie is excellent slightly warm to room temperature; chill briefly if you prefer firmer slices, but avoid freezing as the caramel texture will change.