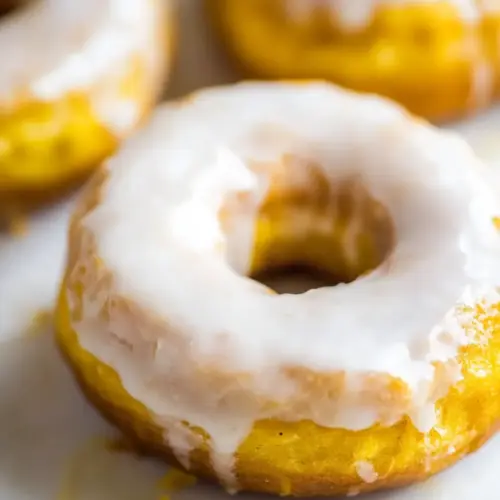
Glazed Pumpkin Donuts
Glazed Pumpkin Donuts offer tender, spiced pumpkin cake and a silky, aromatic glaze for a cozy, easy seasonal treat. This recipe is perfect for quick fall mornings or a festive brunch, delivering warm spice, soft crumb, and glossy finish that make them irresistible. Make them for a simple celebration that feels intentional and comforting.
Equipment
- Oven
- Doughnut pan
- Wire Rack
- Mixing Bowls
- Whisk
Ingredients
- 1 cup and 1/4 cups all-purpose flour Use to provide structure and bulk to the donuts, combining gluten and starch to create a tender crumb; measure accurately to maintain proper dough consistency and texture.
- 1/2 cup light brown sugar, packed Add sweetness and moisture while contributing a deeper caramel-like flavor; pack lightly to ensure correct volume and even sweetness throughout the batter.
- 1/2 teaspoons salt Season to enhance overall flavor balance and to control yeast or chemical leavening strength; dissolve evenly to avoid salty pockets in the finished donut.
- 1 teaspoon baking powder Leaven to create lift and lightness in the donut batter by producing carbon dioxide when heated; whisk into dry ingredients for even distribution so donuts rise uniformly.
- 1 teaspoon pumpkin spice Flavor to add warm, aromatic notes typical of pumpkin desserts; blend with dry ingredients so the spice profile is consistent in every bite.
- 1/2 cup pumpkin puree Moisten and add pumpkin flavor and tender texture while contributing some density and natural sugars; stir gently into wet ingredients for even color and taste.
- 2 and 1/2 tablespoons unsalted butter, melted Enrich and tenderize the batter while adding a subtle buttery flavor; melt and cool slightly before incorporating to ensure proper fat distribution.
- 1 large egg, at room temperature Bind ingredients together, add moisture and richness, and assist with leavening for a cohesive crumb; bring to room temperature to blend smoothly with other wet components.
- 1 cup confectioners' sugar Create a smooth, sweet glaze base that provides sweetness and a soft texture; sift or break up lumps for a silky finish when mixed with liquids.
- 1 teaspoon pumpkin spice Season the glaze with warm, spiced notes to complement the pumpkin flavor; stir thoroughly into the confectioners' sugar to achieve a balanced taste.
- 2 teaspoons milk, more if needed Thin the glaze and adjust consistency to a pourable state while adding slight richness; add incrementally to reach the desired glaze thickness without over-thinning.
- 1/2 teaspoon vanilla extract Enhance overall flavor with a delicate vanilla aroma while rounding out the glaze's sweetness; add sparingly and mix well to avoid overpowering other flavors.
Instructions
- Preheat oven to 350 degrees (F). Generously grease a doughnut pan; set aside.: As the oven warms, you will notice the steady hum of heat building, and the aroma of warm kitchen slowly fills the room, which primes you for baking. Greasing the doughnut pan ensures the baked pieces release cleanly, without tearing; use a thin layer of melted unsalted butter or nonstick spray and brush it into crevices. Why this matters, the donuts rely on the pan to hold their shape as they rise, and any sticking can deflate the sides when you remove them. Troubleshooting, if your pan is too lightly greased, the bottoms may cling and break when turned out, so be thorough but not excessive. Visually, the pan should look evenly coated, and when warm it will help the donut edges brown evenly.
- In a large bowl whisk together the dry ingredients. In a separate bowl whisk together the pumpkin puree, melted butter, and egg. Gently fold the wet mixture into the dry mixture - don't over mix!: When you whisk the all purpose flour , light brown sugar , salt , baking powder , and pumpkin spice you create an even foundation for lift and flavor. The dry mix should smell faintly spiced and look uniform in color, which prevents pockets of spice or leavening in the finished donut. This matters because even distribution affects rise and taste, ensuring each donut has the same texture. A common mistake is under whisking, which can leave clumps of flour or uneven leavening, leading to uneven crumb; take a minute to really blend the mix. You'll notice a soft, dusty texture in the bowl and a warm spice aroma as you finish whisking.
- Spoon or pipe mixture into prepared doughnut pan, and bake for 10-11 minutes, or until the doughnuts spring back when lightly pressed. Allow doughnuts to cool a few minutes in the pan before transferring to a wire rack to cool for a few more minutes.: The wet bowl should show a silky, glossy mixture where the pumpkin puree loosens the batter and the melted unsalted butter adds sheen. As you fold, the batter will change from powdery to cohesive, and you should stop mixing once streaks disappear to avoid developing gluten and making the donut tough. This technique matters because gentle folding preserves a tender crumb while still combining the ingredients fully. A typical pitfall is vigorous stirring, which yields dense donuts, so use a spatula and fold with slow strokes until just combined. You'll notice the batter thicken slightly and take on a smooth, slightly ribboning quality when ready.
- In a wide, shallow bowl combine the confectioners' sugar, pumpkin spice, milk, and vanilla. Whisk well to combine. If the glaze is too thick, add more milk, a half teaspoon at a time; if the mixture is too thin add more confectioners' sugar, two tablespoons at a time. Once you reached your desired consistency, dunk donuts in the glaze, using a fork to turn the donut over in the glaze so both sides are coated. Repeat with all donuts.: When filling the pan, aim for even portions so all donuts bake uniformly; a piping bag or zip bag with the corner snipped gives the cleanest result. As they bake, you will smell the pumpkin spice intensify and see the tops set and possibly show a faint crackle. The spring back test is key, a light touch should bounce back, indicating a tender but set interior. If you remove them too soon, they will collapse, and if you leave them too long they will dry out, so watch closely in the final minutes. Cooling briefly in the pan lets them firm up for safe removal, and finishing on a wire rack prevents sogginess beneath them while preserving the crisp edge where the glaze will cling.
- These donuts are best eaten the day they are made.: The glaze should start smooth and opaque, and as you whisk you will notice it go from thick paste to a glossy, pourable coating; that sheen tells you it will set with a delicate crust. The balance of confectioners' sugar to milk controls mouthfeel, and small adjustments keep it from becoming runny or chalky. Dunking gives complete coverage, and using a fork helps you lift the donut cleanly and tap off excess so the coating firms evenly. Be mindful that a glaze that is too thin will pool and slide off, while a glaze that is too thick will clump and hide the texture, so test with one donut first. The sound of a gentle drip and the sight of a smooth, slightly glossy surface indicate success.
- These donuts are best eaten the day they are made: Freshness is the final ingredient, because the pumpkin and glaze are at their peak texture right after cooling, offering a tender crumb and glossy surface. If stored, they may lose their crisp edges and the glaze can soften, which changes the eating experience. A common error is stacking warm donuts, which traps steam and leads to sogginess, so allow them to cool completely before storing in a single layer if necessary. Enjoy the contrast between warm interior and slightly set glaze while the flavor is most vivid.
Notes
- Swap brown sugar level Adjust the amount of light brown sugar slightly for a less sweet donut if you prefer a more restrained sweetness that lets the pumpkin shine through.
- Glaze thickness control Make the glaze thinner for a translucent sheen or thicker for a white coating, adding milk in tiny increments or more confectioners' sugar as needed.
- Increase spice intensity If you love warm spice, add a half teaspoon more pumpkin spice to the batter, tasting a tiny bit of wet batter to judge.
- Butter temperature Let melted unsalted butter cool slightly before mixing with the egg to prevent cooking the egg and creating an uneven batter.
- Even portioning Use a piping bag or a zip bag with a corner snipped to fill the pan evenly, ensuring consistent bake times and uniform rise.