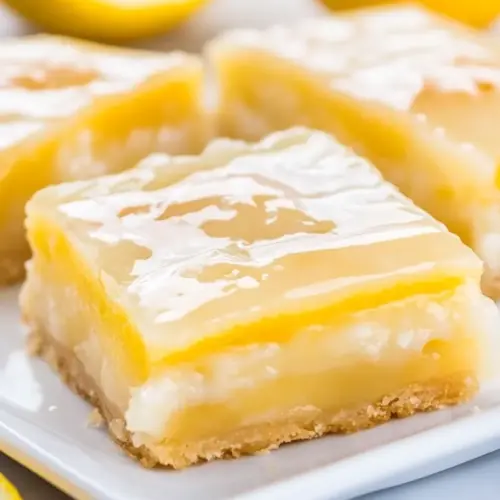
Glazed Lemon Pie Bars
Glazed Lemon Pie Bars deliver a bright, tangy lemon punch balanced by a tender, buttery crust and a glossy sweet glaze. These easy to slice bars are creamy in flavor yet pleasantly textured, perfect for a picnic or easy weeknight dessert. They are quick to assemble, bake to a golden finish, and make a persuasive reason to bake them for any gathering.
Equipment
- Stand mixer
- Paddle attachment
- 15 x 10 x 1-inch jelly roll pan
- Wire Rack
- Spatula
- Mixing Bowl
Ingredients
- 1 cup unsalted butter, softened Creamed until light and airy to provide a rich, tender crust and buttery flavor throughout the bars; softened butter also helps bind dry ingredients and promotes flakiness when combined with flour.
- 2 cups granulated sugar Granulated sugar beaten into fats and eggs to add sweetness, structure, and moisture; sugar also helps with browning and contributes to the soft, tender crumb of the bars.
- 1/2 teaspoons salt, or to taste Seasoned sparingly to balance sweetness and enhance other flavors; salt also strengthens gluten slightly and rounds out the overall taste profile, added according to preference.
- 4 large eggs Beaten until incorporated to provide structure, leavening, and richness; eggs also add moisture and help set the filling and crust when baked.
- 1 teaspoon vanilla extract Added for aromatic warmth and depth to complement the lemon filling; vanilla extract rounds flavors and enhances the perceived sweetness of the bars.
- 1/4 teaspoon almond extract, or 1/2 teaspoon if you love almond extract; lemon extract may be substituted Used in small amount to add a nutty, floral note that complements citrus; almond extract can be adjusted for a stronger flavor or substituted with lemon extract for intensifying citrus.
- 3 cups all-purpose flour Stirred with fats and eggs to form the dough, providing bulk and structure; all-purpose flour creates a sturdy yet tender base that holds the filling and slices cleanly.
- two 23-ounce jars lemon pie filling Poured over the baked crust to supply the concentrated lemon flavor and filling texture; lemon pie filling offers sweetness and tang that define the bars’ character.
- 1 1/4 cups confectioners’ sugar, sifted if yours is particularly lumpy Sifted if lumpy and mixed into glaze to provide smooth sweetness and a glossy finish; confectioners’ sugar dissolves easily and thickens the glaze for drizzling or spreading.
- 1/2 teaspoon vanilla extract Added to the glaze mixture to introduce warm, familiar notes that balance the lemon; vanilla enhances sweetness and smooths the overall flavor of the topping.
- 1/2 teaspoon almond extract, lemon extract may be substituted Included to add a complementary almond essence to the glaze or to be swapped with lemon extract for a brighter finish; used sparingly to avoid overpowering citrus.
- 2 to 3 tablespoons lemon juice, as necessary for consistency Poured in small amounts to thin the glaze to a desired consistency and to brighten flavor; lemon juice adjusts acidity, helps dissolve sugar, and yields a silky pourable glaze.
Instructions
- Preheat oven to 350 F. Spray a 15 x 10 x 1-inch jelly roll pan with cooking spray; set aside. Optionally, line the pan with a sheet of foil and spray with cooking spray. The advantage is you can lift the bars out by the foil and cut them more neatly on a cutting board.: As the oven warms, you will notice a faint dry heat and the kitchen settling into a steady temperature, which is important so the crust bakes evenly. Preheating ensures the dough begins to set on contact, preventing excessive spread and promoting a gentle rise. A common mistake is to put the pan into a not fully heated oven, which can lead to underbaked centers and overly pale crust edges, so always wait until the oven reaches a stable 350 F .
- To the bowl of a stand mixer fitted with the paddle attachment (or large bowl and handheld electric mixer), add the butter, sugar, salt, and beat on medium-high speed until light and fluffy, about 3 minutes. Stop and scrape down the sides of the bowl.: When you spray the pan, the surface will appear slightly glossy and slick, which helps with release after baking. Lining with foil provides a clean, straight edge and makes transferring the slab easier, which is especially helpful if you plan to chill the bars before slicing. A mistake here is skipping the spray if you do not line with foil, this can cause sticking and tearing when you try to remove the bars.
- Add the eggs, one at a time, beating well after each addition. Stop and scrape down the sides of the bowl.: The creaming step transforms dense butter and sugar into a pale, whipped mixture that traps tiny air bubbles, giving the crust lift and tenderness. You will see the mixture lighten in color and feel softer to the touch, and the sound of the mixer will change as resistance drops. Forgetting to scrape the bowl can leave pockets of unmixed butter , causing uneven texture, so pause and scrape at least once.
- Add the extracts and beat on medium-high speed to incorporate, about 30 seconds.: Adding eggs slowly allows the mixture to emulsify smoothly, resulting in a cohesive dough rather than a broken curd. Each egg should be fully incorporated before the next goes in, and the mixture will become silkier and shinier as you go. A common pitfall is adding eggs too quickly, which can create a separated batter and lead to a heavier final crust.
- Gradually add the flour and beat on medium-low speed to incorporate, about 1 minute.: The small amount of extracts will disperse rapidly, and you should be able to detect a warm, aromatic lift from the bowl. This step deepens flavor without changing texture. Be cautious not to overdo the extracts, as their concentrated aroma can quickly dominate the lemon profile.
- Turn about 75% of the dough out into a prepared pan and spread with a spatula to create a smooth, even, flat layer. It’s sticky, tacky, and requires some patience, but just keep spreading and finessing it into the corners.: When you add the flour , the mixture will tighten and become dough like, moving away from a loose batter. Mixing gently prevents too much gluten from forming, which keeps the crust tender instead of tough. The dough should be slightly tacky but hold its shape; overmixing here will produce a dense, dry crust, so stop as soon as the flour disappears.
- Add the pie filling and spread to evenly distribute leaving a 1/4-inch bare margin from edges of pan. It spreads while baking and trying to prevent filling from sticking to sides of pan is advised so it doesn’t burn.: Pressing the dough into the pan yields a uniform base that will bake to a golden, slightly firm foundation for the filling. The tactile feel will be slightly resistant and sticky, and the spatula may need occasional wetting to keep the dough from clinging. If you press too forcefully you can compact the dough, making it dense, so aim for even pressure to leave a light, cohesive layer.
- Drop remaining dough by 2-teaspoonfuls over pie filling. It’s very sticky and I find it easiest to use a 2-tablespoon cookie scoop filled about halfway. The dough will spread together somewhat as the bars bake.: When you spoon the lemon pie filling onto the crust, it will look glossy and jam like, and spreading it will create a smooth, even layer that contrasts with the pale dough. Leaving a margin prevents the filling from bubbling over and caramelizing against the pan sides, which can burn and darken the edges. A frequent error is overfilling the pan, which causes excessive bubbling and messy edges.
- Bake for 35 minutes, or until dough on top and around the edges is very lightly golden brown.: These small dollops will bake into rustic, patchy coverage that gives the bars a homemade look while ensuring some crust shows through. You will hear a soft settling sound as the dough relaxes in the heat, and closely spaced dollops will merge for more even coverage. Avoid trying to smooth these dollops into a uniform top layer, as that can lead to overworking the dough and a denser top texture.
- Allow bars to cool completely in pan on a wire rack.: During baking you will notice the aroma deepen to rich butter and warm lemon, and the edges will turn pale gold first, then deepen slightly. Visual cues are key here, as the interior sets before it browns strongly; remove when edges are golden and the center no longer looks glossy. A common mistake is leaving them in past golden, which causes a dry crust and bitter spots where the filling caramelizes too much.
- To a medium bowl, add the confectioners’ sugar, extracts, and enough lemon juice to reach desired consistency.: Cooling lets the filling set so the bars slice cleanly instead of oozing, and you will feel the pan go from warm to room temperature over time. The texture firms up during cooling, and the surface becomes less glossy as moisture redistributes. Cutting while warm often results in messy slices, so be patient and let them cool fully for neat bars.
- Evenly drizzle glaze over the bars and serve immediately.: As you whisk the glaze, it will transform from a powdery mound into a silky, glossy liquid; the smell will be sweet with a clear citrus note. Adjusting the amount of lemon juice controls flow, so aim for a drizzle texture that holds briefly on the surface. If the glaze becomes too runny you can thicken it with more confectioners’ sugar ; if it is too stiff, add a few drops of lemon juice at a time.
- Evenly drizzle glaze over the bars and serve immediately.: The final drizzle should create thin ribbons of shiny glaze that set slightly on the cooled surface, catching the light. This finish adds a sweet contrast to the tangy filling and gives a polished appearance. If you glaze too soon, the glaze will melt into the warm bars and lose its decorative appeal, so ensure the bars are completely cooled before glazing.
Notes
- Swap extracts carefully Use almond extract sparingly if you want a subtle nuttiness, or replace it with lemon extract for extra citrus punch, but adjust quantity because concentrates vary in strength.
- Adjust glaze consistency Start with less lemon juice and add dropwise until the glaze is drizzleable; too thin and it will run off the bars, too thick and it will look pasty.
- Chill before cutting Refrigerate the cooled pan for 30 to 60 minutes to firm the filling, which makes for cleaner slices if you need neat presentation for serving.
- Use foil for easy removal Lining the pan with foil and spraying it ensures you can lift the entire slab out for a tidy cutting board release and straight edged bars.
- Store properly Keep bars in an airtight container at room temperature for up to five days, or refrigerate if you prefer a firmer texture; freeze wrapped slices for longer storage.