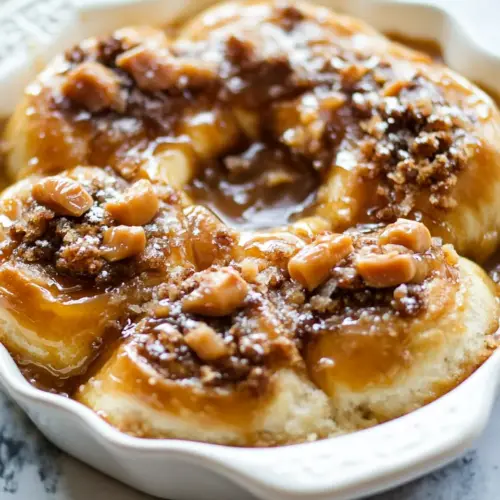
Giant Vanilla Salted Butterscotch Sticky Buns
Giant Vanilla Salted Butterscotch Sticky Buns are gooey, rich, and utterly indulgent, with a silky butterscotch sauce, real vanilla seeds, and crunchy toasted pecans. The soft enriched dough and a sprinkle of flaked sea salt balance sweetness for a memorable brunch treat, perfect as an easy weekend bake that impresses a crowd.
Equipment
- Stand mixer
- Dough Hook
- Rolling Pin
- Muffin tins
- Small sauce pot
- Skillet
Ingredients
- 2 1/4 teaspoons active dry yeast I like Red Star Activate the yeast by dissolving it in warm liquid to help the dough rise and develop a light, airy texture; ensure water is around 105–115°F for best activity and proof until foamy, which indicates freshness.
- 1/4 cup warm water Warm the water to help bloom the yeast and bind with dry ingredients; maintain a gentle temperature so it assists yeast activation without killing it.
- 2 tablespoons light brown sugar Sweeten mildly and feed the yeast while contributing caramel notes to the dough; brown sugar also adds moisture and a subtle molasses depth that complements the butterscotch flavors.
- 1/2 cup unsalted butter melted, stick Provide rich fat and tenderness when melted into the dough, enhancing mouthfeel and shelf life; melted unsalted butter integrates easily with warm liquids and controls overall salt content.
- 1 cup warm milk Contribute moisture and richness while creating a softer crumb; warm milk also helps slightly activate yeast and dissolves sugars for even distribution.
- 1/4 cup plain greek yogurt Add tangy moisture and tenderize the dough through acidity, improving texture and creating a slight balance to the sweetness; Greek yogurt also contributes protein and slight creaminess.
- 2 eggs Enrich the dough with structure, color, and flavor while providing emulsification from yolks; beaten eggs help create a cohesive, enriched dough with improved rise.
- 4 cups all-purpose flour Build the structure and bulk of the dough, providing gluten for chew and strength; all-purpose flour yields a balance of tenderness and support suitable for enriched rolls.
- 6 tablespoons butter very soft Soften the filling and add buttery richness that aids spreadability when rolled into the dough; very soft butter melds with sugar and spices to create a smooth interior layer.
- 1 cup light brown sugar Create a caramelized, sweet filling layer that melts during baking to form sticky, flavorful swirls; light brown sugar offers moisture and a mild molasses tone.
- 2 teaspoons cinnamon Impart warm, aromatic spice to the filling, enhancing overall flavor and complementing the sweetness; cinnamon helps define the classic sticky bun profile.
- 1 cup pecans chopped Add crunchy texture and nutty flavor to the filling or topping while balancing sweetness; chopped pecans provide toasty notes and pleasant contrast to soft bread.
- 2 tablespoons scotch or 1 tablespoon vanilla Flavor the filling or glaze with a boozy, smoky note or, alternatively, pure vanilla depth; a small amount of scotch or extra vanilla intensifies the dessert’s complexity.
- 1 cup unsalted butter stick 1/2 Contribute rich fat that enhances tenderness and creates a voluptuous mouthfeel in the topping and dough when used as a structured stick of butter.
- 1 cup light brown sugar Form a sticky, caramel-like topping when melted with butter and sugar, adding deep molasses flavor and glossy finish to the buns; light brown sugar here balances sweetness and texture.
- 1 cup heavy cream Add luxurious richness and help form a creamy, pourable sauce for the buns’ topping; heavy cream melds with butter and sugar to produce a velvety butterscotch consistency.
- 3 tablespoons scotch or 1 tablespoon vanilla Elevate the sauce with a subtle boozy warmth or pure vanilla aromatic depending on choice, deepening flavor complexity and rounding sweetness in the glaze.
- 1/4 teaspoons salt Season the dough or topping sparingly to enhance and balance sweetness while preventing flat flavor; a small amount of salt strengthens overall taste.
- 2 tablespoons flaked sea salt Finish the sticky topping with a crunchy, briny contrast that heightens sweetness and adds a modern salted-butterscotch character; flaked sea salt sprinkled atop preserves its texture.
- 1 vanilla bean split and seeds removed Infuse intense, floral vanilla aromas by scraping seeds into dough or sauce, producing a concentrated, natural vanilla flavor that complements the butterscotch and caramel notes.
Instructions
- Place yeast and sugar into stand mixer with the dough hook attached. Add the warm water and gently stir. Let sit until yeast has doubled and is puffed and foamy on top, about 10 minutes.: You will immediately notice a faint yeasty aroma as the yeast meets warmth, and the sugar helps it bloom; this foamy mixture should look bubbly and active in about 10 minutes, signaling healthy yeast activity which is essential for light buns. The why here is that the initial proof proves the yeast is alive and provides early rise, and a common mistake to avoid is using water that is too hot which can kill the yeast, leaving the dough dense.
- To the bowl add the melted butter, warm milk, greek yogurt and eggs, stir to combine. Add in the flour and knead the dough with the dough hook until the dough is smooth and forms a ball, about 5 minutes. Remove the dough from the bowl and oil the bowl or use cooking spray. Place the dough back in the bowl and cover with plastic wrap. Let the dough rise in a warm area for about 1 hour or until doubled in size.: A gentle stir helps distribute the food for the yeast without collapsing the initial foam; when done right you will see the surface become uniformly foamy rather than patchy which means the mixture is ready to join the rest of the ingredients. This step matters because even distribution prevents pockets of inactive yeast, and a troubleshooting tip is if the foam never develops, discard and start with fresh yeast and water at the proper temperature.
- While the dough rises make the butterscotch sauce. Melt the butter in a small sauce pot. Add the brown sugar, heavy cream and salt. Bring to a boil and then reduce heat to medium. Boil for 5-10 minutes, until the sauce has thickened and coats the back of a spoon. Remove from heat and stir in the scotch and set aside. If the sauce gets too thick add in a splash of cream to thin.: As you wait you will smell a lightly sweet, bread like scent and see the foam peak and recede slightly; this visual confirms peak fermentation for the starter so you know it will leaven well. This resting period builds strength in the dough, and avoid the mistake of rushing into mixing which results in poor rise during baking.
- When the dough is ready and doubled in size spray 2 muffins tins with cooking spray. Flour your workspace and roll the dough with a rolling pin until it’s thin and somewhat rectangular (about 9 x 24 inches), then brush with melted butter (you may not use all the butter) and generously cover with 2 teaspoons cinnamon and 1 cup light brown sugar. Ok, this is when would be best to add chocolate chips if you choose 🙂 Now drizzle on about 1/4 cup of the butterscotch sauce.: You should feel the mixture transform into a creamy, slightly glossy batter; the temperature of the liquids should be warm not hot so the eggs do not scramble and the yeast stays active, and this blend of fat and dairy creates tender crumb and richer flavor. The why is that warm liquids help the dough come together while the dairy improves softness, and a common error is adding cold ingredients which slows dough development.
- Preheat the oven to 350 degrees F.: Expect a tactile change from sticky to supple, with the dough clearing the bowl and forming a smooth surface that springs back when poked; this signals sufficient gluten development for structure while keeping tenderness. Proper kneading produces elasticity which traps gas for lift, and over kneading will make the dough tight and tough so stop once it is smooth and slightly tacky.
- Next roll up the dough. Starting with the end away from you, roll the dough into a line towards you. Slice the rolls into 18 to 24 slices and place them in the prepared muffin cups. I made 18 rolls, but they were BIG and popping out of the pan. Cover and let the rolls rise for about 15-20 minutes.: The dough will feel soft and pillowy in your hands; oiling the bowl prevents sticking as it rises and keeps the surface moist which aids a steady rise. This protective coating matters for even expansion, and a mistake to avoid is skipping oil which can cause tearing when you remove the dough later.
- Once the oven is hot place the muffin tins on two baking sheets and bake for 30 minutes.: Covering traps gentle humidity so the surface does not dry out and form a skin, you should see the dough slowly puff and loosen the wrap as it proofs; clear plastic lets you monitor the rise without disturbing it. The why is that moisture retention ensures an even, uninterrupted rise, and avoid drafts which can cool the dough and slow fermentation.
- While the buns are baking add the pecans to a skillet set over medium heat and toast for 5-8 minutes or until toasted. Add two tablespoons scotch (or vanilla) and 1/3 cup of the butterscotch sauce, stir and remove from the heat.: During this time the dough will nearly double, become airy and springy, and you will notice a yeasty sweetness and light aroma of dough; this is the bulk fermentation that builds flavor and structure. Proper rising gives the buns lift and soft interior, and a common mistake is leaving it too long which causes over fermentation and collapse.
- After 30 minutes grab the buns out of the oven and drizzle the pecans over the buns. Return the pans to the oven and bake another 10-15 minutes or until the tops are golden brown. Remove from the oven and let sit 5 minutes.: As the butter melts and the brown sugar dissolves you will smell caramelizing sugars, and when the heavy cream is added the sauce will steam and thicken into a glossy, syrupy texture that coats a spoon; simmering for 5 to 10 minutes concentrates flavor and creates that sticky body you want. The reason this matters is that a well reduced sauce resists becoming watery inside the buns, and watch for boiling too vigorously which can separate the sauce.
- Combine the salt and vanilla bean seed in a small bowl. Use your fingers to ingrain the seeds into the salt.: The butter should become golden and fragrant without browning; this warm aroma signals the base for a deep sauce. Starting with properly melted butter gives silkiness to the sauce, and a mistake to avoid is overheating which scorches and creates bitter notes.
- Use a knife to carefully pop the buns out of the tins, they are going to be very sticky! If desired drizzle with more butterscotch sauce and then lightly sprinkle with vanilla salt. Eat while warm and gooey!: As you stir the mixture it will smooth out into a glossy, amber sauce; the salt will banish cloying sweetness and emphasize the caramel notes. This combination creates the signature butterscotch flavor, and an issue to avoid is adding cold cream too quickly which can seize the sugar, so temper it gently.
- Bring to a boil and then reduce heat to medium: The sauce will bubble and thicken, and you will see it cling to the back of a spoon when ready; this concentration is what turns it from loose to stickable. Reducing controls texture, and avoid a furious boil which can cause the sauce to evaporate too quickly and become grainy.
- Boil for 5 to 10 minutes until the sauce has thickened and coats the back of a spoon: When the sauce is done it will trail a ribbon across the spoon and leave a clear line when you run your finger through it, indicating the right viscosity. That coating ability tells you it will set slightly on cooling yet stay pourable, and a common mistake is undercooking which yields a runny filling that soaks the dough.
- Remove from heat and stir in the scotch and set aside: Off heat the alcohol or vanilla integrates into the warm sauce, releasing a fragrant lift; this finishing touch deepens flavor without harshness. Adding off heat preserves aroma, and avoid cooking the scotch which burns off delicate notes.
- If the sauce gets too thick add in a splash of cream to thin: The sauce should be pourable and shiny, and a splash of warm cream will loosen it without diluting flavor; test by drizzling a spoonful over a cold plate to check. This adjustment keeps the filling flowing into spirals and prevents dry pockets, and avoid adding cold cream which can seize the sauce.
- When the dough is ready and doubled in size spray 2 muffins tins with cooking spray: You will feel the dough lightly spring back when poked, and preparing tins prevents sticking when the buns are very gooey; this set up ensures clean removal later. Good release matters because these are sticky buns, and skipping this will make extraction difficult and messy.
- Flour your workspace and roll the dough with a rolling pin until it’s thin and somewhat rectangular about 9 x 24 inches: As you roll you will sense the dough relax, and the surface should be smooth with an even thickness so the filling layers bake uniformly. Proper rolling ensures even bake and proportionate swirl, and common errors include uneven thickness which yields dense centers or over thin edges that leak filling.
- Brush with melted butter you may not use all the butter and generously cover with 2 teaspoons cinnamon and 1 cup light brown sugar: The smell of butter and warm spice is immediate when you spread the filling, creating a fragrant layer that will caramelize; press the sugar lightly so it adheres but does not compact. This layering creates the swirls and pockets of sweet, and avoid piling sugar too thickly which can prevent proper dough contact and even rising.
- Now drizzle on about 1/4 cup of the butterscotch sauce: The sauce sinks into the sugar and butter creating glossy stripes of caramel that will become molten centers, and this is the moment the dough really starts to promise gooeyness. The why is that pre filling with sauce ensures pockets of concentrated butterscotch, and a pitfall is using too much which causes slippage when rolling.
- Preheat the oven to 350 degrees F: The kitchen will warm and a stable oven temperature produces even color and rise; wait until fully preheated so the buns begin baking immediately and set their structure. Accurate oven temperature matters for proper browning and interior bake, and one mistake is placing unheated pans which extends bake time and affects texture.
- Next roll up the dough starting with the end away from you roll the dough into a line towards you: Rolling tightly but gently produces defined spirals; you should hear a faint drag as the dough forms, and the seam should be pinched to seal. Good rolling keeps filling contained and yields neat spirals, and a common mistake is rolling too loosely which causes sprawling during proofing and baking.
- Slice the rolls into 18 to 24 slices and place them in the prepared muffin cups: As you slice you will see tidy cross sections and the spirals will puff a touch; spacing in the cups allows them to rise and press against each other creating pull apart edges. This portioning controls final size and bake time, and avoid squeezing too many into cups which prevents proper expansion and can underbake.
- I made 18 rolls but they were BIG and popping out of the pan: If you prefer more manageable buns slice into 24 pieces; larger rolls are dramatic and gooey but may overflow. The choice affects presentation and baking dynamics, and a troubleshooting tip is to watch the edges and tent with foil if they brown too quickly.
- Cover and let the rolls rise for about 15 to 20 minutes: During the short proof you will notice gentle puffing and a softer texture at the surface; this final rise helps create an open, tender crumb while allowing the filling to relax into the spirals. Final proofing ensures lightness, and avoid over proofing which leads to overly soft structure that can collapse in the oven.
- Once the oven is hot place the muffin tins on two baking sheets and bake for 30 minutes: The initial bake sets the dough and begins caramelizing the tops; you will smell rich toasty sugar and butter as they color, and the buns should rise and gain a deep golden tone. Baking on sheets stabilizes the pans and ensures even heat distribution, and a mistake to avoid is opening the oven frequently which drops temperature and affects rise.
- While the buns are baking add the pecans to a skillet set over medium heat and toast for 5 to 8 minutes or until toasted: The pan will release a warm nutty aroma and the pecans should deepen in color slightly, signaling readiness; toasted nuts bring a fragrant contrast to the sweet sauce. Toasting intensifies flavor, and do not leave them unattended as they can go from toasted to burnt quickly.
- Add two tablespoons scotch or vanilla and 1/3 cup of the butterscotch sauce stir and remove from the heat: The alcohol or vanilla will bloom in the warm pan and cling to the nuts with a glossy sheen; this small coating helps them sit beautifully on top of the buns and integrate flavor. Removing from heat preserves aroma, and avoid cooking the scotch which dissipates the nuanced notes.
- After 30 minutes grab the buns out of the oven and drizzle the pecans over the buns: The aroma will be intense and the pecans will sizzle slightly as they meet residual heat, and their texture will contrast with the soft buns making each bite more interesting. This step elevates both look and crunch, and a caution is to not wait too long because the sauce and nuts adhere best when the buns are still hot.
- Return the pans to the oven and bake another 10 to 15 minutes or until the tops are golden brown: The additional time deepens caramelization and ensures the centers are fully baked; watch for a glossy, deeply colored top and a firm but yielding center when pressed lightly. This finishing bake builds flavor, and avoid overshooting which can dry the buns out.
- Remove from the oven and let sit 5 minutes: Allowing a brief rest helps the sauce settle slightly so the buns release more cleanly and you do not scald yourself when unmolding; you will feel the steam subside and the buns will firm enough to handle. Resting is about safety and texture, and avoid flipping immediately which leads to messy results.
- Combine the salt and vanilla bean seed in a small bowl: The tiny flecks of vanilla mixed into the salt produce an aromatic seasoning that looks beautiful and tastes refined when sprinkled on top; rubbing the seeds into the salt distributes fragrance evenly. This finishing touch polishes the flavor, and avoid combining too far in advance as moisture can dissolve the seeds.
- Use your fingers to ingrain the seeds into the salt: The tactile action releases the vanilla perfume into the salt crystals, and when you sprinkle it will lift the entire flavor profile. Doing it by hand is simple and effective, and the only mistake is over pounding which can crush flakes to dust.
- Use a knife to carefully pop the buns out of the tins they are going to be very sticky: The buns will release with a gentle wedge and the bottoms will be glossy with sauce; use a thin knife to loosen edges and lift steadily to preserve their shape. Careful unmolding keeps the buns intact, and a common issue is forcing them which shreds the pastry and wastes sauce.
- If desired drizzle with more butterscotch sauce and then lightly sprinkle with vanilla salt: The extra sauce adds shine and deepens sweetness while the vanilla salt offers a sparkling contrast, creating an irresistible balance of flavors and textures. Add sparingly to preserve contrast, and avoid over salting which will overwhelm the sweetness.
- Eat while warm and gooey: The final sensory reward is the temperature contrast and the rush of molten butterscotch, with the flaked salt popping against the soft dough; serve soon for the best textural experience. Freshness is key for ideal texture, and avoid storing before cooling fully as trapped steam can make them soggy.
Notes
- Check yeast freshness, always proof your yeast in warm water with a pinch of sugar and wait for foaming to confirm activity; if it does not foam within 10 to 15 minutes discard and start anew.
- Measure flour correctly, spoon flour into the measuring cup and level off to avoid a dry, dense dough which is a common culprit for heavy buns.
- Keep liquids warm not hot, when combining milk and melted butter with eggs ensure they are warm to the touch to protect yeast and eggs from heat damage.
- Roll to even thickness, aim for a consistent rectangle so each slice bakes evenly, patch thin spots gently rather than overworking the dough which can tighten gluten.
- Control sauce consistency, while simmering the butterscotch watch for it to coat the back of a spoon; if it becomes too thick add warm cream a teaspoon at a time until pourable.
- Toast nuts carefully, keep them moving in the skillet and listen for popping sounds, remove when aromatic to avoid a burnt flavor that overpowers the buns.
- Use flaked sea salt at serving, sprinkle just before presenting so the flakes retain their crunch and visual appeal, enhancing the sweet savory contrast.