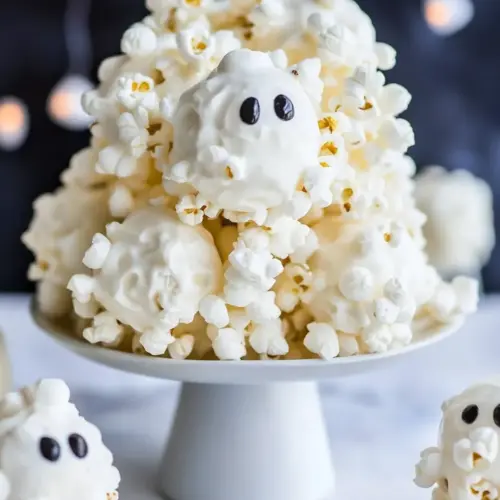
Ghost Marshmallow Popcorn Balls
Ghost Marshmallow Popcorn Balls are a fun, crispy sweet treat that blend airy popcorn with gooey marshmallows and a glossy candy coating. These easy to make, kid friendly snacks are perfect for a quick Halloween party or festive fall gathering, delivering playful texture and adorable presentation, making them impossible not to try.
Equipment
- Cookie Sheet
- Saucepan
Ingredients
- 1/4 cup (58 g) unsalted butter half a stick of butter Melted and foamy, used to create a rich base that helps dissolve marshmallows and bind the popcorn together; provides a subtle savory balance to the sweet mixture and prevents sticking while shaping popcorn balls.
- 10 ounces (280 g) mini marshmallows Soft and gooey, provides the primary sweet, sticky structure that binds popcorn into cohesive balls; melts when heated and sets as it cools to hold the snack’s shape while adding classic marshmallow flavor.
- 1/2 teaspoon pure vanilla extract Fragrant and nuanced, contributes a warm, aromatic note that enhances the sweetness and rounds out flavor; a small amount brightens the overall taste without overpowering the marshmallow and chocolate elements.
- 8 -9 cups popped popcorn, unpopped kernels removed made from 1/2 cup of unpopped kernels Light and airy, supplies the bulk and crunchy texture of the treat while serving as the surface for the marshmallow binder to adhere to; removing unpopped kernels ensures a pleasant, safe eating experience.
- 5 ounces (140 g) vanilla flavored candy melts or white chocolate Smooth and creamy when melted, used to coat or drizzle popcorn balls for added sweetness, shine, and structural reinforcement; sets into a firm shell that can help attach candy eyes and offer visual contrast.
- 20 candy eyes Decorative and playful, add facial detail and a spooky theme when pressed into the coated popcorn surface; lightweight and edible, they complete the ghost motif while requiring minimal application effort.
Instructions
- Prepare a large cookie sheet, and line it with a silicone mat or parchment paper.: The first sensory cue is the quiet rustle of parchment and the cool smoothness under your hands, which signals you are setting a safe landing spot for the warm treats. Using a lined cookie sheet prevents the popcorn balls from sticking and saves cleanup time, and it also gives you a flat surface to arrange the finished ghosts. If you skip lining the sheet, the bottoms can adhere and tear when you move them, so resist the temptation to place them directly on metal.
- In a heavy bottom saucepan over low heat, combine butter and marshmallows. Stir until melted and smooth, remove from heat immediately and stir in the vanilla.: At this point you will notice the gentle hiss of melting as the butter liquefies and the marshmallows collapse into a glossy mass, releasing a sweet, toasty scent. Stir continuously so the mixture heats evenly and does not scorch on the bottom of the saucepan . This technique ensures a smooth binder that will coat the popcorn uniformly, and the low heat preserves the tender texture. Common trouble is raising the heat too high, which can make the marshmallows grainy or burn the butter.
- Pour the marshmallow mixture over the popcorn and stir until all the popcorn is coated. The mixture will be very sticky.: When the mixture looks shiny and homogenous, the aroma becomes more pronounced, and tiny bubbles may appear at the edge. Removing from heat and adding the vanilla allows the fragrance to remain bright rather than evaporating. This step matters because the residual heat will finish the melting while preserving flavor. A mistake here is letting the mixture sit on heat too long, which can darken the flavor and change the texture.
- Butter your hands, then take handfuls of the coated popcorn and shape them into ghost balls. Place the balls on the prepared cookie sheet.: As you pour, you will hear the soft crackle as hot binder meets light popcorn , and you will see glossy strands gluing clusters together. Use a spatula to turn the popcorn and ensure even coating, since pockets of uncoated kernels can lead to dry spots. This matters because consistent coverage is what lets the balls hold their shape. If the marshmallow cools before you finish stirring, it will become sticky and clumpy, so work briskly.
- Melt the candy wafters. Add the candy melts to a microwave-safe bowl, and microwave at 50% power for one minute. Stir, and microwave again for 30 seconds at 50% power. Stir again. Continue microwaving at 50% power for 20 seconds at a time, stirring after each, until the candy is smooth.: The sensation of tackiness on your utensil is normal, and the smell will be a warm sugar note. To manage the stickiness, butter your hands or keep a small bowl of buttered water handy so you can handle the mixture without losing clusters to your palms. This tactile step is essential for forming compact balls that do not fall apart. The common error is pressing too hard when shaping, which compacts the popcorn into a dense ball rather than a light cloud.
- Dip half of each popcorn ball in the melted candy. Immediately decorate with eye candies and allow to set in the fridge for 1 hour.: When you press and roll, you will feel the popcorn compress and the binder give, producing a rounded shape with textured surface. Keep your hands lightly coated in butter to prevent sticking, and do not overwork each ball or the binder will cool and become too firm to shape. Place each formed ghost on the lined cookie sheet with a gentle thump so it sits flat. A frequent mistake is not spacing the balls apart, which can cause them to stick together while setting.
- Place the balls on the prepared cookie sheet: The balls will look slightly glossy and a bit tacky at this stage, and the bottom should be flat where it touched the sheet. Arranging them with room to breathe allows air to circulate and helps the surface cool evenly. This placement is important to maintain shape and to provide a stable surface for dipping. If you stack them or overcrowd the sheet, they may deform or the coating step will become messy.
- Melt the candy wafters: The candy will first give a faint sweet aroma, then become smooth and shiny as it reaches the correct consistency. Melt in a microwave-safe bowl at reduced power to prevent scorching, stirring frequently to distribute heat. Smooth candy ensures a clean coat and eases the decorating process. The typical misstep is overheating, which can cause the candy to separate or seize into clumps.
- Add the candy melts to a microwave safe bowl and microwave at 50% power for one minute: You will hear small pops and see the outer edge soften first, a visual cue that stirring is needed. Start at 50 percent power to control the melt and reduce the risk of burning. Stirring after this initial burst helps distribute heat and create a uniform texture. If you rush with full power, the candy can splatter and overcook.
- Stir and microwave again for 30 seconds at 50% power: With each stir the volume will drop and the surface will look silkier, and that smooth sheen signals readiness for dipping. Continue short bursts at reduced power and stir to prevent hot spots. Properly melted candy will coat cleanly and set with a glossy finish. A common problem is leaving unmelted lumps in the bowl, which will not create a smooth coating.
- Stir again and continue microwaving at 50% power for 20 seconds at a time until the candy is smooth: The rhythm of short microwaves and stirring yields a velvety molten candy, and your spoon will glide through like cream. This technique prevents overheating and preserves the glossy texture you want for dipping. If the candy is too thick, a tiny dab of neutral oil can smooth it, but avoid adding water, which will seize it instantly.
- Dip half of each popcorn ball in the melted candy: As you dip, you will notice the candy cool and thicken slightly on the ball, creating a firm edge where it meets the popcorn. The tactile sensation is pleasing, and the visual contrast makes the ghosts read clearly. Work quickly so the candy remains workable, and if it firms too much, gently rewarm to restore flow. A mistake is dipping when the candy is too hot, which can melt the candy eyes or make the coating slide off.
- Immediately decorate with eye candies and allow to set in the fridge for 1 hour: Pressing the candy eyes into the coating while it is tacky ensures they become embedded and permanent, and the fridge will firm the coating so the eyes do not shift. You will hear the faint hum of the fridge and sense the cool air helping the candy snap. The timing matters because chilling too long before adding eyes can prevent adhesion, while leaving them out too long can cause the coating to remain sticky. After one hour the candy should be fully set and the ghosts ready to serve.
Notes
- Coat your hands before shaping: Lightly rubbing butter on your palms prevents the sticky marshmallow from adhering to your skin, making shaping faster and less frustrating.
- Work in batches when coating the popcorn: If you try to mix too much at once, the binder cools before everything is evenly coated, producing dry pockets in the balls.
- Use a heavy bottom saucepan to melt the butter and marshmallows: It distributes heat evenly and reduces the risk of burning which causes off flavors and grainy texture.
- Keep a small bowl of warm water for your spoon or spatula: Dipping the tool briefly will make stirring and scraping easier when the mixture gets tacky.
- Set up your decorating station first with the candy eyes ready: Press them on while the coating is still tacky to ensure they stay put without sliding.