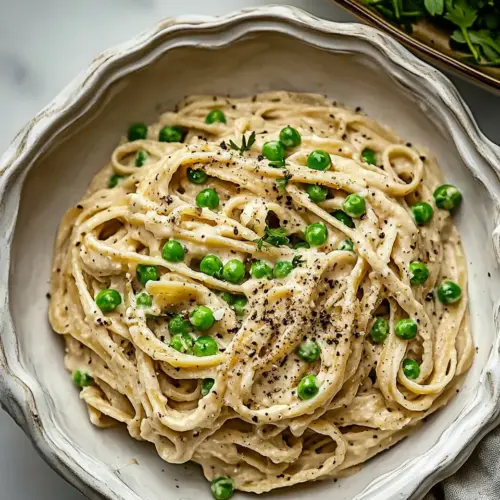
Garlicky Pea Pasta with Cream Sauce
Garlicky Pea Pasta with Cream Sauce is a creamy, comforting bowl that balances sweet peas, aromatic garlic, and savory parmesan. This easy weeknight dinner delivers tender homemade pasta and a silky sauce that clings to every strand, perfect for a simple but impressive meal. Make it for cozy nights when you want something quick and satisfying.
Equipment
- Large Pot
- Mixing surface
- Rolling pin or pasta machine
- Knife or pizza cutter
- Large Skillet
- Colander
Ingredients
- 1 cup All-Purpose Flour Combine to create the pasta dough, providing structure and gluten for chew and elasticity when mixed with eggs and water; sift or whisk to remove lumps and ensure even hydration for a smooth dough.
- 1 cup White Whole Wheat Flour Add alongside all-purpose flour to lighten the dough slightly and boost fiber content while maintaining a tender bite; whisk together thoroughly to distribute whole grain evenly into the pasta base.
- 1/2 teaspoon fine-ground sea salt Season the dough and final dish subtly, enhancing overall flavor balance; dissolve into the dough or sprinkle into the sauce to integrate savory depth without overpowering delicate pea and cream notes.
- 3 large eggs Bind the flours into a cohesive pasta dough, supplying moisture, fat, and richness that contribute to a silkier texture; beat and incorporate gradually to achieve desired dough consistency.
- Water (as needed) Adjust to achieve proper dough hydration or loosen the sauce if necessary, allowing control over pasta elasticity and sauce body; add sparingly to avoid overly sticky dough or watery sauce.
- 3 tablespoons butter Melt to create a rich base for the sauce, lending buttery flavor and helping to lightly brown garlic; finish with a small amount tossed with cooked pasta to enhance mouthfeel.
- 1 to 2 cloves garlic Infuse the sauce with sharp, aromatic flavor when minced and gently sautéed in butter; adjust between mild to pronounced presence depending on number of cloves used.
- 2 cups sweet peas Provide sweet, fresh vegetable character and color to the sauce, contributing texture and vegetal sweetness; blanche or quickly cook to retain brightness and prevent mushiness.
- 1/2 cup heavy cream or half and half Enrich the sauce with creaminess and body, creating a smooth, velvety coating for pasta and peas while balancing acidity and richness from cheese; heat gently to avoid curdling.
- 1 cup grated vegetarian friendly parmesan Add salty, umami-rich savory notes and a nutty finish to the sauce, melting into the cream for cohesive flavor while keeping it vegetarian-friendly; stir in off heat to preserve texture.
- Salt (to taste) Season at the end to taste, allowing control over overall saltiness since several ingredients already contribute sodium; sprinkle gradually and taste before final adjustment.
- Parmesan (for serving) Garnish the finished dish with extra savory, salty complexity and a pleasant granular texture, enhancing presentation and allowing diners to add more cheese to taste.
- Cracked black pepper (for serving) Finish with a bright, slightly spicy note and visual contrast, freshly cracked to taste over the plated pasta to lift richness and add aromatic bite.
Instructions
- Combine the flours and salt on a clean, flat surface. Make a well in the middle, crack the eggs into the well. Using a fork, whisk eggs and slowly begin to incorporate the flour. Keep mixing and once the dough starts to form, switch to your hands and knead the dough until the dough is smooth, adding a few splashes of water as needed to bring the dough together. The dough should feel barely sticky but feel firm. The dough should also spring back when pressed. Form into a disk, cover with a damp towel, and let rest for 30 minutes.: The scent of the dry flours is faintly wheaty and comforting, and when you pile them into a mound on your work surface it feels tactile and grounding. Pressing your thumb into the center to make a well creates a bowl shape that holds the eggs , and that visual guide helps you keep everything contained as you mix. While whisking the eggs with a fork, you will notice the pale yolks turning slightly glossy, which signals that they are ready to meet the flour. A common mistake is adding too much water too early, which can make the dough sticky and hard to knead, so hold back on water until the mixture just starts to come together.
- Divide the dough into 8 pieces. Working with one piece at a time, flatten the dough with your hands. Making sure the dough is covered with flour, use an electric or hand crank (see note) and roll the dough into thin sheets. If using a machine, check instructions for desired thickness.: The bright yellow of the eggs surrounded by flour is visually satisfying and helps you control hydration. As the fork breaks the yolks and blends the whites, you will see a ribbon of liquid forming that gradually picks up flour. The tactile feedback here is important, you will feel the mixture go from wet to doughy under your fingers, and that is the cue to switch to your hands. Avoid letting the egg run all over the board, keep the well intact until you have a cohesive puddle to work with.
- Continue to make the noodles by using the fettuccine attachment or cut into 1/4-inch wide strips with a knife or pizza cutter. Hang noodles for drying if desired and repeat with remaining dough.: As you draw flour into the egg mixture, the sound is a soft scraping and the texture changes from slick to tacky, which tells you the gluten is starting to form. Keep incorporating in small increments so the dough does not become too dry in spots. This deliberate pace means the final dough will be uniform, which matters for even rolling and cooking. A frequent error is rushing and dumping flour in too quickly, which creates lumps and uneven hydration.
- Bring a large pot of salted water to a boil and add noodles. Cook until the noodles float to the top and are tender, 4 to 5 minutes. Drain the pasta, reserving a cup or so of pasta water, and set aside while cooking the sauce.: When you switch to hands, you will feel the dough become elastic and slightly spring back when pressed, that elasticity signals good gluten development. Knead with the heel of your hand, folding and pushing for a rhythm that lasts around ten minutes until the surface is satiny. If the dough feels dry and cracks, add tiny splashes of water to bring it together; if it is too sticky, dust lightly with flour. Over kneading is a danger only if you push too hard, creating a tight dough that resists rolling, so aim for smooth and slightly springy.
- Once the pasta is done, heat a pan over medium heat. Add the butter, melt, and add the garlic. Cook the garlic for a minute then measure in the peas. Cook until the peas are tender, 3 to 4 minutes. Measure in the cream and reduce the heat to low. Stir in the parmesan followed by the cooked pasta. Toss to coat the noodles, adding a splash or two of pasta water as needed. Taste and add salt per your taste.: Resting relaxes the gluten, and you will notice the dough becomes more pliable and easier to roll after a half hour. The surface will be less tacky and more forgiving, which reduces tearing when you roll thin sheets. This pause is important because it rewards patience with a dough that stretches evenly. Skipping the rest is a common oversight that results in hard to roll dough that shrinks back and tears.
- Serve the pasta with extra parmesan and freshly cracked black pepper.: Dividing the dough creates manageable portions that roll more uniformly, and the act of portioning helps you maintain consistent noodle thickness later. Working with one piece at a time keeps the rest of the dough covered so it does not form a dry skin. If you try to roll a large chunk at once you may end up with uneven sheets that take longer to work with, so smaller pieces save time and hassle.
- Working with one piece at a time, flatten the dough with your hands: Flattening prepares the piece for the roller or hand crank and gives you a chance to dust with flour so it does not stick. You should feel the dough relax and spread slightly under gentle pressure, which means it will feed through a machine easily. Keep extra flour on hand, but use it sparingly since too much will dry the sheet. A common pitfall is adding excessive flour which leads to dry, brittle noodles after cooking.
- Making sure the dough is covered with flour, use an electric or hand crank and roll the dough into thin sheets: As the dough passes through the machine, listen for a smooth, even whirr and watch the sheet lengthen and thin uniformly, becoming almost translucent at the desired setting. Rolling in stages, lowering the thickness incrementally, prevents tearing and helps you reach a consistent final thickness that will cook evenly. If you use a hand crank, keep a steady rhythm to avoid jerky thickness changes. Beware of pressing too hard while feeding the dough, which can wrinkle the sheet and trap air pockets.
- Continue to make the noodles by using the fettuccine attachment or cut into 1/4 inch wide strips with a knife or pizza cutter: Cutting produces the satisfying sound of pasta strands separating, and the edges should look clean and even. If using an attachment, guide the sheet steadily and let the cutter do the work to maintain uniform widths. Dust the strands lightly so they do not clump as you handle them. Common mistakes include cutting uneven widths, which results in inconsistent cooking times, so try to keep the width uniform at about a quarter of an inch.
- Hang noodles for drying if desired and repeat with remaining dough: Hanging briefly on a rack or draped over a clean broom handle gives the noodles a moment to set their shape, and you will see the strands lose a bit of tackiness as they dry. This step is optional but helpful if you are not cooking them immediately, and it prevents them from sticking into a single mass. Leaving them to dry too long will make them firmer, so time it to your cooking schedule to avoid overly chewy noodles.
- Bring a large pot of salted water to a boil and add noodles: The water should smell faintly briny, which indicates it is seasoned well enough to flavor the pasta as it cooks. Add the noodles and stir gently so they do not cling to the bottom. Cook until they float and feel tender, usually about four to five minutes for fresh pasta, checking often to avoid overcooking. A frequent error is under salting the water, which leads to a bland final dish even after adding seasoned sauce.
- Cook until the noodles float to the top and are tender, 4 to 5 minutes: As the noodles cook you will see them swell and become more opaque, and when they float that is a visual cue they are nearly done. Taste a strand for the ideal texture, it should be tender with a slight bite at the center, which is called al dente. Overcooking makes them soft and less able to hold the sauce, so drain promptly when they reach the right texture.
- Drain the pasta, reserving a cup or so of pasta water, and set aside while cooking the sauce: The reserved pasta water contains starch that helps emulsify and thicken the sauce, so keep a cup before draining. The drained pasta will still be slightly glossy and warm, which is perfect for tossing into the pan to finish. A common slip up is discarding the water, losing the chance to bind the sauce and achieve that silky cling.
- Once the pasta is done, heat a pan over medium heat: As the pan warms you will sense a slight metallic shimmer, the prelude to adding butter . Medium heat gives you control, so the butter melts evenly and the garlic releases its aroma without browning too quickly. High heat can burn the garlic , while too low keeps the butter from sizzling and developing flavor, so medium is the sweet spot.
- Add the butter, melt, and add the garlic: The first sizzle as the butter hits the pan releases a toasty scent, and when the garlic goes in you will smell an immediate savory perfume. Cook the garlic briefly, about a minute, until it becomes fragrant but not browned, as browned garlic can introduce bitterness. Stir constantly and watch closely, because garlic transitions quickly from fragrant to overdone.
- Cook the garlic for a minute then measure in the peas: Adding the peas brings a bright green color and a fresh vegetal aroma, and as they heat they soften and release a subtle sweetness. The sound changes to a gentle sauté and the pan becomes dotted with little green pearls. Cook until tender, about three to four minutes, and avoid over stirring which can bruise the peas into a mushy texture.
- Cook until the peas are tender, 3 to 4 minutes: Tender peas should offer a soft bite with no raw starchy center, releasing a sweet perfume as you press them with a spoon. This brief cooking keeps them bright and prevents loss of color or flavor. Overcooking will flatten their taste and turn them dull, so keep a close eye and test frequently.
- Measure in the cream and reduce the heat to low: When the cream hits the warm pan it should shimmer and begin to thicken slightly as it warms, creating a velvety base. Reducing the heat prevents the dairy from breaking or curdling, and gives you time to gently coax the sauce to the right consistency. If the sauce bubbles vigorously you risk separation, so maintain a low, steady warmth.
- Stir in the parmesan followed by the cooked pasta: As the parmesan melts, the sauce becomes silkier and gains depth, the aroma turning nutty and savory. Tossing in the warm noodles allows the sauce to cling, and adding a splash of the reserved pasta water helps bind everything into a glossy coating. A common issue is adding cheese to an overheated sauce which causes graininess, so remove from high heat if needed and stir gently.
- Toss to coat the noodles, adding a splash or two of pasta water as needed: The final toss should look glossy and cohesive, each strand wrapped in a thin film of sauce that glistens. The pasta water acts as glue, transforming loose cream into a silky emulsion that adheres to noodles and peas. If the sauce seems too thick, add small amounts of water to loosen it slowly, avoiding a soupy consistency.
- Taste and add salt per your taste: Taste is the final arbiter of balance, and a pinch of salt can brighten the entire dish, while the parmesan contributes savory saltiness as well. Adjust in small increments and taste after each addition so you do not oversalt. A frequent mistake is adding too much salt at once, which cannot be undone.
- Serve the pasta with extra parmesan and freshly cracked black pepper: The finishing touch of freshly grated parmesan and cracked black pepper adds texture and a piquant lift, and the aroma as you grate cheese over the hot plate is the last inviting note. Present it immediately while warm so the cheese melts slightly and the sauce stays silky. Letting it sit too long can cause the sauce to tighten and the texture to lose its glossy appeal.
Notes
- Swap the pasta base: If you prefer, use store bought fresh or dry pasta to save time; the sauce will cling similarly and you will lose only a bit of the homemade chew.
- Use half and half for a lighter sauce: Choosing half and half reduces richness while preserving creaminess, ideal if you want a lighter finish without changing technique.
- Increase pea texture: For added bite, stir in a few peas at the very end raw, they will warm from residual heat and provide a crisp pop.
- Boost garlic intensity: If you crave more garlic, gently infuse the butter with slightly more garlic, but keep the heat low to prevent bitterness.
- Make it vegetarian friendly: Use a vegetarian style parmesan as listed to keep the dish aligned with vegetarian diets without sacrificing umami.
- Adjust for crowd feeding: Multiply the dough recipe and cut larger sheets, or prepare the sauce in a wider pan to toss larger portions efficiently for gatherings.