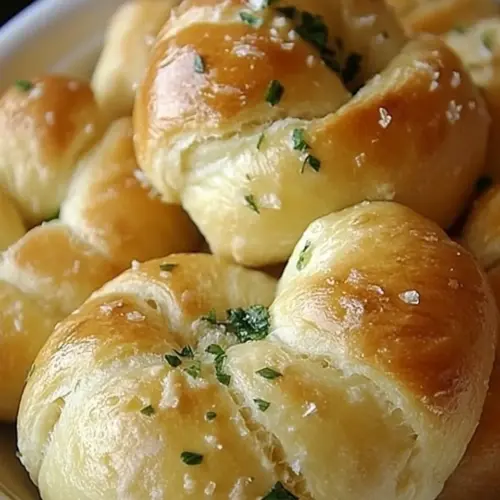
Garlic Knots
Garlic Knots are tender, golden bites infused with buttery garlic and bright Italian parsley. Soft centers and slightly crisp exteriors make them an easy, crowd pleasing side or snack. This easy bake uses pantry staples and simple shaping to deliver rich aroma and comforting texture, perfect for an easy weeknight dinner or entertaining. Try them for their irresistible aroma and shareable appeal.
Equipment
- Mixing Bowl
- Wooden Spoon
- Measuring Cup
- Rolling Pin
- Pizza Cutter
- Baking Sheet
- Parchment Paper
- Small Saucepan
Ingredients
- 51/2 cup s(687.5 g) all-purpose flour Measure precisely and use as the primary structure-providing flour; combines with liquid and yeast to form a cohesive, elastic dough that traps gas for rise. Sift or whisk before measuring to ensure even hydration and consistent texture during kneading and baking.
- 13/4 cup s(437.5 ml) warm water, about 115 degrees F Warm gently and provide the necessary hydration and activation temperature for yeast; maintain about 115°F to wake the yeast without killing it and support fermentation. Stir into the dry ingredients gradually to form a smooth, pliable dough with even consistency throughout.
- 1/4 cup (54 ml) olive oil Add for tenderizing the dough and contributing to flavor; oil coats flour proteins to limit gluten development slightly, resulting in a softer crumb and easier shaping. Reserve a portion for dough and use additional for brushing to create a glossy, fragrant exterior.
- 11/2 tablespoon s(1.5 tablespoons) active dry yeast Activate to leaven the dough and produce carbon dioxide for lightness; ensure yeast is fresh and proofed in warm water with a little sugar for reliable rise. Sprinkle evenly into the flour or dissolve first to encourage even fermentation and consistent texture.
- 1 tablespoon granulated sugar Feed the yeast during proofing and balance flavor by enhancing Maillard reactions in the crust; sugar accelerates fermentation and improves browning during baking. Dissolve with warm water when proofing to help confirm yeast activity and ensure predictable rise times.
- 1 teaspoons ea salt Season early to build balanced flavor throughout the dough and help control yeast activity; salt strengthens gluten networks and enhances overall taste without overpowering. Dissolve or mix in with dry ingredients so seasoning distributes evenly and supports proper dough structure.
- 2 tablespoons olive oil Brush or incorporate to add moisture and a fruity, savory note; extra olive oil used after shaping or in the dough increases tenderness and prevents dryness. Use for coating knots before baking or mixing into dough for added richness and easier handling.
- 2 tablespoons unsalted butter Melt and use to enrich flavor and provide a glossy finish; butter contributes richness and a soft mouthfeel when brushed onto knots after baking. Combine with garlic and herbs to create a flavorful finishing glaze that soaks slightly into the crust.
- 4 cloves of garlic, finely minced Mince finely and release pungent, aromatic compounds that infuse the butter or oil; garlic gives a signature savory, sharp flavor when sautéed briefly or mixed raw into finishing oil. Sprinkle or rub into the glaze to ensure even distribution and pronounced garlic notes on each knot.
- 1/4 cup (15 g) finely chopped fresh Italian parsley Chop finely and add bright, herbaceous freshness to the finished knots; parsley cuts through richness and adds color contrast. Toss with melted butter or oil so leaves adhere to the surface and provide a fresh, aromatic finish with every bite.
Instructions
- Measure the flour into a large bowl; set aside. Combine the water, olive oil, yeast, sugar and salt in a large, 4-cup measuring cup or in a small bowl, mixing to dissolve the yeast. Pour the water mixture over the flour and mix with a wooden spoon until all of the flour is moistened. Turn the dough out onto a lightly floured surface and knead for a minute or two, adding additional flour or water if the dough it is too sticky or dry, until soft and just slightly tacky. Place the dough in a well-oiled bowl, cover with plastic wrap, and place in a draft-free area until doubled in size (this can take anywhere from 1 to 3 hours).: When you lift the bag and scoop the all purpose flour you will notice its faint, nutty aroma. Sift or spoon it gently into the bowl to avoid compacting it, which can make the dough too dense. The flour sits quietly as the foundation while you prepare the wet mix. A common mistake is packing the measuring cup, which adds too much flour and yields heavy dough.
- Line three baking sheets with parchment paper or silicone baking mats and set aside. Working on a pastry mat or clean counter or table, oil the surface, your hands and a rolling pin. Divide the dough into two. Take the first half and gently press down on it, flipping it over and doing the same, to release gasses and flatten it. Using the rolling pin or your hands, shape the dough into a rectangle measuring about 5 inches by 16 inches, and 1/2-inch thick. Using a pizza cutter, slice the rectangle into 5-inch by 3/4-inch strips.: The warm water should feel like a warm bath, not hot. Stir in the sugar to feed the yeast , and watch for a faint foam after a few minutes which signals active yeast. The mixture smells faintly yeasty and sweet. If you do not see any foam, the yeast may be inactive and the dough will not rise, so replace it and start again.
- Sprinkle the strips with flour. Taking the strips one at a time, gently roll it back and forth to create an even rope. Tie it into a knot and place on a prepared baking sheet. Place the knots about 11/2 inches apart. Continue to make the rest of the knots and repeat process with the second piece of dough. Cover the baking sheets with a dry kitchen towel or cheesecloth and place in a warm, draft-free area to rise. The rolls should double in size during the second rise.: As you combine the wet and dry, the dough will look shaggy and floured at first. Use a wooden spoon to gather it, feeling the mass come together. The sound is muted, the dough moving as a single mass, and the surface looks uneven. Resist the urge to add a lot more flour at this stage, because the dough will firm up as you knead.
- Preheat the oven to 400 degrees F.: Kneading transforms texture, you will feel the dough get smoother and more elastic. Stretch and fold movements build strength, and small air bubbles start appearing inside. The perfect tackiness means it clings lightly to your fingers then springs back. Over kneading makes it tough, while under kneading leaves it slack and prone to collapsing.
- Once the knots have doubled in size, remove the towel covering them and bake, one pan at a time, for 12 to 15 minutes, or until golden.: This is where patience pays. The dough warms, breathes, and expands, filling the kitchen with a sweet, bready smell. The surface becomes domed and soft to the touch. If the room is cold the rise will be slow, so find a slightly warm corner. A common pitfall is opening the bowl too often, which lets cool air in and slows the rise.
- While the knots are baking, prepare the garlic coating. Over low heat, warm the olive oil, butter and garlic in a small saucepan. Add the chopped parsley, cover and set aside.: Preparing the sheets ahead saves frantic searching later. The parchment prevents sticking and helps the bottoms brown evenly, and the surface will feel smooth under the knots. If you skip lining, the knots may stick and tear when removed.
- After removing the knots from the oven and while they are still warm, either brush them with the garlic coating, or place the knots in a large bowl and toss with the garlic coating. Season with additional sea salt to taste.: Oil prevents the dough from clinging while you shape it, and the tactile feel is pleasantly slick rather than floury. The rolling pin glides with less tearing, producing even thickness. Using only flour to prevent sticking can lead to excess dry patches in the dough.
- Serve warm or at room temperature. Baked rolls can be individually wrapped and frozen in an airtight freezer bag. Rewarm in a 350 degree F oven for about 5 minutes.: Halving the dough makes it manageable and creates uniform pieces. Each half feels pillowy and resilient in your hands. When you flatten it to release gasses you will sense a soft hiss and see small bubbles deflate. A common error is rolling too thin, which gives overly crisp knots instead of pillowy centers.
- Take the first half and gently press down on it, flipping it over and doing the same, to release gasses and flatten it: Pressing and flipping helps degas evenly and sets a consistent structure for rolling. The surface becomes smoother and slightly tacky. If you do not release the gases gently, the interior may form large voids and an uneven crumb.
- Using the rolling pin or your hands, shape the dough into a rectangle measuring about 5 inches by 16 inches, and 1/2 inch thick: Aim for uniform thickness so each strip bakes the same. The rectangle should have clean edges and a slightly glossy sheen from the olive oil . If the dough resists, let it rest for 5 minutes to relax the gluten. Forcing it can cause shrinkage during shaping.
- Using a pizza cutter, slice the rectangle into 5 inch by 3/4 inch strips: The thin slicing is satisfying, each strip like a promise of a knot. The cutter should glide cleanly, leaving neat edges that will twist without tearing. Dull blades drag and can compress the dough, creating uneven baking.
- Sprinkle the strips with flour: A light dusting prevents sticking during rolling and gives a slight rustic look. The flour mutes shine and adds friction so the strip rolls evenly. Too much flour will make the surface too dry and the knot crumb denser.
- Taking the strips one at a time, gently roll it back and forth to create an even rope: Rolling evens the thickness and aligns the gluten for a consistent texture. You will feel the rope lengthen, and it should be supple enough to tie without cracking. If it breaks when you bend it, let it rest briefly to relax the gluten.
- Tie it into a knot and place on a prepared baking sheet: The knotting motion is tactile and satisfying, creating a compact little bundle that bakes into a swirl. Place each knot about 1 1/2 inches apart so they have room to expand. Crowding the pan leads to merged knots and uneven browning.
- Continue to make the rest of the knots and repeat process with the second piece of dough: Work rhythmically so your knots are consistent in size and shape, which ensures even baking. The assembled tray will look inviting as the pieces rest together. Rushing can produce uneven shapes and inconsistent texture.
- Cover the baking sheets with a dry kitchen towel or cheesecloth and place in a warm, draft-free area to rise: During the second rise the knots should double, becoming pillowy and full. The surface will look soft and slightly domed. If the towel sticks, use a gentle touch when uncovering to avoid deflating the knots.
- Preheat the oven to 400 degrees F: A hot oven promotes oven spring, creating a light interior and golden exterior. You will hear a faint hum as it reaches temperature, and the heat readies the pans. Baking at too low a temperature yields pale, dense knots.
- Once the knots have doubled in size, remove the towel covering them and bake, one pan at a time, for 12 to 15 minutes, or until golden: As they bake you will see color deepen, the aroma turning to toasty, garlicky comfort. The surface should be evenly golden, and tapping the bottom yields a hollow sound. Overbaking dries them out, while underbaking leaves a gummy center.
- While the knots are baking, prepare the garlic coating: Gently warming the olive oil , unsalted butter , and garlic on low allows the flavors to meld without scorching. The garlic softens and infuses the fat with savory perfume. High heat will burn the garlic , turning it bitter, so keep the flame low and watch closely.
- Over low heat, warm the olive oil, butter and garlic in a small saucepan: The mixture should shimmer gently and smell sweet and fragrant. Stirring helps release the oil soluble flavors from the garlic . If the butter browns, remove from heat to prevent a nutty, unintended flavor.
- Add the chopped parsley, cover and set aside: Adding Italian parsley off heat keeps it bright and green, preserving its herbal freshness. The oil soaks into the herb, carrying its flavor to every knot. If you add the parsley while the saucepan is hot, it will wilt and lose some vibrancy.
- After removing the knots from the oven and while they are still warm, either brush them with the garlic coating, or place the knots in a large bowl and toss with the garlic coating: Warm knots absorb the coating readily, so the surface becomes glossy and fragrant. Brushing lets you control coverage, while tossing ensures every crevice is coated. Waiting until they cool makes the topping sit on the surface rather than soak in.
- Season with additional sea salt to taste: A final sprinkle of salt enhances the flavors and balances richness. Taste one knot and adjust lightly, because a little salt makes the garlic and butter sing. Over salting can overpower the delicate herb and garlic notes.
- Serve warm or at room temperature: The optimal experience is slightly warm, when the crumb is tender and the coating is fragrant. At room temperature the flavors remain vibrant and they are easy to pack. Reheating briefly at 350 degrees F restores just baked warmth without drying them out.
- Baked rolls can be individually wrapped and frozen in an airtight freezer bag: Cooling completely before freezing prevents ice crystals. When you rewarm, a short stint in a hot oven revives texture and aroma. Freezing without proper wrapping leads to freezer burn and off flavors.
- Rewarm in a 350 degree F oven for about 5 minutes: A quick reheat crisps the exterior and warms the interior evenly. Listen for a soft sizzle as moisture redistributes and the aroma returns. Microwaving can make them gummy, so oven reheating is preferred for texture.
Notes
- Cold proofing option If you want more flavor, place the dough in the refrigerator after kneading and let it rise slowly overnight. The slow fermentation deepens the flavor and makes the dough easier to handle the next day. Bring back to room temperature before shaping to ensure proper second rise.
- Room temperature troubleshooting If your kitchen is cool, create a warm proofing spot by placing the bowl near a warm oven or on top of a warm appliance. Avoid direct heat sources to prevent uneven rising or killing the yeast.
- Garlic intensity control For a milder garlic flavor, reduce the garlic to two cloves or steep the garlic for less time in the warm fats. For a bolder hit, let the minced garlic sit in the warmed oil a little longer off heat.
- Batch scaling To make fewer knots, halve the recipe and keep the proportions the same. Dough handling remains identical, and the smaller batch often proofs more predictably in modest kitchens.
- Freezing and reheating Freeze fully cooled knots in a single layer before bagging to prevent sticking. Reheat at 350 degrees F for about 5 minutes to regain a fresh baked texture, longer if frozen solid. Avoid microwaving to preserve crust.