Funeral Baked Meats
Funeral Baked Meats is a rustic, historic pie with flaky pastry and a spiced filling of veal, suet, and dried fruit. This easy to share treat offers a warm, aromatic bite with notes of mace, cinnamon, and saffron, perfect for an easy weeknight dinner or a fall gathering. Try it for its balance of savory and sweet, and for a truly memorable reason to bake.
Equipment
- Muffin Tin
- Mixing Bowls
- Large pot with lid
- Small Saucepan
- 4 inch biscuit ring
- 3 inch biscuit ring
- Sheet tray
- Rolling Pin
- Flat surface for rolling
- Fork
- Knife
Ingredients
- 4 cups pastry flour (use pastry flour for a flakier result) Provide a tender, flaky dough structure when combined with fat and liquid, contributing to the pastry’s delicate layers and mouthfeel; recommended for a lighter texture than all-purpose flour and ideal for baking applications that require flakiness.
- 2 large egg yolks Enrich the dough with concentrated fat and bind liquid components together, contributing color and richness to the pastry while helping create a smooth, pliable dough for easier handling and a richer final flavor.
- 1 cup water Hydrate the flour to form gluten and create the pastry matrix, allowing proper dough consistency and offering steam during baking to help produce flakiness; adjust slightly for humidity and flour absorption.
- 8 tablespoons butter (1 stick) Contribute fat for lamination and tenderness, promoting flakiness and rich mouthfeel while aiding browning and flavor; chill and cut into the dough to preserve flaky layers during baking.
- 1/2 pound veal shoulder meat (weight should not include bone) Add lean meat for savory depth and texture in the filling, providing a substantial, meaty component that contrasts with the rich fat and sweet dried fruits; trim from the bone and finely chop or mince to distribute evenly.
- 1 pound suet (or raw beef fat - suet preferable, finely chopped but not into a paste) Introduce rendered fat and coarse texture to the filling, supplying moisture, richness, and traditional suet mouthfeel that helps create a dense, hearty filling; keep chopped rather than pureed to retain structure.
- 1/4 pound dried currants Contribute concentrated fruity sweetness and chewiness, balancing savory elements while adding small bursts of flavor and visual interest throughout the filling; plump if desired before use to soften.
- 1/4 pound dates Provide sticky sweetness and deep caramel notes, enhancing overall richness and binding filling components together while adding chew and concentrated fruit flavor when chopped and dispersed.
- 3/4 cup sugar Add granulated sweetness to balance spices and savory meat, helping to caramelize and meld flavors during cooking while controlling overall sweetness level in the filling.
- 1/2 tablespoon mace Lend a warm, slightly floral aromatic note that enhances the pastry’s spice profile and pairs well with sweet fruits and meat, used sparingly due to its potency.
- 1/2 tablespoon cinnamon Supply a warm, sweet spice foundation that complements other aromatics and helps create a classic spiced filling, contributing depth and familiarity to the flavor profile.
- 1/2 tablespoon ginger Impart bright, pungent heat and a warm, peppery complexity to the spice blend, elevating the overall spiced character and balancing sweetness and richness.
- 3/4 teaspoon cloves Introduce a potent, warm, and slightly bitter aromatic note that anchors the spice mix; used in small amounts to add depth and a clove-like intensity without overpowering.
- 1/2 teaspoon salt Provide essential seasoning to enhance and balance all other flavors, ensuring the filling and pastry are neither flat nor overly sweet; distribute evenly for best results.
- 1/4 teaspoon pepper Contribute a subtle heat and savory counterpoint that sharpens the filling’s flavors and complements the sweeter elements; use judiciously to avoid overwhelming the blend.
- 1/8 teaspoon crushed saffron Offer a delicate, floral, and slightly honeyed saffron aroma and color, imparting a unique exotic note when crushed and dispersed, used sparingly due to its potency and cost.
Instructions
- In a large pot, cover the veal with cold water. Cover pot with a lid and simmer until tender, about 1 1/2 hours.: You will notice the pot beginning to release a gentle steam and a savory aroma as the veal softens; simmering slowly allows connective tissues to break down so the meat becomes tender and easy to chop, which is crucial for a cohesive filling. Listen for a soft, steady bubble instead of a hard boil, and skim any foam that rises to keep the broth clear and the flavor clean. One common mistake is boiling too hard, which can toughen the meat and make the broth cloudy, so maintain a gentle simmer and check the meat with a fork for tenderness periodically. The visual cue you want is meat that flakes easily when prodded, and the scent should turn rich and meaty without burned notes.
- Drain and allow the veal to cool. Then chop it finely with the chopped suet or beef fat. Note that suet will produce a better texture result; beef fat will make for a greasier pie, but it is easier to locate than suet so we add it here as an alternative. Add in currants, chopped dates, sugar and spices. Set aside.: As the veal cools you will feel it firm slightly, making it easier to handle; finely chopping it creates a consistent mouthfeel where the little pieces mingle with suet and fruit. When you mix in the currants and dates , their fragrance and sticky texture begin to knit the filling. If you chop the fat too fine into a paste, you lose the little pockets that render and create texture, so keep the pieces small but distinct. A common error is adding the sugar too early while the meat is still hot, which can dissolve the fruit and make the filling overly loose; wait until the mixture reaches a manageable temperature. The aroma will shift to a complex sweet savory perfume, and the filling should hold together when pressed gently.
- Preheat oven to 350 degrees F. To make crust, first melt the butter in 1 cup of water. Heat just until the butter is melted, do not boil.: You should smell warm butter notes as it melts into the water , creating a rich liquid that will hydrate the pastry flour evenly. Heating just until melted preserves the butter's emulsion; boiling can change the texture. A common slip is overheating the mixture which can scald and alter how the dough binds, so remove from heat as soon as the butter liquefies. Visually the liquid will look glossy and uniform, and it should be warm, not piping hot, when you incorporate it into the flour.
- In a large mixing bowl, make a well in the center of the 4 cups of flour. Mix in water/melted butter mixture until well combined. Let sit until it reaches room temperature. Mix in egg yolks. The dough should come together as a ball.: When you add the warm liquid to the pastry flour the bowl will fill with a soft cloud of flour scent and the dough will form into a shaggy mass before smoothing out; resting until it cools prevents the egg yolks from cooking on contact, and encourages a pliable dough. Use gentle strokes to blend, keeping handling minimal to avoid developing too much gluten which would tighten the pastry. A typical mistake is overmixing or kneading as if making bread, which makes the crust tough, so stop as soon as the dough holds together. The correct visual cue is a smooth ball that yields slightly under pressure but does not feel sticky.
- Allow dough to rest for 10 minutes, then divide into 4 equal portions.: Resting the dough relaxes gluten and makes rolling easier, and you will notice it becoming more supple to the touch. Dividing into equal portions ensures uniform thickness and consistent baking times across the pies. A common oversight is skipping the rest, which often leads to a dough that springs back while rolling and tears; give it the brief pause it needs. The dough should be cool and calm under your palms, ready for rolling.
- On a floured surface roll the dough to 1/16 inch thickness, then cut out 24 4-inch circles. Roll out remaining dough and cut into 24 3-inch circles.: Rolling to the right thinness is key; visually you will see the dough become almost translucent at the edges when it hits about 1/16 inch, which creates a delicate, crisp crust after baking. Cutting circles cleanly yields neat edges that crimp together easily. Overstretching causes thin spots that burst when filled, so lift and turn the dough frequently and re flour lightly to prevent sticking. The ideal sound is a quiet flour scuff, and the circles should feel even and smooth.
- Place the larger dough circles into the bottoms of a greased muffin tin, then spoon in 2 tbsp of filling.: As you press the larger circles into the muffin tin, you will notice the pastry gently hug the cup contours, forming a neat pocket; the filling should be spooned in so it sits slightly below the rim, which helps sealing. If you overfill, the pies can leak, so measure the 2 tbsp portions for consistency. A frequent error is packing the filling too tightly, which can prevent proper expansion and lead to a dense texture; leave the filling gently aerated. The filling should glisten slightly from rendered fat and dried fruit juices.
- Top with the smaller dough circles, pressing down to make sure that there are no air pockets between the dough and the filling. Use a fork to crimp the top and bottom edges together.: When sealing, press gently to express any trapped air, which could otherwise expand and break the crust during baking; the forks' tines leave a decorative and functional crimp that ensures a tight seal. Listen for a soft squish as air escapes and watch for even contact between layers. Not sealing properly is a common mistake and results in leaking; take your time to press the edges fully. The edges should look neatly joined and the surface smooth except for the crimped rim.
- Make a vent in the top by cutting a small “x” in the center.: The vent will let steam escape during baking so the filling does not burst the crust, and you should see a subtle steam plume rising from the cuts as the pies bake. Keep the vent small to preserve moisture while preventing sogginess. Cutting too large an opening leads to dry filling, so aim for a modest small x . The visual cue is a neat cut that remains stable and does not widen as the pies set.
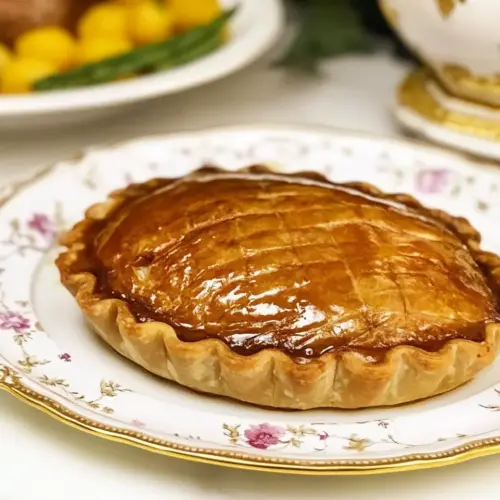
- Place muffin tins on a baking sheet, then bake for 1 hour rotating the pan halfway through, till golden brown and baked through.: As the pies bake the kitchen will fill with a complex aroma of spice and rendered fat, and the crust will slowly turn a golden brown; rotating halfway ensures even color and doneness across the oven. Keep an eye on the edges and center color, and test one pie for a deeply set filling before removing all of them. A typical mistake is opening the oven too often, which can lengthen baking and disrupt browning; limit checks and rely on rotation. The sound is a gentle whisper of fat bubbling, and the proper visual sign is an even golden surface with no raw dough patches.
- If you open the oven and see that fat is draining from the pies onto the baking sheet, don't worry, this is likely to happen (especially when using beef fat in place of suet) and will not ruin the pies.: You may notice golden droplets collecting on the tray, and while it can look alarming it often means the fat is rendering out and the pies are moist inside; use parchment or a sheet beneath to catch drips. If you used beef fat the pies may be richer, so allow them to rest to let excess fat redistribute. A misstep is assuming the pies are ruined and overbaking to dry them; instead, finish the bake and drain if necessary. The smell will be savory and intense but not unpleasant, and the pies should still hold their shape.
- Serve warm or at room temperature (we preferred them warm). They are similar to sweet mince pies. Note they tend to get greasy after sitting for prolonged periods of time; keep pies separated by layers of parchment or wax paper when storing.: Serving warm accentuates the spice perfume and soft texture, while chilled pies will feel firmer and a touch denser; choose based on preference. If storing, layer pies with parchment or wax paper to prevent sticking and to absorb excess fat. One common oversight is stacking hot pies which encourages sweating and greasiness; cool them to room temperature before stacking. The final sensory moment is a warm mouthful where flaky pastry meets spiced meat and fruit, offering a nuanced echo of historic recipes.
Notes
- Choose suet when possible, because it produces a flakier texture and renders in a way that mimics traditional versions; if you must use beef fat, expect a slightly greasier result and drain excess fat after baking.
- Keep the simmer low, since a gentle simmer breaks down collagen without toughening meat; constant high heat is the most common reason for dry, stringy veal.
- Rest the dough, as short rests relax gluten and make rolling smooth and consistent, preventing the dough from snapping back and tearing.
- Measure filling, because using 2 tbsp per cup ensures uniform pies that bake evenly and reduce the chance of leaks or underbaked centers.
- Use parchment between layers for storage to absorb any excess fat and keep pies from sticking together, which preserves texture and presentation.
- Rotate the pan halfway through baking to promote even browning and prevent hot spots from creating unevenly cooked pies.