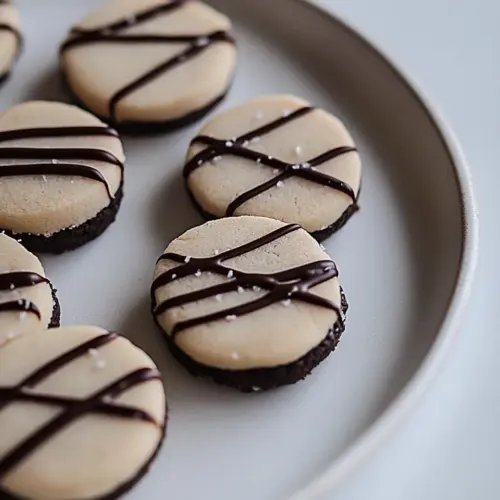
Fudge Striped Cookies
Fudge Striped Cookies are buttery, tender rounds finished with glossy milk chocolate stripes and dipped bottoms. These cookies deliver a soft interior and slightly crisp edges, making them an easy yet impressive treat for gatherings or an easy weeknight baking session. Their classic contrast of buttery dough and smooth milk chocolate chips is reason enough to bake a batch.
Equipment
- Stand mixer
- Mixing Bowl
- Rolling Pin
- 3 inch Cookie Cutter
- 1/2 inch cutter or piping tip
- Baking Sheet
- Parchment Paper
- Microwave Safe Bowl or Double Boiler
- Piping Bag
- Cooling rack
- Bench scraper
Ingredients
- 1 cup unsalted butter, at room temperature Creamy and softened to room temperature to ensure easy creaming with sugars, providing a tender, tender crumb and rich flavor throughout the dough. Helps incorporate air for lightness and carries fat-soluble flavors for balanced taste.
- 1/2 cup white granulated sugar Granulated for structure and aeration when creamed with butter, contributing to cookie spread and a subtle sweetness. Balances texture by promoting slight crispness around the edges.
- 1/2 cup powdered sugar, sifted Finely textured and sifted to dissolve smoothly into the dough, offering additional sweetness and a delicate, melt-in-mouth bite. Helps control dough moisture and contributes to a fine, tender texture.
- 1/4 teaspoon salt Fine and measured precisely to enhance flavor balance and control gluten development, preventing the cookie from tasting flat. Supports the dough's structure without overpowering sweetness.
- 1 large egg Beaten into the dough to add moisture, enrich flavor, and provide structure through protein and emulsification. Works with yolk to bind ingredients and contribute to tenderness.
- 1 large egg yolk Added for extra richness and emulsification, supplying concentrated fat and lecithin for a silkier crumb and deeper color. Enhances chewiness and helps bind the dough more securely.
- 1/2 teaspoon vanilla bean paste or 2 teaspoons vanilla extract Aromatic and used sparingly to introduce fragrant vanilla notes that elevate overall flavor; paste offers flecks and intensified aroma while extract provides convenience. Balances sweetness and rounds out chocolate and butter flavors.
- 2 1/2 cups all-purpose flour Measured and folded in to provide structure through gluten and form the cookie matrix, determining chewiness and thickness. Offers neutral background that lets butter and chocolate remain the stars.
- 6 ounces milk chocolate chips, melted Melted to create the signature chocolate stripes or swirls, contributing glossy shine, intense milk chocolate flavor, and a smooth mouthfeel. Adds contrast in texture and visual appeal once cooled and set.
Instructions
- To make the cookies: To the bowl of a stand-up mixer, add the butter, granulated sugar, powdered sugar and salt. Beat until light and fluffy, about 3 minutes. Add the egg, egg yolk, vanilla paste or extract and beat once more until combined. In two batches, add the flour, being sure each addition is combined before adding the next one. Divide the dough in half, transfer it to two sheets of plastic wrap (it’ll be quite soft!), shape into a disc and transfer to the fridge. Allow to chill for about 1 hour.: The bowl fills with the sweet, buttery scent as you cream the butter and sugars together, a light hum from the mixer as air collapses into a fluffy pale mass, which signals proper aeration. The texture should be visibly lighter and slightly voluminous, a few minutes of beating usually does this. When you fold in the egg , egg yolk , and vanilla , a richer aroma develops and the batter becomes silkier, indicating cohesion. Adding the all purpose flour in two batches prevents overworking the dough, which would toughen the cookie; you want just enough mixing for a uniform dough. A common mistake is adding all the flour at once and continuing to mix aggressively, which creates a dense texture. If the dough feels too soft to handle, chilling will firm it up and make rolling simpler.
- Turn the oven up to 375 degrees F. Line two baking sheets with parchment paper and set aside.: A cool, slightly firmer dough is easier to shape, so divide and wrap each portion in plastic wrap, smoothing into discs so they chill evenly. The refrigerated dough firms and holds moisture, which minimizes spreading during baking, and it gives the butter time to solidify so the cookies bake with a tender interior and defined edges. One hour chilling is usually perfect; shorter chilling can leave the dough too soft, and much longer chilling can make rolling more work. Avoid cutting corners here, because skipping the chill often produces flat, misshapen cookies.
- Remove the first disc of dough from the fridge. Allow to come to room temperature for about 5 to 10 minutes. Liberally flour a rolling pin and work surface. Roll out the cookie dough to a 1/8-inch thickness. Stamp out the cookies using a 3-inch circular cookie cutter and cut out holes in the center using a 1/2-inch cutter (I found a piping tip to be the best for this). Transfer the cookies to the baking sheet, spacing them about 1-inch apart (these spread slightly). Re-roll the scraps to get a few more cookies, if you like. Repeat with the second disc of dough.: Preheating to the correct temperature ensures the cookies set quickly at the edges and maintain a slightly soft center. You will notice the oven door closing on a steady heat that helps the cookies color evenly. Using parchment on the sheets prevents sticking and promotes even browning on the bottom. A mistake to watch for is placing cold baking sheets in the oven with cookie dough on them, which can alter bake time; allow sheets to come to oven temperature if you preheat with them inside.
- Bake the cookies, one baking sheet at a time, for about 8 to 10 minutes, until lightly golden brown around the edges. Cool on the baking sheet before transferring to a cooling rack. Repeat with the remaining cookies.: Allowing it to rest for about 5 to 10 minutes softens it just enough to roll without tearing, giving a cool, slightly pliable feel under your palms. Generously flouring the work surface and rolling pin prevents sticking while rolling the dough to a 1/8 inch thickness, which yields a delicate, even bake where the center remains tender and the edges gain a light crisp. Cutting with a 3 inch cutter and using a 1/2 inch cutter for the center creates the classic shape, and transferring the rounds to the sheet should be done with a thin spatula to avoid distortion. A common problem is rolling too thin or too thick; inconsistent thickness leads to uneven baking, so check visually for uniformity across the sheet.
- For the record, my favorite way to melt chocolate is to put it in a glass bowl and microwave it for a minute and stir until smooth. You can also nestle a glass bowl atop a saucepan that’s filled with a few inches of simmering water. Add the chocolate to the bowl and allow to melt. Stir until smooth.: As the cookies bake, the kitchen fills with a warm, toasty butter aroma and the edges begin to take a light golden tone, the main visual cue they are ready. They typically need about 8 to 10 minutes; you will see a slight color at the edges while the centers remain pale. Cooling briefly on the baking sheet lets them set without being fragile, then moving to a cooling rack finishes the process and prevents condensation on the bottoms. A common misstep is overbaking to achieve color; that kills the tender center, so remove them when edges are lightly golden and centers still look slightly soft.
- When the cookies are cool, drop the bottom side into the chocolate, allowing any excess to run off (I found a bench scraper to help in getting the excess off). Transfer to a baking sheet with parchment. Repeat with the remaining cookies.: The chocolate takes on a glossy sheen as it loosens into a smooth pool, whether you microwave in short bursts or use a double boiler method where steam warmth gradually softens the chips. A wooden spoon or spatula should glide through the melted milk chocolate chips with a satin feel, and a breath of chocolate aroma will fill the air. If the chocolate seizes or becomes grainy, it usually means it overheated; add a tiny splash of neutral oil or warm cream and stir gently to restore gloss. Melting too quickly is the typical error, so patience here pays off for silky dipping and piping.
- Pour the remaining chocolate into a piping bag. Snip off the tip and create chocolate stripes. Do the best you can—mine weren’t perfect! Transfer to the fridge to set for 10 minutes. Serve with milk.: When the cookies are cool, dipping the bottom side into the warm milk chocolate chips delivers a satisfying click and swirl as excess chocolate runs off back into the bowl. Using a bench scraper to tap off extra keeps the bottoms tidy and evenly coated. Transfer the dipped cookies onto parchment to set, and the contrast between the matte cookie and glossy chocolate is obvious and pleasing. A common mistake is dipping while the chocolate is too cool and thick, which yields clumpy coverage, so keep the chocolate fluid but not scorching hot.
- Pour the remaining chocolate into a piping bag: The remaining milk chocolate chips should flow smoothly through a small snip in the bag, creating thin stripes across the cookies. The tactile rhythm of moving from cookie to cookie, applying steady pressure, results in even lines that harden with a snap in the fridge. Even if the stripes are imperfect, they add a handmade charm. Avoid overfilling the bag which can cause uncontrollable splats, and chill the cookies for about 10 minutes to set the design.
- Transfer to the fridge to set for 10 minutes: The coolness firms the chocolate quickly, giving you a neat finish and a crisp snap when bitten. It also helps the stripes keep their shape during storage or transport. Leaving them at room temperature too long before serving can soften the chocolate and reduce visual appeal, so a short chill is both practical and aesthetic.
- Serve with milk: Pairing the cookies with a cold glass of milk enhances the balance between sweet and buttery textures, and the milk acts as a palate cleanser between bites. The contrast of creamy milk and dense cookie is timeless, and I often notice guests deliberately dunking for that nostalgic feel. A mistake is offering warm drinks that can soften the chocolate prematurely, so I stick with cool or room temperature beverages.
Notes
- Adjust the vanilla: Try vanilla bean paste if you want little flecks and a deeper aroma, it enhances the cookie’s richness without altering texture.
- Swap the chocolate finish: Use darker chocolate for a less sweet contrast and a more pronounced chocolate flavor that pairs well with the buttery cookie base.
- Chill longer for firmer dough: If you prefer less spread, chill the discs for several hours or overnight, which yields thicker, chewier cookies after baking.
- Use a piping tip for the center hole: A small piping tip creates a neat center cutout, giving the finished cookie a tidy look compared to tearing or pushing the center out.
- Work in batches for freshness: Bake one sheet at a time so each set gets consistent oven heat and you can monitor color closely, producing uniform results.