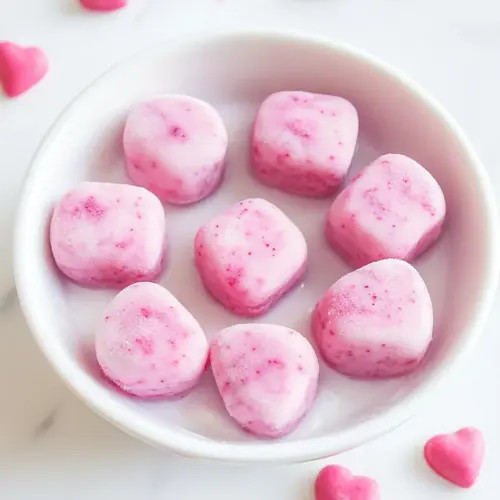
Frozen Yogurt Bites
Frozen Yogurt Bites are creamy, fruity, and easy to make, combining creamy vanilla Greek yogurt with bright mixed berries for a refreshing snack. Perfect for summer afternoons, lunchboxes, or simple desserts, these bite sized treats freeze quickly and travel well. Make a batch to keep on hand for a cool, protein rich snack that is effortless to prepare and delightful to eat.
Equipment
- Equipment
- The Best Homemade Kid’s Snacks on the Planet
- Clean Treats Cookbook
Ingredients
- 1 cup mixed berries, for ours, we used strawberries, blackberries, and raspberries Provide bright, fresh flavor and natural sweetness while contributing color and texture; chop larger berries for even freezing and distribute evenly in the tray to avoid clumping. Include a mix of varieties to balance tartness and sweetness, and lightly macerate if extra juice is desired for easier spooning. Serve as the primary fruit component that complements the creamy yogurt base and adds visual appeal when popped from the mold.
- 1 cup vanilla Greek yogurt Supply a creamy, tangy base that binds the fruit and freezes into a smooth, scoopable texture; choose full-fat Greek yogurt for richer mouthfeel or low-fat for lighter bites. Stir gently to ensure uniform consistency before portioning into the silicone tray, and lightly sweeten if preferred to balance berry tartness. Act as the dairy component that provides protein and structure to the frozen bites.
- Silicone ice cube tray, any shape Allow easy removal of frozen bites and determine the final shape, making portioning simple and consistent; choose a flexible silicone tray for effortless popping and minimal breakage. Ensure the tray is clean and dry before filling to prevent sticking and freeze on a level surface for even setting. Function as the mold that controls size and presentation of each frozen yogurt bite.
Instructions
- Place the mixed berries in a small blender, and blend until they are coarsely chopped. Add the vanilla yogurt and blend until smooth.: You will notice the color deepen and a fragrant berry aroma lifting as you pulse the mixed berries , with small flecks still visible if you stop early. This texture gives little bursts of fruit in the finished bites and prevents the mixture from becoming uniformly pink, which I find less interesting. A frequent mistake is overblending, which completely liquefies the berries and releases more water, making the frozen bites icier, so pulse just enough to break the berries down to coarse pieces. The sound will be a gentle chopping rather than a steady whirr when you do short pulses, and visually you should still see tiny seeds and bits of flesh. If your blender warms the mixture, pause and scrape the sides, as heat can soften the texture and change freezing time.
- Pour the mixture into the silicone ice cube trays and transfer to the freezer. Freeze for 3 to 4 hours or until frozen solid.: As you add the vanilla Greek yogurt , the mixture becomes creamier and the raw fruit tang mellows into a harmonious pink hue. The smell will shift from purely fruity to a subtle, creamy scent with a hint of vanilla, and the texture should become thick and pourable rather than runny. This step matters because blending the yogurt fully integrates the dairy proteins with the fruit, which creates a more cohesive frozen bite and reduces ice crystal formation. Avoid adding too much additional liquid, and do not overblend into a thin slurry, because that leads to an icier mouthfeel once frozen. If you see separation, stop and fold gently with a spatula to combine, as aggressive blending can also incorporate excess air that changes the final creaminess.
- Once they're solid, transfer the frozen bites out of the trays into freezer bags.: Slowly pouring the mixture into each cavity helps control portions and keeps the surface smooth. You will see the mixture settle, and the surface should look glossy and uniform. If air bubbles appear, tap the tray gently on the counter to release them, resulting in a denser, creamier bite. This technique is important because trapped air pockets can make the texture less pleasant, and uneven filling causes inconsistent freezing. One mistake is overfilling the cavities, which makes demolding difficult and may cause the bites to freeze together. Use a small spoon or a measuring cup with a spout for precision, and place the trays flat in the coldest part of the freezer to ensure even freezing.
- Freeze for 3 to 4 hours or until frozen solid: You will notice the trays change from glossy to matte and firm when the bites are set, and the cold air in the freezer will remove residual warmth quickly. The timing depends on the cavity size and your freezer's temperature, so check after 3 hours by gently pressing the surface; it should feel firm and resist indentation. This waiting time is crucial for texture, because partially frozen centers will be too soft and prone to melting, whereas overfreezing is seldom a problem for these small bites. A typical error is opening the freezer repeatedly, which lengthens freezing time and can introduce temperature fluctuations, so try to minimize door openings. If your freezer is packed, give them extra time and ensure the tray sits on a flat surface for uniform setting.
- Once they're solid, transfer the frozen bites out of the trays into freezer bags: The moment you flex the silicone ice cube tray the pieces should pop out easily, emitting a faint scent of frozen yogurt and berries. Transferring them to airtight freezer bags protects their flavor and prevents freezer burn, which preserves texture and taste for weeks. Work quickly but gently, laying them in a single layer first to avoid clumping, then press out excess air before sealing. A common pitfall is leaving them exposed on a baking sheet in the freezer, where they can absorb other odors or get freezer frost, so airtight storage is essential. Label the bag with the date to keep track of freshness, and store at the back of the freezer where the temperature is most consistent.
Notes
- Choose the right berries - Opt for firm, ripe mixed berries rather than overripe ones to limit excess liquid and improve freezing texture; if berries are slightly overripe, drain some juice before blending.
- Use thick yogurt - Full fat or strained vanilla Greek yogurt produces a creamier bite and prevents an icy finish; if your yogurt is thin, strain it in a fine mesh for 30 minutes before using.
- Mind the tray size - Smaller cavities freeze faster and create creamier centers, while larger molds take longer and yield a firmer, icier bite, so pick the tray size to match the texture you prefer.
- Minimize freezer openings - Place trays in the coldest section and avoid opening the freezer frequently during the 3 to 4 hours freeze period to ensure consistent setting.
- Seal well - Transfer frozen bites to airtight freezer bags and remove excess air to maintain flavor and prevent freezer burn; portion into small bags for easy snacks.