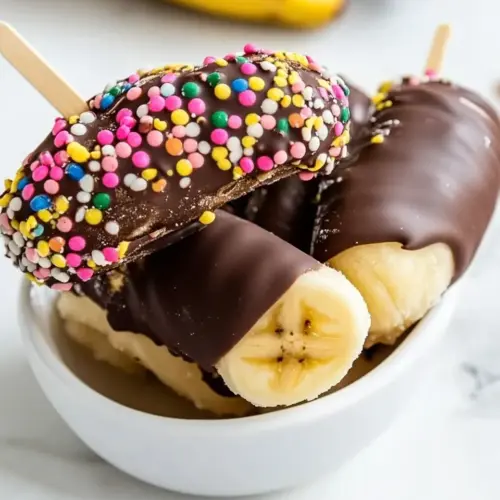
Frozen Chocolate Covered Bananas
Frozen Chocolate Covered Bananas are an easy, crispy treat with creamy frozen centers and a glossy chocolate shell. This playful dessert is quick to assemble and perfect for summer gatherings, offering satisfying texture contrast and customizable toppings. Make a batch ahead for stress free hosting and enjoy a sweet, refreshing snack that everyone will love.
Equipment
- Popsicle sticks or bamboo skewers (8)
Ingredients
- 4 Bananas The more ripe the bananas, the better! Provide natural sweetness and creamy texture while acting as the base for each frozen treat; choose very ripe bananas for optimal flavor and easier browning when sliced or halved. Freeze promptly after coating to ensure a firm center and prevent mushiness during dipping and storage.
- 12 ounces Chocolate Chips semi sweet or milk chocolate Melt smoothly into a glossy coating that hardens around the bananas, creating the classic chocolate shell; select semi-sweet or milk chips based on desired sweetness and mouthfeel. Temper slightly with coconut oil if needed to improve pourability and minimize bloom for a shinier finish.
- 2 tablespoons Coconut Oil Improve the chocolate’s consistency by thinning and adding shine, allowing an even, glossy coating that sets well in the freezer. Use sparingly to avoid an overly oily finish while ensuring the melted chips remain fluid enough for dipping.
- 1/4 cups sprinkles Add crunchy color and a festive texture contrast when pressed onto the chocolate while still wet; measure a small cup to avoid overpowering the banana and chocolate balance. Sprinkle immediately after dipping so the decoration adheres before the coating sets in the freezer.
- 1/4 cup Peanuts chopped Contribute salty, nutty crunch and complementary flavor when chopped and sprinkled over the warm chocolate; finely chop to ensure even coverage and easier bites. Apply right after dipping so the pieces stick to the chocolate before it hardens.
Instructions
- Remove the peel from the bananas and cut them in half the short way. Push a popsicle stick into the cut end of each banana. Place bananas on a baking sheet covered in parchment paper, then freeze for three hours.: The cold snap as you press the popsicle sticks into the halved bananas is satisfying, and you can hear and feel the slight firmness as the stick settles into the fruit. This long freeze firms the interior, so when you dip the fruit the chocolate hardens quickly without melting the banana . You will notice the exposed banana flesh becomes pale and frosty around the edges once it's properly frozen. A common error is skimping on freezing time, which causes the chocolate to slide off or sink into a soft center. If your kitchen is warm, rotate the tray once during freezing so all pieces chill evenly. The why here is simple, the fully frozen core prevents the coating from warming and ensures a crisp outer shell.
- When the bananas are done freezing, add the chocolate and coconut oil to a microwave safe cup or bowl.: When you combine chocolate and coconut oil , you will see the mixture gleam as the oil sits on the surface, promising a silkier melt. This step sets the stage for an even coating that will cling to the frozen surface. Use a shallow, tall cup if you can, because it helps you submerge the banana without splashing. Be careful to choose a microwave safe vessel, since a cracked bowl can spoil both the chocolate and your mood. A typical misstep is using too wide a dish, which makes dipping awkward and messy.
- Melt the chocolate on half power on your microwave for 2-3 minutes. Stir about every 30-60 seconds to keep the chocolate from scorching until fully melted.: You will hear a faint, comforting hum from the microwave as the chocolate softens, and each stir brings it to a glossy, uniform texture. The aroma of warm cocoa will become stronger with each interval, and stirring prevents hot spots that burn and grain the mixture. If the chocolate thickens after a stir, let it rest for a few seconds, then stir again to encourage smoothness. Avoid blasting it at full power, because scorched chocolate smells bitter and will clump. If you see any graininess after melting, add a tiny splash more coconut oil and stir to rescue the texture.
- Pour melted chocolate into a tall glass, like a mason jar.: As the melted chocolate cascades into the glass, notice the glossy surface and the way it coats the sides. A tall glass concentrates the chocolate, allowing you to dip without drenching the entire fruit. The vertical shape helps the chocolate flow evenly and reduces splatter. If the container is too shallow, you will end up with uneven coverage and more mess. A frequent oversight is using a bowl that is too wide, which forces a dunking motion that splashes chocolate onto your work surface.
- Dip the bananas one at a time into the melted chocolate, then remove and immediately sprinkle with nuts or sprinkles.: The moment the frozen banana meets the warm chocolate you will hear a faint sizzle and see steam kiss the surface. Watch how the chocolate clings and runs in a smooth sheet, coating the fruit. After lifting, let excess drip back into the glass, then press in your chosen topping while the coating is still tacky. This immediate topping step ensures good adhesion and an even finish. If you wait too long the coating will harden and toppings will not stick. Avoid dunking too deeply, because you might warm the banana too much and lose the desired contrast.
- Place on parchment paper to cool then serve. Extras can be stored in the freezer for up to one month.: Lay each finished piece on parchment paper where you will hear a faint click as the chocolate sets in place. The surface will go from glossy to satin as it hardens, and you can touch the edge gently to check for firmness. Store any extras in a single layer initially so they do not stick together, then transfer to an airtight container or bag once fully set. A common mistake is stacking them while still tacky which ruins the finish. The reason for quick freezing or refrigeration here is to preserve texture and prevent condensation that can make the coating dull. Label your storage container so you enjoy them within the recommended time for best flavor.
Notes
- Use semi sweet or milk chocolate for balanced flavor, and measure the chocolate accurately so the coating sets with a pleasant snap rather than remaining too soft.
- Measure the coconut oil precisely, because just enough thins the chocolate for smooth coverage, while too much keeps the shell soft and less crisp.
- Freeze on parchment to prevent sticking and make cleanup easier, the coated pieces lift cleanly once the chocolate has hardened.
- Organize your toppings near the dipping station so you can apply them immediately while the coating is tacky and ensure even adhesion.
- Work in small batches to keep the chocolate warm and fluid, reheating briefly on low if it begins to thicken while you finish dipping.