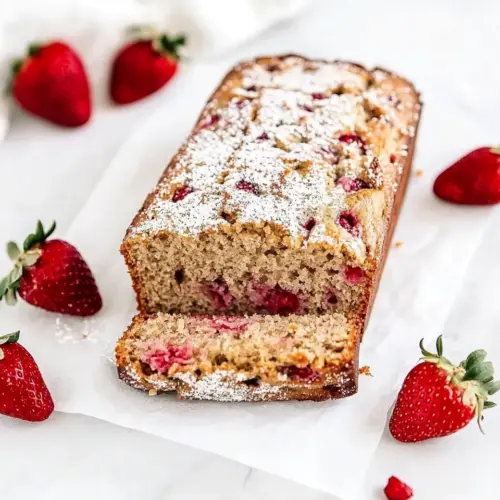
Fresh Strawberry Bread
Fresh Strawberry Bread offers tender, slightly tangy slices studded with bursts of juicy strawberries and a hint of lemon. This easy loaf uses simple pantry ingredients like all purpose flour and honey, producing a moist crumb that feels both rustic and refined, perfect for brunch or gifting. Make it when berries are ripe for a naturally bright, crowd pleasing treat.
Equipment
- Honey
- All Purpose Flour
- Loaf Pan 8.5 x 4.5 x 3-Inch
Ingredients
- 1 -3/4 cups all purpose flour, 220 grams Provide structure and tender crumb to the loaf; measure precisely to maintain proper texture and balance with leaveners and liquids. Sift or whisk briefly to break up lumps, and avoid overmixing once combined with wet ingredients to prevent a tough bread.
- 1 teaspoon baking powder, 5 grams Give lift and lightness to the bread by producing bubbles in the batter; combine with wet ingredients promptly to activate. Use the indicated amount to prevent over-rising and ensure an even crumb throughout the loaf.
- 1/2 teaspoon baking soda, 2.5 grams Contribute additional leavening power for a fine crumb and slight rise, especially in combination with baking powder. Use the small measured amount to avoid metallic or soapy flavors while promoting tender texture.
- 1/4 teaspoon kosher salt Enhance overall flavor and balance sweetness while strengthening gluten slightly; kosher salt also helps control yeast and chemical leavening reactions. Dissolve evenly throughout dry ingredients to ensure consistent seasoning in each slice.
- 2 large eggs, room temperature Bind ingredients and add richness and moisture, helping with structure and aeration when beaten; room temperature eggs incorporate more easily into batter. Beat gently before adding to ensure even distribution and improved emulsion with fats.
- 1 lemon, finely zested Provide bright, fresh citrus aroma and subtle acidity that lifts flavors and complements strawberries; finely zest to avoid bitter pith. Incorporate zest into batter to release essential oils and enhance overall fragrance of the bread.
- 1/2 cup runny honey, 170 grams Add natural sweetness, moisture, and a distinct floral flavor profile while contributing to browning; measure by weight for accuracy. Use runny honey to help keep the loaf tender and slightly dense, adjusting other liquids if necessary.
- 1/3 cup vegetable oil, 80 ml Supply fat for tenderness, moistness, and a soft crumb while aiding in heat transfer during baking; use neutral vegetable oil for unobtrusive flavor. Pour measured amount directly into wet mixture to create a smooth emulsion with honey and eggs.
- 1 teaspoon vanilla extract Contribute warm, familiar flavor notes and enhance perceived sweetness without adding bulk; use a pure vanilla extract for best results. Add to the wet ingredients to evenly distribute flavor throughout the batter.
- 3/4 cup buttermilk, 180 grams Provide acidity and tang that reacts with baking soda to help leavening, while adding moisture and a tender crumb; use true buttermilk for consistent results. Stir into the wet ingredients and balance its temperature with room-temperature eggs for optimal mixing.
- 10 oz 2 cups fresh strawberries, chopped Deliver fresh fruity flavor, moisture, and pleasant texture contrasts; chop to relatively uniform small pieces to ensure even distribution in the loaf. Gently fold into batter at the end to prevent crushing and color bleeding, and pat into the top if desired for visual appeal.
- Turbinado sugar for sprinkling, optional Add a crunchy, caramelized finish on the crust for visual appeal and texture contrast when sprinkled before baking; use sparingly and optionally to taste. Sprinkle evenly across the top to create a sweet, slightly crunchy crust that complements the soft interior.
Instructions
- Preheat the oven to 350 degrees F and grease an 8 1/2 x 4 1/2 inch (22×12 cm) loaf pan and line with parchment paper.: The room begins to warm and a gentle oven heat fills the kitchen with a dry warmth that hints at what is coming, an important signal so the batter bakes evenly from the moment it goes in. You should feel a steady heat when you open the oven, and the loaf pan lining prevents sticking while making the loaf easy to lift out later. If the oven temperature is off, you can end up with an underbaked center or burned edges, so use an oven thermometer for accuracy.
- Whisk flour, baking powder, baking soda, and kosher salt in a medium bowl.: The dry mix should look homogenous, with pale peaks of flour and tiny specs of leavener evenly distributed. Whisking aerates the flour slightly, which helps create a lighter crumb, and it ensures no clumps of baking powder lurk in one spot. A common mistake is to skip this step, which can yield uneven rise and pockets of salty or bitter leavener in the loaf.
- In a large bowl whisk eggs, lemon zest, honey, vegetable oil, and vanilla extract until fully incorporated.: As you whisk, the aroma of zest and honey will lift the room, and the mixture will become glossy and slightly thicker. This step melds flavors so that each bite tastes consistent, and the lemon oils disperse through the batter. Overbeating at high speed can incorporate too much air and change the texture, so whisk until just smooth.
- Whisk in the buttermilk.: The batter will loosen and steam a faint tangy scent from the buttermilk. This liquid cools the mixture and provides acid to react with the baking soda, so the loaf gets its tender crumb and gentle lift. If you add cold buttermilk straight from the fridge, let it sit briefly or temper it so the batter mixes evenly; a very cold liquid can make the oil seize slightly.
- Slowly pour the wet ingredients into the dry ingredients and use a rubber spatula to mix until there are no more lumps. Do not overmix!: You will notice the batter go from a shaggy to a cohesive mass, with a few small streaks of flour disappearing under gentle strokes. The key here is texture, the batter should be thick but pourable, and small lumps are fine because overmixing develops gluten which yields a tougher loaf. If you overmix, the bread can become dense and chewy, so stop as soon as lumps are gone.
- Separate 2-3 tablespoons of strawberries and toss the rest with 1 tablespoon of flour.: When you toss the chopped strawberries in flour you will see their surfaces take on a dusty coating, which prevents them sinking as the batter bakes. The reserved berries will later top the loaf for visual interest. A common pitfall is skipping the toss, which can cause the fruit to drop to the bottom and create a soggy layer beneath the loaf.
- Gently fold in chopped tossed in flour strawberries.: Folding is a soft, deliberate motion that preserves air in the batter while evenly distributing fruit. You should hear nothing but light swishes and see pockets of pink fold through the batter, not frantic stirring. Vigorous mixing will bruise the berries and turn the batter pink and watery, so fold until evenly distributed.
- Pour the batter into the prepared pan, top with the rest of the strawberries and sprinkle with turbinado sugar, if desired.: The batter will spread with a slight sheen, and placing the reserved berries on top creates rustic peaks that caramelize into glossy spots. The turbinado sugar will glint on the surface and give a satisfying crunch after baking. Avoid packing the batter too tightly into the pan, which can impede rise and give a dense loaf.
- Bake 55-65 minutes or until a toothpick comes clean out of the center.: The oven will fill with a sweet, almost jam like aroma and the top should become a warm golden brown. The toothpick test is the most reliable indicator, but also look for the loaf pulling slightly from the pan edges. If you remove it too early, the center may be underdone and gummy, so err on the side of the longer bake time if your oven runs cool.
- After 30 minutes cover the bread loosely with aluminum foil to prevent the top from getting too dark. Check toothpick test at 50 minutes mark.: The foil shields the top while allowing the interior to continue baking, preventing an overly browned crust. When you peek at 50 minutes, listen for a gentle crackle as the surface sets and watch for the center to spring back. A frequent mistake is leaving the top exposed the whole bake, which can cause an excessively dark crust before the inside is ready.
- Let cool in the pan for 10 minutes, then gently lift the bread out of the pan and transfer it to a cooling rack to cool completely.: Cooling for a short time allows the loaf to settle so slices hold together, and transferring to a rack prevents steam from condensing on the bottom which could make the crust soggy. The aroma will continue to deepen as it cools, and patience here yields cleaner slices. Slicing too soon often gives a gummy center and torn crumb, so wait until it is fully cooled for best results.
Notes
- Use whole wheat or part whole wheat: Substitute up to half of the all purpose flour with whole wheat for a nuttier flavor and heartier texture, but expect a denser crumb so keep mixing gentle and consider adding a splash more buttermilk if the batter seems stiff.
- Swap oil for melted butter: If you prefer a richer mouthfeel, replace the vegetable oil with the same amount of melted butter, cooled slightly, which will add a toasty depth and a more pronounced buttery aroma in the final loaf.
- Adjust the sweetener: Use a bit more or less honey depending on the sweetness of your strawberries, tasting them first; less honey keeps the fruit forward, while a touch more yields a sweeter, cake like loaf.
- Add citrus variations: Swap part of the lemon zest for orange zest for a sweeter citrus note, which pairs especially well if your strawberries are very tart, creating a rounder flavor profile.
- Make mini loaves or muffins: Divide the batter into smaller pans or a muffin tin for shorter baking times and portable treats; watch the bake times carefully since smaller shapes will finish much sooner.
- Try a crunchy topping: Mix a tablespoon of turbinado sugar with a teaspoon of ground almond or finely chopped nuts and sprinkle on top for extra texture and a nutty counterpoint to the soft crumb.