French Hot Chocolate
French Hot Chocolate is a creamy, intensely chocolatey drink made with whole milk and high quality dark chocolate, finished with a touch of brown sugar for depth. This easy winter treat is velvety, smooth, and perfect for cozy evenings or an indulgent pause in your day. Make it when you want a quick, luxurious cup that feels special.
Equipment
- Saucepan
- Whisk
- Knife
- Cutting Board
- Ladle
Ingredients
- 2 cups whole milk Warm gently to provide the creamy liquid base and tender mouthfeel for the drink; helps dissolve chocolate and carry flavors evenly throughout the hot chocolate. Adds subtle natural sweetness and richness that balances the bitterness of dark chocolate, and aids in creating a smooth, velvety texture when combined and heated slowly.
- 6 to 8 oz. 70% dark chocolate, finely chopped Provide concentrated cocoa intensity and deep chocolate flavor while melting into the milk to create a luxurious, decadent body; finely chopped form ensures rapid, even melting and prevents graininess in the final beverage. Contribute cocoa solids and cocoa butter that define the drink’s bitterness, aroma, and silkiness, allowing control over overall chocolate strength depending on amount used.
- 2 tbsp brown sugar, or to taste Sweeten lightly to taste while enhancing and rounding out chocolate’s natural bitterness; brown sugar’s molasses notes add a warm, caramel-like complexity that deepens the flavor profile. Allow gradual adjustment of sweetness for balance, and dissolve into the hot mixture to integrate flavor without altering texture significantly.
Instructions
- Heat milk in a saucepan over medium heat. Once barely simmering at edges remove from heat, whisk in chocolate and brown sugar.: As the milk warms, you will notice a gentle steam rise and a sweet dairy scent filling the kitchen, a calm, reassuring sound. Visually watch for tiny bubbles forming at the edges, not a rolling boil, because that is your sign to remove from high heat soon. Warming slowly is important because it prevents scalding and preserves the smooth proteins that support a velvety texture. If the milk overheats and scorches, it will smell burnt and add an unpleasant taste to the chocolate, so keep the heat controlled and stir occasionally to distribute warmth evenly. A common misstep here is letting the milk come to a rapid boil, which changes the texture and can create a thin film on top. Take your time, and you will be rewarded with a delicate base for the chocolate.
- Return to medium-low heat and cook for about 30 to 60 seconds, whisk constantly, to thicken slightly.: The moment the milk is barely simmering is tactile and visual, with a faint ripple and soft steam. Removing from the heat and adding the finely chopped dark chocolate lets the residual warmth melt it gently into a glossy emulsion. Whisking creates a shiny sheen, and you will feel the mixture thicken as the chocolate disperses. Adding the brown sugar at this stage allows it to dissolve fully into the warm matrix, lifting the cocoa notes. Why this matters: sudden high heat can shock the chocolate and cause it to seize, while gentle incorporation yields smoothness. A typical troubleshooting point is encountering small lumps of chocolate; if that happens, return to very low heat while whisking constantly until smooth, but avoid high flames which can overcook the mixture.
- Serve warm with whipped cream and chocolate shavings on top if desired.: As you bring the saucepan back to medium-low, keep the whisk moving and listen for a soft hum of simmer, not an aggressive boil. This short cooking period helps the cocoa fats and milk proteins marry, producing a thicker body and a luxurious mouthfeel. Visually you will see the drink become more cohesive and glossy, and the aroma will shift toward deeper chocolate notes with a hint of caramel from the brown sugar . The reason for constant whisking is to prevent localized overheating which can separate the emulsion; steady motion distributes heat and keeps the texture uniform. A common error is leaving it unattended and allowing the mixture to boil, which can create a grainy texture and may reduce the silky sensation you want. If the drink becomes too thick, simply remove from heat and whisk in a splash of warm milk to adjust.
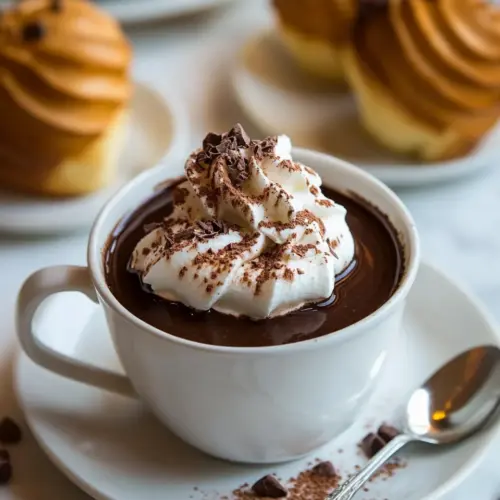
- Serve warm with whipped cream and chocolate shavings on top if desired: When you ladle the hot chocolate into cups, take a moment to enjoy the steam and the deep cocoa scent. Adding a dollop of whipped cream introduces a cool, airy contrast both in temperature and texture, while freshly shaved chocolate lends a final bright crunch and extra aroma. Serving is about the experience, so present it in prewarmed cups to maintain temperature, and use a steady hand to avoid spills. One reason this finishing step matters is that contrast amplifies pleasure, making the drink feel richer and more layered. A troubleshooting tip: if you find the topping melts too quickly, consider slightly thicker whipped cream or serving in smaller cups so the balance stays pleasing; long sitting can flatten the textures, so serve promptly for best impact.
Notes
- Choose quality chocolate, since the final flavor hinges on it; 70 percent offers a pleasant balance of bitterness and cocoa depth, and chopping it finely helps it melt quickly and evenly into the warm milk.
- Control your heat, warming the milk until it is just shy of simmering; this prevents scorching and preserves the smooth proteins that give the drink body, and a gentle hand here avoids a burnt taste.
- Whisk with intention, using a steady motion to create a glossy emulsion; constant whisking when the chocolate is added ensures even melting and helps the texture become silky instead of grainy.
- Balance the sweetness by adding brown sugar gradually; tastes vary, so start with the suggested amount and increase in small increments to avoid overpowering the chocolate.
- Finish for contrast with a small spoonful of whipped cream or a light dusting of chocolate shavings, which introduce temperature and texture differences that make each sip more interesting.