Fourth of July Sugar Cookies
Fourth of July Sugar Cookies are tender, buttery celebration cookies topped with glossy royal icing that dries firm for easy stacking and transport. These easy to decorate cookies capture summer flavors and visual flair, making them ideal for patriotic gatherings and easy weeknight baking projects. Try them for their soft center, slightly crisp edges, and picture perfect finish that everyone will love.
Equipment
- Stand mixer
- Mixing Bowl
- Wire Whip
- Rolling Pin
- 2 1/2 inch Round Cookie Cutter
- Baking Sheet
- Silicone Mat or Parchment Paper
- Wire Rack
- Piping Bag and Tip
Ingredients
- 2 -1/2 c, All Purpose Flour Provides structure and bulk to the dough, giving cookies their tender chew when properly measured and mixed. Sifts to remove lumps and ensures even hydration for consistent texture. Balances with fats and sugars to create the cookie crumb and shape retention during baking.
- 1/4 c. Corn starch Adds tenderness and a delicate, melt-in-your-mouth texture by reducing gluten formation when combined with flour. Works as a softening agent to lighten the dough and help create a finer crumb. Measured accurately to maintain proper dough consistency and prevent grease or collapse.
- 1/4 tsp Salt Enhances overall flavor balance by slightly amplifying sweetness and rounding other flavors, while controlling dough fermentation and gluten development. Helps highlight vanilla and almond extracts without adding saltiness when used sparingly. Critical for taste equilibrium in sweet cookie recipes.
- 3/4 c. Butter Unsalted, room temperature Contributes richness and moisture, creating a tender, flaky texture when creamed with sugar and providing flavor depth. Adds fat that limits gluten development, improving spread and mouthfeel in the baked cookie. Room-temperature butter creams easily to trap air for a light, airy dough.
- 3/4 c. Granulated Sugar Sweetens and assists with creaming to incorporate air, which helps leaven and tenderize the dough while contributing to browning. Controls sweetness level and interacts with butter to affect spread and texture during baking. Accurate measurement ensures correct dough consistency and structural balance.
- 1 Large Egg room temperature Adds moisture and acts as a binding agent, helping to emulsify fats and sugar for a cohesive dough. Contributes slight richness and aids in browning through proteins and moisture content. Room temperature egg incorporates more evenly for uniform texture.
- 1 tsp Vanilla Extract Imparts warm, familiar flavor and aromatic depth, rounding out sweetness and complementing almond and butter notes. Enhances perceived sweetness without adding sugar and aids in flavor complexity. Dissolves readily into wet ingredients for even distribution.
- 1/2 tsp Almond Extract Provides a subtle nutty, floral aroma that enhances the cookie's flavor profile without overpowering vanilla. Small amounts contribute complexity and a slightly almond-like finish to balance the sweetness. Used sparingly to avoid dominating the delicate sugar cookie taste.
- 4 c. powdered sugar Creates the base for royal-style icing by contributing fine texture and smoothness when sifted into dry mixes. Provides bulk sweetness and structure for piped decorations, dissolving easily into meringue powder and water. Ensures a stable, glossy finish for decorating cookies.
- 3 tbsp Meringue powder Stabilizes and helps whip the powdered sugar into a stiff, glossy icing by providing structure and volume to the meringue base. Ensures the icing sets firm and holds piped shapes for detailed decorations. Used to achieve a reliable consistency and longer shelf life for decorated cookies.
- 9 -10 tbsp water room temperature Adjusts icing consistency to reach desired piping or flooding thickness while hydrating meringue powder and powdered sugar. Room-temperature water dissolves powders smoothly and allows control over flow for detailed decoration work. Measured gradually to avoid overly thin or runny icing.
- Gel Food Coloring optional Adds vivid color for festive decoration without significantly altering icing consistency when used sparingly. Provides visual appeal for themed Fourth of July designs and allows precise color control for gradients or accents. Use gel form to avoid changing sugar balance or hydration in the icing.
Instructions
- Sift the flour, corn starch and salt into a medium sized mixing bowl.: You will notice a faint, clean flour aroma as you sift, and the texture becomes light and airy, which helps the dry ingredients blend uniformly; this step prevents pockets of flour or corn starch that would create uneven spots in the dough. If the mixture clumps, run a whisk through it to break it up before adding to the wet ingredients. A common mistake is skipping sifting, which can lead to a denser cookie with occasional lumps.
- Run a whisk through it to mix well and set aside.: After whisking you should see a uniform pale mixture with no streaks, and the bowl will be easy to handle when adding to the creamed butter; whisking ensures even salt distribution. I find this step calming, because the rhythm makes the mise en place feel complete. Avoid overworking the flour mix, which can add air and make measuring inconsistent.
- With a stand mixer, in a large mixing bowl beat the butter and the sugar together, on medium speed, until creamy, about 5 minutes.: The kitchen will fill with a sweet, buttery scent as the butter and granulated sugar transform into a pale, whipped cream, and the mixture should look light and slightly fluffy; this aeration contributes to a tender texture. If the butter is too cold you will see clumps, and if it is too soft the mixture will go oily, so keep the butter at room temperature. A typical pitfall is rushing this step, which leaves the sugar gritty and the dough heavy.
- Turn the mixer to low and add the egg while beating, then add the vanilla and almond extract.: As you add the Large Egg , the batter will momentarily look slightly separated before emulsifying, then it will come back together into a glossy, cohesive mixture; the extracts add fragrant notes that make the cookie taste full. Mixing slowly avoids splatter and ensures even incorporation. Be careful not to add cold eggs, which can cause the butter to seize and make a curdled-looking mixture.
- One cup at a time add the flour mixture until it is well incorporated. The sugar cookie dough will pull away from the mixing bowl at this point.: When you add the sifted dry mix gradually, you will notice the dough transform from sticky to pliable and smooth, and it should clean the sides of the bowl, signaling the right hydration. This controlled addition prevents overmixing and gluten development. The common error here is dumping all the flour at once, which makes the dough tough and hard to incorporate evenly.
- Take the dough and form a ball, then flatten out into a disc. Wrap in plastic wrap and place into the refrigerator for a minimum of 30 minutes.: Chilling firms the butter , relaxing the gluten and making rolling easier, with the dough smelling faintly of vanilla when you unwrap it; this step helps the cookies keep their shape during baking. I always chill longer if my kitchen is warm. Skipping or shortening chilling often leads to spreading and misshapen cookies in the oven.
- Preheat the oven to 375°F.: The oven should be fully heated so the cookies start baking immediately, creating a tender center and slightly crisp edge; a properly preheated oven gives predictable color and rise. I set my rack in the middle for even air circulation. Not preheating results in uneven baking and a flat, greasy texture.
- Take the dough out of the refrigerator and turn out onto a lightly floured surface.: The chilled disc will be firmer to the touch and easier to roll, and a light dusting of flour prevents sticking without drying the dough excessively. If the dough resists rolling, let it rest 5 minutes to soften slightly. Overflouring the surface can lead to drier cookies with inconsistent color.
- Take a rolling pin and roll out to about 1/4” – 1/2” thick.: As you roll, watch for an even, smooth surface and the right thickness which determines the cookie's bite; thinner cookies crisp more, while thicker ones stay softer. I rotate the dough occasionally to keep it even and check thickness frequently. Rolling too thin will produce brittle cookies that brown too quickly.
- Using a 2-1/2” round cookie cutter, cut as many discs out of the dough as possible and place onto a baking sheet lined with a silicone mat (or parchment paper).: You should hear a clean 'thunk' as the cutter separates the dough and see crisp edges on each disc, which bakes into a defined rim; spacing them ensures heat circulates evenly. If the edges become ragged, re roll the scraps gently. Pressing the cutter straight down and lifting without twisting keeps the shapes tidy.
- Take the remaining dough and mold into a ball again and roll out again. Cut out more cookies until all the dough has been used.: Reworking scraps will warm them slightly, so chill briefly if they become soft, and you will still achieve consistent cookies when you re roll to the same thickness. I try to limit the number of re rolls to maintain tender texture. Overworking can toughen the dough due to excess gluten development.
- Place the baking sheet into the oven and cook for 12 minutes. Turn the tray around half way.: During baking you will smell buttery sweetness and notice the edges set first, with a faint golden tint when done; turning the tray ensures even browning across rack hot spots. The centers should remain pale, and the edges should look just set. Leaving them much longer will make them hard and overly crisp.
- Remove from the oven and allow to cool a little on the baking sheet before transporting to a wire rack.: Cooling briefly on the sheet lets the cookies finish setting while still aiding release, then transferring to a wire rack prevents steam from making the undersides soft, keeping the texture ideal for decorating. If you move them too soon they may deform, and if you leave them too long they can stick slightly to parchment.
- Once cooled completely decorate as desired.: Cooling fully is essential so the icing adheres and sets without melting; the cookie will feel room temperature and firm to the touch. Plan your piping order so base layers set before adding details. Decorating on warm cookies causes runny, glossy icing that will not hold shape.
- Add the powdered sugar to a large mixing bowl attached to your stand mixer, as well as the meringue powder and stir a little to mix.: The dry ingredients should look powdery and lump free, and the aroma will be sweet and neutral; a brief stir disperses the meringue powder so the icing sets correctly. Sifting here can help if the powdered sugar seems compacted. Using undissolved lumps will create an uneven icing texture.
- Using your wire whip, turn on your stand mixer on a low speed and slowly add the water. As the powder subsides you can turn up the speed to medium.: As water is added the mixture will come together and turn glossy; start slow to avoid a dusty cloud, then increase speed when the powder is incorporated. Proper hydration determines whether the icing will pipe or flood. Too much water at once makes the icing runny and hard to correct.
- Whip the mixture well for about 7-10 minutes, until you start to see tips forming.: Whipping develops structure so the icing holds peaks and dries to a smooth shell, and you will see glossy peaks that hold shape briefly; this indicates proper aeration. Underwhipped icing will be flat and slow to set. Overwhipping can incorporate too much air and affect texture.
- Check the consistency of the icing. If it falls off the wire whip and melts back into the bowl of icing within 5-10 seconds then it’s perfect.: This visual test ensures your icing is floodable and will level to a smooth surface, which is crucial for neat decoration. If the icing holds too long, add a teaspoon of water and test again. A common error is trusting measurement alone without checking the flow and texture.
- Cover the bowl tightly with plastic wrap until you are ready to use it.: Covering prevents a crust from forming, preserving the smooth texture and ease of piping, especially if you step away for an hour or more. I press the plastic to touch the surface if I plan to store it briefly. Leaving it uncovered leads to a skin that ruins the batch.
- Take a piping bag and a number three tip and place into a tall glass, folding the edges over the outside of the glass. This is the easiest way to fill up an icing bag with less mess.: This setup keeps the tip steady while you spoon in icing, and you will notice much less dripping and waste; it's a practical trick I always use when I have multiple colors. Avoid overfilling the bag which makes handling difficult.
- Use a rubber band to tie the top of the icing bag. Place a piece of wet paper towel in the bottom of the glass, this will help the tip stay moist while you are working.: The rubber band secures the bag and the wet towel prevents the tip from drying, which keeps the flow smooth between colors. It also creates a tidy workspace for prolonged decorating sessions. Forgetting the towel can cause tips to crust and clog.
- If you are using other colors, pour a little of the remaining icing into a small bowl and mix in a little of the food color until you reach the desired color.: Small batches let you control intensity and avoid wasting large amounts of colored icing; you will see pigments disperse into glossy swirls as you stir. Use gel coloring for vibrancy without thinning. Adding too much color at once can cause flavor change or overly dark shades.
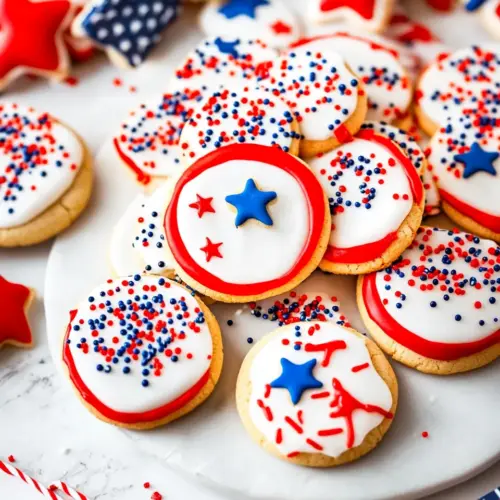
- If your cookies have a white background, which most of mine did (in the images), use the piping bag to pipe the icing around the outside edges, and then fill the middle. Use a toothpick to spread the icing evenly.: When you pipe the border first it creates a dam that keeps flood icing inside, and using a toothpick helps coax the icing into tight corners for a smooth finish with a glossy surface. Work patiently and move quickly to avoid crusting. Filling before the outline is piped will cause run off and messy edges.
- Leave cookie to set while you move onto the next, or if you are using sprinkles on your cookies sprinkle them on at this point, while the icing is still wet.: Setting times vary, but the surface should look dull rather than glossy when ready for more layers; adding sprinkles while wet ensures they adhere firmly. I rotate colors and decorations to keep a steady workflow. Waiting too long causes sprinkles to sit on a hardened surface and fall off later.
- Use the colors you have mixed and a toothpick to create the designs on the cookies. If you are putting a design on the white background let the white set first before you start with your next color.: Layering colors produces crisp lines and prevents bleeding, and using a toothpick lets you drag fine details like stars or stripes for precise motifs, creating a festive finish. Patience with drying between layers gives the cleanest results. Rushing layers will cause colors to blur together and lose definition.
Notes
- White Base First: Pipe a white flood icing base and let it fully set before layering on stripes or stars for crisp, clean designs that stand out.
- Direct Piping Option: Skip the base and pipe stars and stripes directly onto uniced cookies for a faster, more rustic look that is still festive.
- Alternative Shapes: Use different cookie cutters like stars or rectangles for variety, keeping the same baking time when thickness is consistent.
- Color Intensity: Use gel coloring sparingly to achieve vivid hues without altering the icing consistency, adding color a little at a time until you reach the perfect shade.
- Sprinkle Accent: Add sprinkles to wet icing for instant texture and sparkle, which works great for a quick patriotic finish.
- Storage Strategy: Store plain baked cookies in an airtight container until you are ready to decorate, and keep decorated cookies layered with parchment to prevent sticking.