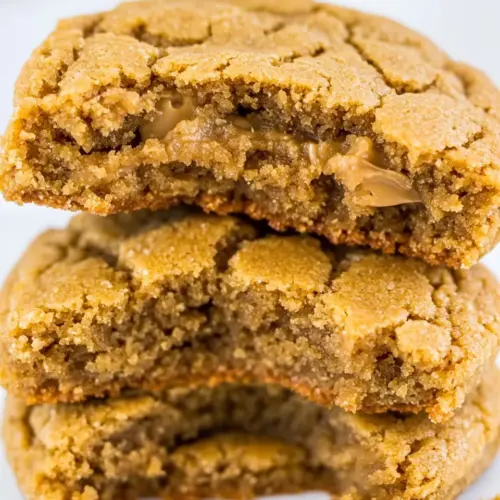
Flourless Peanut Butter Cookies
Flourless Peanut Butter Cookies are an easy, creamy and slightly crispy treat that highlight rich peanut flavor. These simple cookies use pantry staples for a quick bake, perfect for an easy weeknight dessert or last minute hostess gift. They deliver a tender center with crisp edges, making them irresistible and reliable every time.
Equipment
- Large Mixing Bowl
- 2 inch cookie scoop
- Baking Sheet
Ingredients
- 1 large egg Bind and enrich the dough with structure and moisture; whisk until smooth to help create a tender cookie crumb while aiding in browning during baking.
- 1 cup creamy classic-style peanut butter or honey-roasted peanut butter Creamy and flavorful fat that provides richness, moisture, and the characteristic peanut taste; stir thoroughly to ensure even distribution and to help create a soft, fudgy texture.
- 3/4 cup light brown sugar, packed Add depth of sweetness and a hint of molasses flavor while contributing to chewiness and moisture retention; pack firmly and mix well to dissolve into the batter.
- 1/4 cup granulated sugar Supply surface sweetness and help balance texture by adding crispness to the cookie edges; sprinkle and blend into the batter for an even sweet profile.
- 2 teaspoons vanilla extract Enhance overall flavor with warm, sweet aromatic notes and help amplify other flavors; measure and mix in to boost the cookie's fragrant finish.
- 1/2 teaspoon baking soda Leaven and slightly aerate the dough, creating lightness and modest rise; dissolve into the batter to react with other components for optimal texture.
- 1/2 teaspoon salt Season and balance sweetness while enhancing flavor complexity; incorporate evenly to prevent any flat or overly sweet taste.
Instructions
- To a large mixing bowl, add all ingredients and stir to combine using a spoon. It takes some elbow grease and it’s okay for the dough to be slightly granular because the sugar absorbs into the dough over time as the dough chills.: The first stir releases the warm nutty aroma of the peanut butter and the sweet molasses scent from the brown sugar . As you fold with a spoon, you will feel the dough become cohesive though slightly granular from sugar crystals. This texture is expected because the sugars will absorb liquid during chilling, so do not panic if it seems grainy at first. The key is to mix until you no longer see large pockets of dry sugar or streaks of egg. A common mistake is over mixing at this stage, which can make the dough denser; stop when combined and avoid vigorous beating. If the dough feels too sticky, rest it briefly in the fridge to firm up before scooping.
- Using a medium 2-inch cookie scoop, form two-tablespoon mounds, place mounds on a large plate, cover with plastic wrap, and refrigerate for at least 3 hours, or up to 5 days, before baking. Do not bake with warm dough because cookies will spread and bake thinner and flatter.: Chilling concentrates flavors and firms the fat so cookies hold shape. When you scoop, the dough should form tidy mounds that are slightly tacky but not dripping. Covering and refrigerating lets the sugars and peanut butter knit together, which reduces spread during baking. I like to press the surface lightly with the back of the scoop to remove air pockets before chilling. A frequent error is baking immediately with warm dough, which causes excessive spreading and thin cookies. If you plan to bake later in the week, label the plate, and keep it airtight to avoid fridge odors transferring into the dough.
- Preheat oven to 350 F, line a baking sheet with a Silpat or spray with cooking spray. Place mounds on baking sheet, spaced at least 2 inches apart (I bake 8 cookies per sheet), flatten slightly using a fork to make a criss-cross pattern if desired.: Heat brings the kitchen alive with the scent of warm air and a hint of caramel as sugars begin to react. Preheating to a full 350 F ensures the cookies set quickly at the edges while maintaining a tender center. Lining the sheet ensures even browning and prevents sticking; a Silpat gives the most consistent underside color. If your oven runs hot or cold, use an oven thermometer to confirm the temperature, because incorrect heat leads to under or overbaked cookies. Avoid placing cold dough on an unlined pan that has leftover grease, as it can cause uneven bake and dark spots.
- Bake for 8 minutes, or until edges are set and tops are barely set, even if slightly underbaked and glossy in the center. Cookies firm up as they cool; don’t overbake.: As you arrange the mounds, the air will feel slightly cooler against your fingertips, and the dough surface will glisten a little from natural oils. Leaving space is crucial because the cookies will expand a touch; spacing prevents them from merging. The criss cross pattern not only looks classic but also helps the center cook evenly and gives a larger surface that crisps slightly. Pressing too thin will create flat cookies, so aim just to flatten enough for a gentle imprint. A common slip up is crowding the sheet, which causes uneven baking and softer centers where cookies touch each other.
- Allow cookies to cool on baking sheet for about 10 minutes before serving. I let them cool on the baking sheet and don’t use a rack.: During baking, your kitchen will fill with a roasted nut aroma and a caramel top note as sugars bubble. Look for edges that are lightly firm and a top that still has a faint sheen, because cookies continue to cook as they cool. The slight underbake at the center is intentional to keep chewiness. Resist the urge to extend baking time for a uniformly dry cookie; overbaking ruins the tender interior. If you notice the edges becoming too brown before the centers set, lower the oven temperature slightly and rotate the sheet halfway through a future batch.
- Allow cookies to cool on baking sheet for about 10 minutes before serving: Cooling on the sheet lets residual heat finish the cook, and you will hear a faint settling sound as they firm up. This step preserves texture, giving you crisp outer edges with a soft middle. If you transfer too early, cookies may break apart; waiting ten minutes helps them stabilize. Many people make the mistake of moving them to a rack immediately, which can lead to misshapen cookies. I personally cool right on the baking sheet and only move them when they hold their shape fully.
Notes
- Stick with classic creamy peanut butter for the most predictable texture and flavor, which helps the cookies hold shape and develop the right chew.
- Choose honey roasted peanut butter if you want a subtle extra sweetness and caramelized note, keeping other sugars the same to avoid an overly sweet result.
- Pack the brown sugar firmly to ensure consistent moisture and chewiness across batches, which helps the dough achieve the ideal texture after chilling.
- Chill the dough thoroughly when you want thicker cookies, because firm dough spreads less and bakes into a denser, more satisfying bite.
- Use a cookie scoop for uniformity so each cookie bakes in the same time, producing even color and texture across multiple sheets.
- Store dough mounds in the refrigerator if you want to bake small batches over time, keeping them airtight for up to five days for convenience.