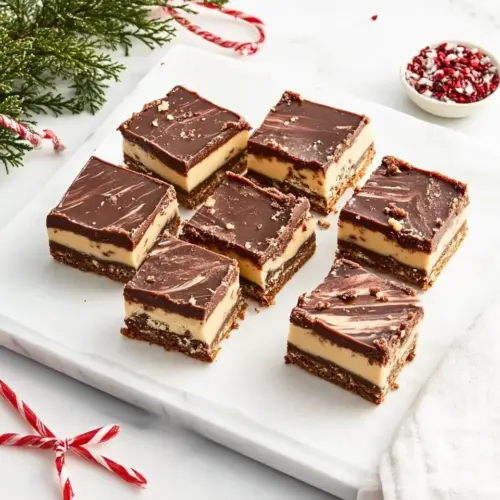
Eggnog Nanaimo Bars
Eggnog Nanaimo Bars are creamy, crunchy, and festive, with a buttery crumb base, a spiced eggnog custard layer, and a glossy chocolate top. These easy to slice bars are perfect for holiday gatherings and make ahead hosting, delivering comforting textures and seasonal flavor. Try them for a crowd pleasing treat that elevates any dessert table.
Equipment
- 9-inch square baking pan
- Parchment Paper
- Double boiler
- Wire Rack
- Offset Spatula
- Instant read thermometer
- Serrated Knife
Ingredients
- 2/3 cup (150 grams) unsalted butter cup Melted and rich, provides a silky fat base that binds the crust ingredients and adds moisture and flavor to the bottom layer of the bars.
- 1/2 (43 grams) unsweetened cocoa powder Bitter and dry, contributes deep chocolate notes that balance sweetness and lends a subtle cocoa backbone to the crust mixture.
- 1/3 cup plus 2 tablespoons (91 grams) granulated sugar Granular and sweet, dissolves into the crust to sweeten and tenderize the crumb while helping to caramelize edges during baking or setting.
- 1 teaspoon (3 grams) kosher salt large egg (50 grams) Salty and mineral-rich, enhances overall flavor contrast and helps amplify the chocolate and nutty components; also aids in balancing sweetness.
- 1 large egg yolk (19 grams) Creamy and rich, provides concentrated yolk fat that adds tenderness and richness to the crust and helps emulsify the mixture for cohesive texture.
- 2 1/3 cup s (295 grams) shortbread cookie crumbs Fine and crumbly, offers structure and bulk to the crust by creating a sandy texture that compresses into a firm base when combined with butter.
- 1 1/4 cup s (105 grams) sweetened flaked coconut Flaky and sweet, contributes chewy texture and a tropical nuance that complements the nut and cocoa flavors in the crust layer.
- 1/2 cup (57 grams) finely chopped toasted walnuts Crunchy and toasty, supplies nutty complexity, texture contrast, and savory depth to the crust while enhancing overall mouthfeel.
- 1 teaspoon (4 grams) vanilla extract Aromatic and floral, adds fragrant warmth and enhances the sweetness and overall flavor profile of both crust and filling components.
- Eggnog Custard Filling (recipe follows) Creamy and spiced, serves as the rich, vanilla- and nutmeg-infused custard layer that brings eggnog flavor and silky texture between crust and chocolate.
- 6 ounce s (170 grams) 64% cacao semisweet chocolate baking bars, finely chopped Deep and bittersweet, melts into a glossy ganache that forms the final chocolate topping, providing intense cocoa flavor and firm set when cooled.
- 2 tablespoon s (28 grams) vegetable oil Viscous and neutral, thins melted chocolate for a smooth, glossy finish and improves pourability while helping the topping set with a sheen.
Instructions
- Spray a 9-inch square baking pan with cooking spray. Line pan with parchment paper, letting excess extend over sides of pan.: The moment you press the warm crust in later, you will appreciate having parchment handles, they make lifting the bars effortless. Expect the pan to feel slightly warm if it's been near the stove, but the real cue is the parchment overhang giving you a two handed grip. If you skip lining, the bars can stick to the pan and tear when removed. A common mistake is using parchment that is too small, which forces you to pry at edges and damages clean layers; always leave generous overhang for easy removal.
- In the top of a double boiler, combine butter, cocoa, sugar, and salt. Cook over simmering water, stirring frequently, until butter is melted. Whisk in egg and egg yolk until well combined; cook, stirring occasionally, until thickened and an instant-read thermometer registers 160°F (71°C), about 10 minutes. Remove from heat; stir in cookie crumbs, coconut, walnuts, and vanilla. Press mixture into bottom of prepared pan; let cool in pan on a wire rack for 30 minutes.: When these ingredients meet heat, you will notice a glossy, slightly grainy mix at first that smooths as the butter melts. The scent shifts from dry cocoa powder to warm chocolate, and small steam lifts will tickle your nose. Stirring often prevents scorching on the chocolate particles, and keeping the water at a gentle simmer avoids splatter. If the heat is too high, the mixture can seize or the butter can separate; maintain moderate steam and stir until homogenous.
- Using a small offset spatula, spread Eggnog Custard Filling onto prepared crust in a smooth, even layer. Refrigerate for 30 minutes.: As you whisk, the mixture turns silkier and gains body, releasing a custardy aroma that signals proteins are cooking and thickening. Use steady, continuous motion to prevent the eggs from scrambling, and watch for the texture to go from runny to noticeably more viscous. The thermometer is your friend here; hitting 160°F ensures safe cooking without overcooking. Overheating will produce a curdled texture, so remove promptly when the temperature is reached.
- In the clean top of a double boiler, combine chocolate and oil. Cook over simmering water, stirring frequently, until chocolate is melted and mixture is smooth. Working quickly, pour chocolate mixture over chilled filling. Using a small offset spatula and tilting pan as needed, spread chocolate mixture into an even layer; several times to smooth chocolate mixture and release any air bubbles. Refrigerate for at least 1 hour or up to overnight.: Off heat, the mixture cools slightly while the dry elements soak up fat and flavor, producing a cohesive, pressable dough scented with vanilla. The shortbread cookie crumbs will take on moisture and loosen any dry spots, creating a base that compacts easily. Mix until evenly distributed; if you see pockets of dry crumbs, continue folding gently. One mistake is under mixing, which results in an uneven crust with loose bits that fall apart when sliced.
- Using excess parchment as handles, remove from pan; using a warm, dry, serrated knife, cut into bars. Serve at room temperature.: Pressing the base evenly ensures consistent density across the pan, and using the base of a measuring cup helps achieve a smooth, compact surface. As it cools, the aroma will shift to a settled, buttery note and the structure firms. Resist the urge to rush this step, because a warm or loose base will mar the filling layer. Avoid pressing too thin in some corners, which yields bars that break at the edges when cut.
- Using a small offset spatula, spread Eggnog Custard Filling onto prepared crust in a smooth, even layer.: When you apply the chilled custard, you will feel its cool creaminess glide across the compact crust, leaving a glossy surface. Smooth application prevents air pockets that can create weak spots when slicing. If the custard is too soft, return it to the fridge for a few minutes; if it is too firm, let it sit briefly at room temperature so it spreads without cracking. A common error is spreading with a tool that tears the crust, so work gently and use even strokes.
- Refrigerate for 30 minutes.: Chilling sets the custard so it supports the chocolate top and allows flavors to meld. During this time the custard becomes firmer and the scent of eggnog spices rounds out. Do not skip this pause, as an unset filling will mix with the melted chocolate and create messy layers. One warning, refrigerating for too long before adding the chocolate can cause the surface to form a brittle skin, which makes the top layer harder to adhere.
- In the clean top of a double boiler, combine chocolate and oil. Cook over simmering water, stirring frequently, until chocolate is melted and mixture is smooth.: As the chocolate melts, it will release a deep, warm aroma and transform into a glossy pool. The added vegetable oil creates silkiness and improves spreadability. Stir continually to prevent hot spots, and keep the water at a low simmer so steam gently warms the bowl. If moisture from the double boiler gets into the chocolate, it can seize into grainy clumps, so be cautious of splashing and wiped condensation on the underside of the bowl.
- Working quickly, pour chocolate mixture over chilled filling. Using a small offset spatula and tilting pan as needed, spread chocolate mixture into an even layer; several times to smooth chocolate mixture and release any air bubbles.: Pouring warm chocolate over chilled filling creates a thin sheen that sets with a glossy finish. You will see a delicate steam and smell the intensifying cocoa; spreading in swift, confident strokes removes trapped air so the top cures flat. If the chocolate starts to harden mid spread, work in smaller sections to avoid uneven thickness. A frequent slip is waiting too long and letting the chocolate thicken, which leads to a dull, clumpy surface.
- Refrigerate for at least 1 hour or up to overnight.: Extended chilling helps the layers bond and makes slicing clean. The bars will cool until the chocolate firms to a gentle snap, and the custard settles into a sliceable texture. Overnight chilling deepens the flavors, but be mindful of refrigerator odors, which can transfer into the bars if uncovered. A common issue is insufficient chill time, producing squishy bars that smear when cut.
- Using excess parchment as handles, remove from pan; using a warm, dry, serrated knife, cut into bars. Serve at room temperature.: Lifting the slab on parchment keeps all layers intact while you trim. Warming a serrated knife under hot water and drying it between cuts helps you slice smoothly without cracking the chocolate. Let the bars sit a few minutes at room temperature before serving to soften the filling slightly for better mouthfeel. Cutting straight away from the refrigerator can shatter the edges, so allow a short tempering period for best results.
Notes
- Swap cookie base for homemade crumbs — If you prefer making crumbs from scratch, pulse a batch of butter cookies to achieve a finer, more uniform crumb. This gives you control over salt and butter levels and can enhance the crust's buttery note.
- Use toasted nuts — Toasting the walnuts brings out their oils and deepens flavor, avoiding any raw, astringent edge; I toast them in a dry skillet until fragrant, watching closely to prevent burning.
- Adjust chocolate intensity — Choose a higher or lower cacao percentage depending on desired bitterness; for sweeter bars pick a lower percentage, for richer, more adult flavors choose 64 percent or higher.
- Make the custard ahead — Prepare and chill the custard a day early to streamline assembly; keep it covered to avoid skin formation and return to a brief whisk before spreading if it firms too much.
- Press crust evenly with a flat tool — Use the bottom of a measuring cup to pack the base; this ensures a uniform thickness so bars bake set consistently and slice neatly.
- Serve slices at room temperature — Allow bars to sit out for 10 to 15 minutes before serving to let the filling soften for a creamier bite while keeping the top pleasantly firm.
- Wrap tightly for transport — If you are taking these to a party, wrap the cooled slab in parchment and foil to prevent moisture loss and protect the glossy chocolate surface.