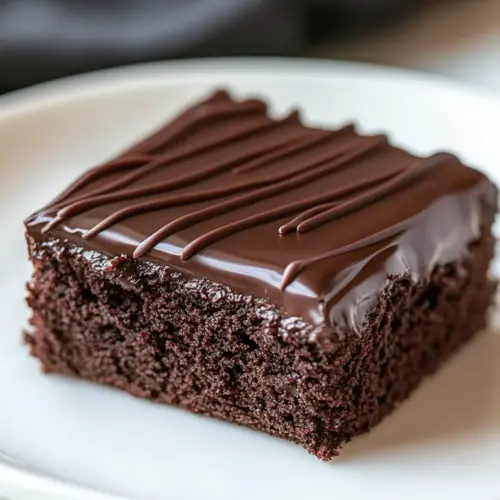
Easy Chocolate Cake
Easy Chocolate Cake brings a tender, moist crumb and a glossy, silky ganache for a simple yet impressive dessert. The deep chocolate notes from Dutch process cocoa powder and a creamy ganache make it feel luxurious, while the hands on time stays short, perfect for an easy weeknight dessert or casual entertaining. Make it when you want chocolate that feels special with minimal fuss.
Equipment
- 9 by 9 or 8 by 8 inch baking dish
- Mixing Bowl
- Whisk
- Small Saucepan
- Heat proof mixing bowl
- Wire Rack
- Rubber spatula
Ingredients
- 1 cup (142 g) all-purpose flour (scoop and level to measure) Sifted and measured to provide structure and body to the cake batter; contributes gluten that gives the crumb its framework and stability when baked. Helps absorb and balance moisture from wet ingredients for proper texture. Scoop and level method ensures consistent volume for reliable results.
- 1 cup (200 g) granulated sugar Granulated sugar used to sweeten the cake while also tenderizing the crumb by interfering with gluten formation. Aids in browning the crust through caramelization during baking, improving flavor and appearance. Dissolves into the batter to create a uniform sweetness and moistness.
- 6 tbsp (35 g) Dutch process cocoa powder, plus more for dusting pan Dutch process cocoa powder added for rich chocolate flavor and deep color; its alkalized nature produces a smoother, less acidic taste. Contributes dry structure and helps balance moisture in the batter. Extra for dusting the pan helps prevent sticking and adds a thin chocolate coating to the cake's exterior.
- 1/2 tsp baking soda Leavening agent that reacts with batter components to help create lift and a lighter crumb when baked. Provides modest rise to complement the cake's texture without affecting flavor significantly. Measured precisely to avoid soapy or metallic tastes from overuse.
- 1/2 tsp salt Salt incorporated to enhance and balance the cake's sweetness and chocolate flavors; it heightens overall taste perception. Stabilizes and rounds out flavors while subtly reinforcing other ingredients' profiles. Even small amounts noticeably improve the final cake's complexity.
- 1 cup buttermilk Buttermilk contributes acidity and moisture, tenderizing the crumb and reacting with baking soda to produce leavening and a fine texture. Adds a pleasant tang that complements chocolate and deepens flavor complexity. Helps keep the cake moist and slows staling after baking.
- 1/2 cup vegetable oil or canola oil Vegetable or canola oil provides fat to tenderize the crumb and retain moisture, yielding a soft, moist cake that stays fresh longer. Neutral flavor avoids competing with chocolate notes while ensuring an even, smooth batter. Liquid fat contributes to a finer, more tender texture than solid fats.
- 2 tsp vanilla extract Vanilla extract used to enhance and round out the flavor profile, bringing warmth and aromatic depth to the chocolate cake. Small amount amplifies other flavors and adds subtle complexity. Stirred into wet ingredients to distribute flavor evenly.
- 2 large eggs Large eggs supply structure, emulsification, and moisture; their proteins set during baking to support the cake's crumb and lift. Yolks add richness and color while whites contribute to aeration when beaten into the batter. Help bind ingredients together for a cohesive texture.
- 6 oz . semi-sweet chocolate, finely chopped Finely chopped semi-sweet chocolate melted or folded in to intensify chocolate flavor and add richness to the batter; contributes cocoa fat for a smoother mouthfeel. Provides pockets of concentrated chocolate if not fully melted and enriches the overall chocolate profile. Quality chocolate influences the final taste significantly.
- 3/4 cup heavy cream Heavy cream used to create a ganache or pourable chocolate component when warmed and combined with chopped chocolate; adds richness and a silky texture. Contributes fat and moisture that enhance mouthfeel and gloss in the finished topping or filling. Heats easily to melt chocolate and form a smooth emulsion.
Instructions
- Preheat oven to 350 degrees. Spray a 9 by 9 or 8 by 8-inch baking dish with non-stick cooking spray then dust with cocoa. Shake out excess cocoa.: The oven should be fully heated to ensure even rise and proper set of the crumb. As it warms, you will notice a dry, warm air in the oven when you briefly open the door, and the top of the cake will brown evenly rather than forming a pale ring. This step matters because an oven that is not hot enough can cause the cake to bake slowly and collapse in the center. A common mistake is placing the cake in an oven that is still warming, which leads to uneven texture, so always wait until the temperature is reached.
- In a large mixing bowl whisk together flour, sugar, 6 Tbsp cocoa, the baking soda, and salt.: Dusting with cocoa after spraying creates a thin chocolate barrier that helps the cake release cleanly and adds a uniform edge color. When you tap the pan, you may hear a soft metallic echo indicating it is empty and ready, and the cocoa will cling in a sheer layer. Skipping the dust or using flour can create a pale residue on the cake sides, so use cocoa for a flawless finish. If excess cocoa piles up, shake the pan to remove it so you do not create clumps on the edges.
- Add buttermilk, oil, vanilla and eggs.: As you whisk, the dry ingredients will take on a uniform color and texture, and a faint cocoa aroma will rise. This even distribution is why we mix dry components first, so the leavening and salt are dispersed evenly through the batter. A lumpy mixture leads to pockets of uneven flavor and rise, so whisk thoroughly. Avoid overworking the flour once liquids are added, since vigorous mixing will develop gluten and yield a tougher crumb.
- Whisk mixture until very well blended (about 1 minute).: Pouring these wet elements into the dry mixture introduces moisture that dissolves sugar and hydrates starches. You may notice the batter looking glossy where the oil sits atop the dry mix before whisking. The combination of buttermilk and baking soda begins to create tiny bubbles that give lift. Watch out for adding everything at once when eggs are cold, which can cause temperature shock; I usually let eggs sit at room temperature briefly for smoother incorporation.
- Pour into prepared baking dish.: You should see a homogenous batter with no streaks of flour, and the texture will be slightly thick but pourable. The cocoa will bloom into the batter, releasing a rich scent, and small air pockets will form that help with rise. The reason we limit the whisk to about a minute is to avoid developing gluten; overmixing makes a dense cake. If your batter looks heavy and gummy, you likely overmixed it, so stop as soon as it is uniform.
- Bake in preheated oven until toothpick inserted into the center of cake comes out clean, about 27 to 35 minutes.: The batter should pour smoothly and settle into the pan with an even surface. I use a spatula to scrape the bowl clean and level the top so the cake bakes uniformly. Visual cues for readiness include a glossy surface and no dry flour visible. Filling the pan unevenly causes lopsided rise, so tap the pan gently on the counter to release large air bubbles and level the batter before it goes into the oven.
- Let cool completely on a wire rack.: You will smell chocolate deeply as the cake bakes and see the edges pull slightly from the pan. The top may develop a thin, matte crust and the center should spring back when lightly pressed. The toothpick test signals doneness, but if you remove the cake too early it will sink as it cools, so err on the longer side of the range if your oven runs cool. Resist opening the oven too often while it bakes, as frequent temperature drops can interfere with rise.
- Meanwhile make ganache. Place finely chopped chocolate in a medium heat proof mixing bowl.: Cooling on a rack allows air to circulate and prevents the bottom from steaming and becoming soggy. As the cake cools, you may hear tiny settling sounds and notice the aroma deepen into a roasted chocolate note. Patience here is key because spreading warm ganache will cause it to slide and thin out. A typical mistake is attempting to frost immediately, which yields a runny top, so wait until the cake reaches room temperature.
- Heat heavy cream in a small saucepan over stovetop on medium heat until just simmering.: While the cake rests, gather your chopped chocolate and bowl. The process of making ganache is quick yet transformative, and you will appreciate having the ganache ready when the cake has cooled. The chocolate should be finely chopped so it melts swiftly and evenly under hot cream. Coarsely chopped pieces may leave unmelted lumps and a grainy texture.
- Pour hot cream over chocolate then stir with a rubber spatula until melted and smooth. Let it cool until it's a thicker consistency, about 30 minutes then spread over cake and slice.: The bowl will feel cool to the touch compared to the hot cream you will pour in. Finely chopped chocolate melts uniformly, which ensures a glossy finish without streaks. A mismatch in bowl material or unevenly chopped chocolate can lead to uneven melting, so use a stable heat proof bowl and aim for small, uniform pieces.
- Heat heavy cream in a small saucepan over stovetop on medium heat until just simmering: The cream will start to steam and tiny bubbles will form at the edges, giving off a subtle sweet dairy scent. Avoid bringing it to a rolling boil, as scalded cream can change the texture and flavor. This gentle heating is crucial because pouring scalding cream onto chocolate can separate the fat and create a broken ganache. If your cream looks like it might boil, remove it from heat a touch earlier.
- Pour hot cream over chocolate then stir with a rubber spatula until melted and smooth: As you fold, the chocolate will gradually lose its solid chunks and transform into a glossy, velvety emulsion. The sound is quiet, and the sheen becomes apparent within moments. Stir until completely smooth and uniform; this step is what yields a silky ganache that sets with a shine. If the mixture looks oily or separated, continue stirring gently and allow it to cool slightly before continuing.
- Let it cool until it is a thicker consistency, about 30 minutes then spread over cake and slice: Patience while the ganache cools gives you a spreadable texture that holds shape and creates clean slices. You will notice the ganache darken slightly and become more viscous, and the aroma will be rich and focused. Spreading it too warm will cause it to run off the cake, while spreading too cold will crack, so aim for that window when it is glossy but thick. A typical error is rushing this step, so set a timer and let it rest.
Notes
- Measure flour correctly, spoon it into the cup and level it off rather than scooping, to prevent a dense cake.
- Room temperature ingredients help the batter emulsify smoothly, especially the eggs and buttermilk.
- Dust pan with cocoa rather than flour for a neat chocolate rim and easier release.
- Watch the cream closely as it warms so it reaches a gentle simmer without boiling over.
- Let ganache cool to a spreadable thickness, about 30 minutes, for cleaner slices and a glossy finish.
- Tap the pan on the counter after pouring batter to release large air bubbles and level the surface.
- Use a serrated knife to slice the finished cake for smoother edges if the ganache has set firm.