Easter Fudge
Easter Fudge is a creamy, rich chocolate treat studded with mini Cadbury Creme Eggs that makes a playful spring dessert. This easy to follow recipe yields glossy, sliceable bars that are perfect for holiday parties and gifting. With simple pantry ingredients and straightforward technique, it is an ideal easy weeknight dessert or festive make ahead sweet to share.
Equipment
- 8×8 or 9×9-inch pan
- Parchment Paper
Ingredients
- 4 tablespoons unsalted butter Melted and creamy, provides a rich, smooth base and helps bind the chocolate for a silky fudge texture; contributes subtle milkfat flavor and sheen to the finished candy.
- 3 cups chocolate chips (Note 2) Melted together into the base for deep chocolate flavor and structure; determines the fudge’s primary taste and sets into a firm, sliceable confection once cooled.
- 1/4 teaspoon fine sea salt Balanced and subtle, sharpens and enhances the chocolate’s flavor while cutting through sweetness; helps elevate overall taste complexity without making the fudge salty.
- 1 can (14 oz.) sweetened condensed milk (full-fat, NOT evaporated milk) Thick and sweet, supplies concentrated milk sugar and liquid fat to create a dense, creamy fudgy consistency; adds sweetness and moisture to help the chocolate set properly.
- 1 teaspoon vanilla extract Warm and aromatic, adds a delicate sweet flavor lift and rounded aroma that complements chocolate; used sparingly to avoid overpowering the confection’s sweet profile.
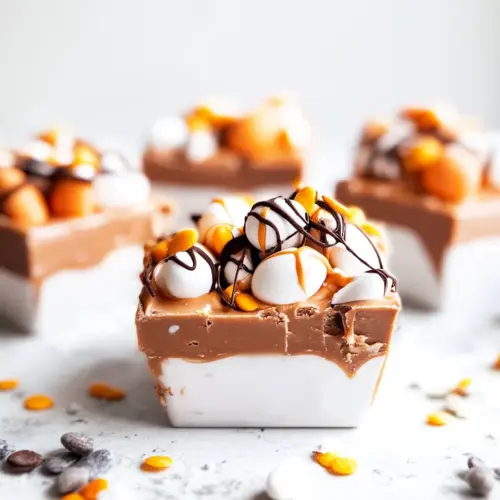
- 12 mini Cadbury Creme Eggs or Cadbury Caramel Eggs (Note 3) Sweet, creamy centers provide bursts of contrasting texture and flavor when chopped and folded into the fudge; create festive pockets of caramel or fondant in each bite.
- 1/4 cup miniature chocolate chips optional Small and decorative, sprinkled in for extra chocolate texture and visual appeal; optional addition enhances chocolate intensity and creates tiny melty pockets throughout the fudge.
Instructions
- PREP: Line pan with parchment paper (or foil), leaving an overhang for easy removal. Do not skip this step or you probably won't be able to get the fudge out looking very nice. Cut the butter into 1-tablespoon-sized pieces.: Line pan with parchment paper (or foil), leaving an overhang for easy removal : You will notice a clean routine calm your nerves as you prepare the pan, the parchment creating a protective sling that makes unmolding effortless. The tactile feeling of smoothing the paper into the corners gives you confidence that the fudge will come out in neat squares. This step also prevents sticking, which is crucial because fudge adheres stubbornly to metal if unlined. One common mistake is skipping the overhang, which makes removal awkward and can tear the fudge when you try to lift it out.
- CHOCOLATE EGGS: Unwrap the eggs and slice them in half with a sharp knife.: Small pieces melt more quickly and evenly, so you will get an even glossy texture without hot spots. As each piece softens, the aroma becomes buttery and comforting, signaling that the mixture will be rich. If the butter is added in large chunks it may not incorporate smoothly, leaving greasy pockets or causing uneven melting.
- COMBINE: In a thick-bottomed nonstick pan, heat the butter, chocolate chips, salt, and sweetened condensed milk on the lowest heat setting. Using a heat-resistant spatula, stir the mixture constantly, making sure to scrape the sides and bottom. Resist the urge to increase the heat– your patience will pay off!: Unwrap the eggs and slice them in half with a sharp knife : The bright colors and creamy centers are revealed as you slice, and the clean cut helps the halves nestle attractively on the fudge surface. The sound of a crisp knife through the shell and soft center is oddly satisfying, and arranging them becomes a small creative task. If your knife is dull, the eggs will tear and create a mess, so a sharp blade is key.
- ADD FLAVOR: As soon as the mixture is melted and smooth, remove the pan from heat. Stir in the vanilla extract; mix well.: In a thick-bottomed nonstick pan, heat the butter, chocolate chips, salt, and sweetened condensed milk on the lowest heat setting : As the mixture warms you will see glossy ribbons form, and the aroma of melting chocolate will deepen. Stir constantly with a heat-resistant spatula so the heat distributes evenly and nothing clings to the bottom. Keeping the heat low prevents the chocolate from seizing and preserves a satin texture, which is why patience is rewarded here. A common error is turning up the heat to rush melting, which risks grainy, separated chocolate that ruins the smooth outcome.
- ADD CHOCOLATE EGGS: Transfer the mixture to the prepared pan. Spray a spatula with nonstick cooking spray and spread the fudge into one even layer with a smooth, even top. Press the chopped eggs into the top of the fudge spacing them evenly apart. IF desired, sprinkle on the mini chocolate chips and gently press them in. Cover tightly and refrigerate for six hours or until fudge is firm.: The continuous motion ensures an even melt and helps you monitor the texture, watching the chips transform into a velvety blend. You may hear a faint soft bubbling as the mixture warms, but it should never boil vigorously. Scraping the sides prevents sugar or chocolate residue from burning, which would introduce a bitter note. If you stop stirring, the bottom can scorch, producing a burnt aroma and compromising flavor.
- SERVE: Remove fudge from the pan, using the parchment paper overhang. Cut the fudge with a hot, very sharp knife. (Run it under hot water, dry, and then make quick cuts.) I recommend cutting the fudge into small pieces — it's rich!: Keeping the flame or burner low preserves that glossy, cohesive mixture. The slow transformation also keeps the fat and sugar from separating, which matters for setting properly. The visual cue is a smooth, shiny pourable mass without grainy bits. A frequent misstep is impatience, raising the heat and then having to rescue a seized or oily mixture, which is difficult to fix.
- STORAGE: Fudge is best stored in an airtight container in the fridge and enjoyed cold. If it's left out of the fridge for long, the fudge becomes dry. Leftover fudge will stay fresh for up to two weeks in an airtight container in the fridge, but we like it best when eaten within three days.: As soon as the mixture is melted and smooth, remove the pan from heat : Taking the pan off the heat retains the velvety texture and prevents overcooking. The residual warmth is perfect for folding in delicate flavorings, and you will notice the aroma of chocolate intensify when the pan is lifted. Leaving the pan on heat risks evaporating aromatic notes and can slightly alter the fudge firmness, so step away promptly.
- FREEZING: Cut the fudge into squares and wrap each piece individually in plastic wrap (as airtight as possible). Then place each wrapped piece in a large freezer bag. Seal, removing as much air as possible. If you don't wrap each piece individually, be sure to separate pieces with wax paper so they don't freeze and stick together. Thaw pieces in the fridge.: Adding vanilla extract off heat preserves its fragrant top notes, which accentuate the chocolate. Stirring brings a slight sheen and rounds the flavor profile, making each bite more complex. If you add vanilla too early on heat, its volatile flavors will dissipate and the aroma will be muted.
- ADD CHOCOLATE EGGS: Transfer the mixture to the prepared pan : When you pour the warm mixture in you will hear a soft settling sound, and you can smooth it to an even surface while it is still workable. The glossy top indicates the right temperature for pressing the candy without melting it entirely. Pouring into a cold pan or moving too slowly can create an uneven top or allow the candy to sink in oddly.
- Spray a spatula with nonstick cooking spray and spread the fudge into one even layer with a smooth, even top: The tactile action of smoothing creates a uniform thickness and pleasing finish, and the nonstick spray prevents dragging. You will feel the subtle resistance as the mixture levels out, and small air pockets will escape, leaving a polished surface. Overworking the surface can introduce bubbles or a dull finish, so smooth with intentional, gentle passes.
- Press the chopped eggs into the top of the fudge spacing them evenly apart: Pressing the halved Cadbury Creme Eggs anchors them and creates pretty pockets of color and texture. The contrast between the glossy chocolate and the candy centers is visually appealing, and a light press avoids embedding them too deeply. Pressing too hard can make the candy sink into the fudge and complicate slicing.
- IF desired, sprinkle on the mini chocolate chips and gently press them in: These tiny chips add texture and visual interest without overwhelming the candies. A gentle press helps them adhere while keeping the surface attractive. Overcrowding with chips will obscure the eggs and create a congested top, so use them sparingly if you want a clean look.
- Cover tightly and refrigerate for six hours or until fudge is firm: Chilling solidifies the texture, turning the glossy mass into sliceable bars. You will notice the scent mellow as the fudge sets, and the firmness test is a gentle press with a finger, which should leave no indentation. Cutting too soon results in sticky, crumbly squares, so be patient and allow full chilling time for best results.
- SERVE: Remove fudge from the pan, using the parchment paper overhang : Lifting the sling reveals a neat block, and the clean edges make slicing satisfying. Using a hot, very sharp knife produces clean cuts, and warming the blade between slices ensures smooth edges. Dull knives tear and create ragged pieces, which detracts from presentation.
- Cut the fudge with a hot, very sharp knife: Running the knife under hot water and wiping dry before each cut makes slicing effortless and creates glossy edges. The tactile difference between a hot blade and a room temperature one is obvious, you will feel the heat glide through the fudge. Rushing this step can crush the pieces or leave sticky residue on the blade.
- Storage: Fudge is best stored in an airtight container in the fridge and enjoyed cold : When chilled, the texture stays lush and compact, and refrigeration prevents drying. Leaving it out too long will dry the surface, so keep it sealed between servings. A common oversight is not sealing properly, which allows the fudge to pick up fridge odors and become stale faster.
- Leftover fudge will stay fresh for up to two weeks in an airtight container in the fridge: Proper wrapping maintains moisture and flavor, and I find the first three days are the sweetest window. For longer storage, freezing is an option but requires individual wrapping to prevent sticking. Storing at room temperature for extended periods causes dryness and a grainy mouthfeel.
- FREEZING: Cut the fudge into squares and wrap each piece individually in plastic wrap : The wrapping prevents freezer burn and sticking, and separating pieces with wax paper keeps them accessible. Thaw in the fridge to maintain texture and prevent condensation. A slippery oversight is wrapping loosely, which permits air pockets and ice crystals to form, degrading quality.
Notes
- Choose good chocolate: High quality chocolate chips make the flavor shine; consider mixing milk and dark for depth.
- Low and slow is key: Maintain the lowest heat setting to keep the mixture smooth and prevent graininess.
- Prep your pan first: Lining with parchment and leaving an overhang saves time and protects presentation.
- Sharp knife for slicing: Use a very sharp knife warmed under hot water and dried between cuts for clean edges.
- Chill fully: Refrigerate at least six hours so the fudge sets properly and slices neatly.
- Individual wrap for freezing: Wrap squares tightly to prevent freezer burn and avoid pieces sticking together.