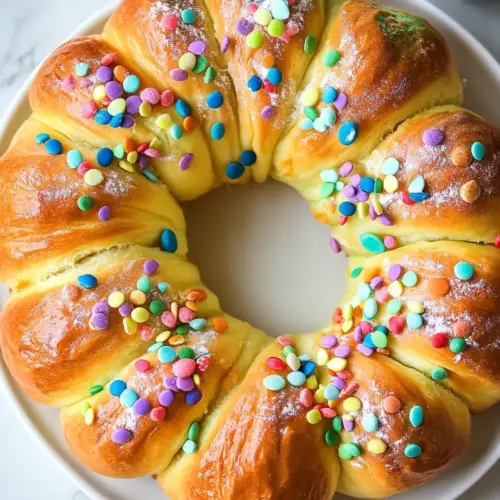
Easter Bread
Easter Bread is a soft, slightly sweet braided loaf with a glossy finish and a festive colored egg centerpiece. This easy to follow recipe yields tender, pillowy bread with a golden crust, ideal for spring gatherings and holiday brunches, offering a comforting aroma of warm milk and melted butter. Make it for seasonal celebrations to create a beautiful, shareable centerpiece.
Equipment
- Stand mixer
- Dough Hook
- Small Saucepan
- Baking Sheet
- Parchment Paper
- Cooling rack
Ingredients
- 1 1/4 cups milk Warm gently and scald before cooling to lukewarm to activate yeast and incorporate moisture; provides the liquid base and tenderizes the dough while contributing to crumb richness.
- 1/3 cup unsalted butter sliced Melt or soften to blend evenly into the dough, adding concentrated butterfat that enriches flavor, improves texture, and contributes to a soft, tender crumb.
- 2 1/4 teaspoons rapid rise instant yeast (1 package) Proof by mixing into the warm liquid to leaven the dough and create rise; supplies carbon dioxide and contributes to a light, airy structure in the finished bread.
- 1/2 teaspoons salt Dissolve into the dough to enhance flavor balance and strengthen gluten structure; helps control yeast activity and accentuates overall taste.
- 1/3 cup granulated sugar Combine with the dry ingredients to add sweetness, promote browning, and tenderize the crumb by inhibiting excessive gluten formation.
- 2 large eggs beaten Beat thoroughly and incorporate to add moisture, structure, and richness; eggs contribute to leavening, color, and binding in the enriched dough.
- 4 cups all-purpose flour divided, plus more for kneading Measure and add gradually while mixing to form the dough; provides the primary structure through gluten development and determines dough consistency.
- 1 large egg beaten Brush onto the shaped loaf before baking to create a glossy, golden-brown finish that improves appearance and helps sprinkles adhere.
- 1 tablespoon water Whisk and use as part of the egg wash to thin the glaze and adjust glossiness; aids in achieving an even sheen and better coloration.
- 4 dyed easter eggs not hard boiled Place gently into the braided dough before baking to create a festive decorative element; raw eggs cook in the oven while nestled in the bread.
- Colored sprinkles optional Scatter sparingly over the egg wash to add color, texture, and a festive finish; provides optional visual appeal and a bit of crunch when baked.
Instructions
- In a small saucepan over medium low heat, add milk and butter to the pan and stir until the butter melts. Make sure not to let it get too hot, once butter is melted pull off heat.: The warm mixture should feel pleasantly warm when you touch the handle of the pan, never scalding, and you will notice a sweet dairy aroma as the butter melts into the milk . This temperature is crucial because it helps activate the yeast without killing it, producing gentle fermentation and a tender crumb. A common mistake is overheating the liquid, which can kill the yeast and lead to dense bread. If the milk looks to be steaming, let it cool briefly until it is lukewarm. The reason for removing from heat immediately after melting is to preserve the delicate proteins in the milk that contribute to a soft final texture.
- In a large mixing bowl, combine yeast, salt, and sugar. Add the eggs and whisk together. Add the warmed milk and butter mixture and then add 2 cups of the flour.: Right away you will notice the sweet scent of the sugar mingling with the eggy aroma as you whisk the eggs , and the yeast will sit evenly distributed in the mix. Adding only part of the flour at first creates a loose batter that allows for even incorporation of the wet ingredients; it feels slightly tacky to the whisk but not doughy. The technique matters because adding all flour at once can make the mixture lumpy and harder to knead. If the bowl seems too heavy, pause to scrape the bowl and ensure nothing is clinging to the sides, which helps consistent hydration.
- Attach a dough hook to a stand mixer and mix on medium speed until smooth, about 2 minutes. Scrape the sides with a spatula as needed.: As the mixer runs, the dough will transform from a shaggy batter to a smooth, cohesive mass, and you can hear a steady, low whir as the mixer works the gluten. The surface should look satiny and slightly elastic after about two minutes. Scraping the bowl ensures even hydration and prevents dry pockets of flour . A common pitfall is overmixing at high speed, which can develop the gluten too aggressively and produce a tough crumb; medium speed gives you structure without toughness.
- Slowly add the remaining 2 cups of flour to the mixer on medium-low speed and scrape the sides as needed. Knead until the dough is stiff and slightly sticky, about 12 minutes.: As you add the remaining flour , the dough will gradually firm up and begin to pull away from the bowl sides, while still clinging slightly when you touch it. After extended kneading, the dough should be elastic and spring back slowly when poked, indicating well developed gluten. You want it firm yet still slightly sticky to the touch so the crumb stays tender. One mistake to avoid is adding too much extra flour to force stiffness, which yields a dry loaf. The long knead time helps build strength so the braids keep their shape while rising and baking.
- Place the dough on a lightly floured surface and hand knead for about 3 to 4 minutes, adding a little more flour to prevent sticking if needed. Do not use more than 1/4 cup of flour.: The dough should feel supple beneath your palms as you fold and press, with a rhythmic slap and fold that warms the dough slightly. Hand kneading offers a tactile check on hydration and texture, letting you sense when the dough is ready; you should see smoothness and feel elasticity. Be conservative with additional flour ; a sticky surface is better than an overdry interior. Overflouring here is a frequent misstep, causing a denser crumb instead of the soft, pillowy interior we aim for.
- Shape dough into a ball, cover with a dish towel and allow to rest for 10 minutes.: Resting lets the gluten relax, making it easier to divide and shape. The surface will feel relaxed and slightly smoother after resting, and the dough will be noticeably more pliable. This short pause prevents tearing when you roll ropes, and it gives the yeast a chance to get a head start on fermentation. A mistake people make is skipping this rest, which often leads to frustrating tearing when forming ropes.
- Divide into 8 pieces. Roll each piece to form a 1-inch wide rope, about 14-inches long.: As you roll each portion, you will feel the dough stretch and tighten into a uniform rope, with a soft, slightly glossy outer layer from gentle handling. Aim for consistent thickness so the braids bake evenly; uneven ropes lead to mismatched bake times and textures. If a rope resists stretching, give it another minute to relax. Overrolling can incorporate too much flour and make ropes stiff, so maintain a light touch.
- Taking 2 pieces, braid the rope, pinching the ends together and then loop into a circle. Make sure the ends are securely joined together.: When you braid two ropes, the strands will tangle into a pleasing pattern that holds shape; you should hear a soft creak as the dough winds together. Pinching firmly keeps the braid intact during proofing and baking, so the ring does not unravel. A common error is leaving ends loose, which can open up in the oven. Securely joining ensures a neat ring and even rise.
- Place on a parchment-lined baking sheet (2 per sheet), leaving enough room for the dough to rise.: Laying the rings on parchment prevents sticking and promotes even browning beneath each loaf. Leave ample space so they can nearly double without touching; crowded pans lead to misshapen rings and uneven crust. You should be able to slide your fingers under each ring to feel space between them. If the pan is too crowded, transfer extra rings to another sheet to maintain air circulation and uniform bake.
- Loosely cover the baking sheet with a dish towel and allow to rise in a warm area until it doubles in size, about 45 to 60 minutes.: During this proof you will notice the dough puff gently and the surface smooth as air pockets expand, giving off a yeasty, slightly sweet aroma. The timing varies with room temperature; a warmer room shortens rise and a cooler one lengthens it. A typical mistake is overproofing, where the dough collapses and loses strength, so check visually for doubling rather than relying strictly on time. The reason this step matters is that full rise creates the tender interior and lift that define traditional rings.
- Preheat the oven to 350°F. Set the rack in the middle position.: A proper oven temperature ensures even browning and full set of the crumb. As it preheats you will notice a faint warm, toasty smell from the oven cavity. Positioning in the middle gives the bread steady heat from top and bottom, preventing burnt bottoms or pale tops. Avoid opening the door frequently while baking, which can drop the oven temperature and affect final texture.
- Whisk together the egg wash, large egg and 1 tablespoon water. Brush each braided bread with the egg wash.: The egg wash should look glossy and flow easily off your whisk; when brushed it leaves a thin, even sheen that glows after baking. This step adds a deep golden color and helps any sprinkles adhere. Be careful not to overapply, which can pool and create overly dark spots. Using a light, even brush stroke ensures a beautiful, uniform crust.
- If desired, top the bread with sprinkles.: Sprinkles add playful color and a slight crunch, and when applied after the egg wash they stick well. Use them sparingly so they do not overwhelm the bread or melt into clumps. A frequent error is piling them on too thick, which can lead to burnt sugary spots. The visual payoff is high, and a few strategically placed sprinkles brighten each ring.
- Gently place one dyed egg in the center of each braided ring. Do not press into the dough, it will sink as it bakes.: The egg should sit gently atop the braid, creating a classic centerpiece that looks festive as it roasts in the oven. You will notice the raw egg settle slightly as it heats, no need to press it in. Pressing can deform the braid and trap air, altering the rise. The egg will cook through in the bake, adding tradition and charm to the final presentation.
- Bake one tray at a time until golden brown, approximately 15 to 18 minutes.: The oven will produce a warm, toasty smell as the crust takes on color and the interior sets, and the rings should be a deep golden hue at completion. Baking one tray at a time ensures even heat exposure and uniform browning. A common misstep is baking multiple trays together without proper air circulation, causing uneven color. The goal here is a golden shell and a soft interior when you press lightly on the top.
- Quickly transfer the baked bread to a cooling rack.: Moving the rings to a rack prevents sogginess by allowing air to circulate underneath, maintaining a slightly crisp crust while the interior finishes setting. You may notice a faint steam release as the crumb cools, a sign of proper bake. Leaving them on the hot sheet can create a steamed, dull crust, so transfer promptly. Cool until slightly warm before serving for the best texture and flavor.
Notes
- Bring eggs and milk to room temperature — Cold ingredients slow fermentation and can extend rise times. Let eggs and milk warm slightly before mixing for a predictable rise and a more consistent dough texture.
- Measure flour by weight if possible — Cup measurements vary, and too much flour makes the bread dense. Use a scale for accuracy or spoon and level cups to avoid overpacking.
- Don’t over knead at high speed — Long, gentle kneading builds gluten without toughness. Medium speed in a mixer or patient hand kneading yields a tender crumb and good structure for braiding.
- Use a light hand with the egg wash — A thin, even coat of the beaten egg and water gives shine without burning. Reapply sparingly if needed, but avoid puddles that brown too fast.
- Proof in a warm, draft free spot — Consistent rising produces predictable volume. I often use a slightly warm oven turned off or a sunny countertop to achieve even proofing.
- Cool on a rack promptly — Transferring to a cooling rack prevents a soggy bottom and preserves the texture contrast between crust and crumb.