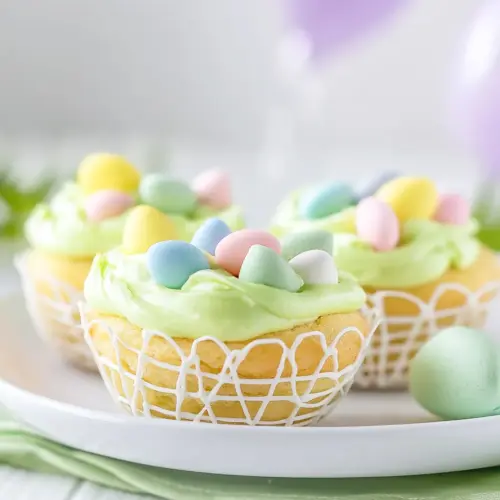
Easter Basket Cookie Cups
Easter Basket Cookie Cups are buttery, nostalgic mini cookies filled with creamy frosting and topped with colorful mini eggs. The tender cookie shell contrasts with smooth buttercream, offering a playful texture and festive presentation perfect for spring gatherings and easy weeknight baking. Make a batch for brunch or gifting, they travel well and always draw compliments.
Equipment
- Mini Muffin Pan
- hand electric mixer
- Large Mixing Bowl
- Measuring teaspoon
- Small Cookie Scoop
Ingredients
- 1/2 cup (113 g) unsalted butter 1 stick, at room temperature Creamed until light and fluffy, provides richness and structure to the cookie dough while adding moisture and a tender crumb.
- 1/2 cup (100 g) granulated sugar Granulated sugar for sweetness and aeration, helps create a light texture and promotes browning during baking.
- 1/4 cup (50 g) light brown sugar Light brown sugar for added moisture and a subtle caramel flavor, contributes chewiness and depth to the cookie base.
- 1 large egg at room temperature Beaten and incorporated to bind ingredients, adds moisture and helps with leavening for a soft interior.
- 1 teaspoon pure vanilla extract Added for aromatic flavor, enhances the overall sweetness and balances the cookie’s flavors with a warm vanilla note.
- 1 1/4 cups (150 g) all purpose flour Whisked in as the primary dry structure, provides stability and bulk to the dough while determining final texture.
- 1/2 teaspoon baking powder Leavening agent to create gentle rise and lift, helps cookies puff slightly and develop a tender crumb.
- 1/2 teaspoon salt Balances and enhances flavors while controlling gluten development, essential for proper texture and seasoning.
- 1/2 cup (113 g) unsalted butter 1 stick, at room temperature Creamed into frosting base to provide richness and a smooth, buttery mouthfeel, forming the structure of the buttercream.
- 3 cups powdered sugar Confectioners’ sugar for sweetness and structure in frosting, creates a smooth, pipeable consistency and stabilizes the icing.
- 2 tablespoons milk or heavy cream Added to frosting to adjust consistency and creaminess, helps achieve a spreadable or pipeable texture without thinning flavor.
- 1 teaspoon pure vanilla extract Added for flavoring the frosting with vanilla, enhances sweetness and gives a familiar aromatic profile to the icing.
- Green food coloring Used sparingly as a tinting agent, provides a green color to frosting or filling for the basket grass effect.
- 1 cup Cadbury mini eggs or M&M eggs Scattered on top as colorful candy, adds crunch, chocolate flavor, and an Easter-themed decorative finish to each cup.
Instructions
- Preheat the oven to 350°F/180°C, and lightly spray a mini muffin pan with baking spray.: You will notice a warm, dry scent as the oven reaches temperature, and the precise heat helps cookies set at the edges while staying tender inside. Preheating is important for even rise and consistent browning. A common mistake is skipping preheating, which can cause uneven texture and wider spread. Make sure the oven rack is centered so heat circulates evenly around the pan.
- In a large bowl, using a hand electric mixer, beat the butter with the sugars until light and creamy. 2 minutes.: As you beat, you should see the color lighten and the mixture take on a slightly fluffy texture, with tiny air pockets forming that will translate into a lighter cookie. The sound is a steady mixing hum, and the aroma becomes buttery and sweet. If you under-cream, the cookies may be dense; over-creaming can cause excessive spread, so stop when the mixture is visibly paler and smooth.
- Add the egg and vanilla extract, and beat until well combined.: The batter will become silkier and glossy as the egg emulsifies the fats and sugars. You might hear a faster, smoother mixer sound as the mixture becomes more cohesive. Ensure the egg is at room temperature to avoid chilling the butter and causing lumps. If curdling occurs, scrape the bowl and mix gently until smooth.
- Add flour, baking powder, and salt, and beat again at low speed until just combined.: Once the dry ingredients join, the dough should transform from creamy to slightly thicker, with a uniform color and no streaks of flour. Use low speed to prevent gluten development, which keeps the cookies tender. Overmixing is the main error here, leading to chewier, tougher results. Stop mixing when you no longer see dry patches.
- Using a small cookie scoop, divide the cookie dough between cookie cups.: As you portion dough into the mini muffin tin, you will feel soft, pliable dough hold its shape briefly before settling. I like to press each mound lightly so it nests in the cup; the sound is soft and doughy, without stickiness. Inaccurate scooping will result in uneven bake times, so keep the portion sizes consistent for uniform results.
- Bake for 12 minutes. Remove from the oven, and as the cookie cups are still warm – using a measuring teaspoon push down the center of the cookie cup a little (this is optional but allows you add more frosting).: During baking, you will smell a caramelized sugar note and see the edges take on a gentle golden hue. Removing at the right moment is crucial; the centers should look set but slightly soft. Pressing the center while warm creates a shallow well for frosting and avoids cracking. If you wait until they cool, the cookie may harden and resist shaping, so work quickly but carefully to avoid burns.
- In a large bowl, using an electric hand mixer, beat the butter until creamy then gradually add the powdered sugar to avoid a sugar storm.: The butter will appear pale and smooth, emitting a faint dairy aroma. As you slowly add powdered sugar , the texture will thicken into billowy frosting. Adding the sugar too fast can create a cloud of dust, and overbeating can warm the frosting and make it runny. Keep the mixer speed low while incorporating dry sugar for the cleanest result.
- Add the milk, vanilla and food coloring if using, and beat again. Adjust the consistency if needed by adding more powdered sugar or milk.: Small splashes of milk will loosen the frosting, and the vanilla brings a sweet, aromatic finishing note. When you add color, do it drop by drop to control the shade. The frosting should hold soft peaks if lifted with a spatula; if it becomes too loose, add more powdered sugar in small amounts. A typical problem is oversaturating with liquid, which makes piping messy.
- Frost the cookie cups, then decorate with mini eggs.: Use a small spatula or piping bag to deposit frosting into the warm wells, feeling the creamy texture spread smoothly into the indentation. The final step is tactile and visual; press the Cadbury mini eggs gently into the frosting so they nestle slightly without cracking. If frosting is too warm, it may slump, and if too cold, it will be stiff to spread. Aim for a spreadable, creamy balance so decorations adhere well.
Notes
- Measure Correctly: When baking it’s important to measure all of the ingredients accurately. Use a digital scale to weigh ingredients, or spoon and level your all purpose flour into the measuring cup. Accurate measurements ensure consistent texture and prevent overly dense or spread out cookie cups.
- Go Slow with Powdered Sugar: If you add it all in at once and turn on the mixer, you’ll create a sugar storm. Add the powdered sugar in increments and mix at low speed to avoid a cloud and to achieve a smooth frosting without lumps.
- Want Less Frosting: Skip the step where you press the centers down if you prefer a thin frosting dollop on top instead of a filled cup. This reduces the total amount of frosting used and shortens assembly time while maintaining a pleasant presentation.
- Adjust Frosting Consistency: If your frosting is too loose, add small amounts of powdered sugar to thicken it; if too stiff, add milk a teaspoon at a time. Aim for spreadable but stable frosting so decorations sit on top without sliding.
- Make Ahead: Bake the cookie cups one day in advance and store them in an airtight container. Frost them the next day for the freshest look and texture. If transporting, layer with parchment to protect the frosting and preserve the mini eggs.