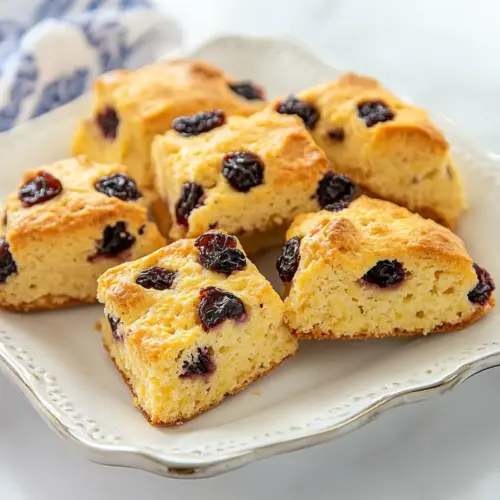
Dried Cherry Scones
Dried Cherry Scones are tender, slightly sweet scones studded with chewy fruit, offering a crisp golden crust and a soft interior. This easy bake is perfect for weekend brunch or a cozy morning treat, delivering bakery flavor with minimal fuss. Make a batch to share, because their balanced sweetness and flaky texture invite seconds.
Equipment
- Mixing Bowl
- Pastry blender
- Measuring Cups
- Baking Sheet
- Parchment Paper
- wire cooling rack
- Cookie Cutter
Ingredients
- 2 1/2 cups flour Provide structure and bulk to the scones, creating the dough matrix that holds other ingredients together. Develops gluten when mixed, which should be minimized for tender scones by gentle handling and short mixing. Also contributes to the final crumb and texture, and can be measured precisely for consistent results.
- 1/2 cup sugar Add sweetness and balance to the scones while also aiding in browning of the exterior during baking. Dissolves into the dough to affect moisture and tenderness, and can be adjusted slightly for taste without dramatically altering structure. Helps create a pleasant contrast to the tart dried cherries.
- 2 1/2 teaspoons baking powder Leaven the scones by releasing gas when exposed to moisture and heat, producing lightness and rise in the baked product. Should be evenly distributed through the dry ingredients to avoid uneven pockets of lift and ensure consistent texture. Works quickly so dough should be baked soon after mixing for best results.
- 1/2 teaspoon kosher salt Enhance overall flavor by balancing sweetness and accentuating other tastes in the scones. Strengthens gluten slightly and can influence the chemical reaction of the leavening agent, so use the specified amount for proper rise. Also helps preserve freshness and improves mouthfeel.
- 6 tablespoons unsalted butter, chilled and chopped Introduce rich, buttery flavor and create tender, flaky layers by coating flour particles with fat. Cold, chopped butter forms small pockets that melt during baking, producing steam and lift for flakiness; keep chilled to maintain texture. Contributes to mouthfeel, flavor, and a golden exterior when evenly distributed.
- 3/4 cup whole milk Provide moisture to hydrate dry ingredients and activate the baking powder, forming the scone dough. Contributes to tenderness and richness, and the type of milk affects flavor and crumb slightly; whole milk adds more richness than lower-fat milks. Use measured amount to achieve correct dough consistency without overhydrating.
- 1/2 cup dried cherries Offer concentrated fruity flavor and chewy texture that complements the scones' richness. Adds bursts of tart-sweet contrast and visual interest; if very dry, consider briefly rehydrating to prevent it from drawing moisture from the dough. Distribute evenly so each scone gets a balanced amount.
- 1 egg, beaten or 1 tablespoon heavy cream Bind the dough and promote browning on the scone surface when brushed on top, while adding richness if incorporated. Beaten egg will contribute more structure and shine, while heavy cream gives a subtler glaze and tender finish; choose based on desired crust and richness. Use sparingly to avoid overworking the dough.
Instructions
- Preheat oven to 400 F.: Your kitchen will fill with warm, slightly sweet aromas almost immediately once the oven is ready, and starting with a properly preheated oven ensures the butter creates steam that lifts the scones. A common mistake is sliding the tray in before the oven is hot enough, which yields dense, under risen scones. Check for an accurate oven temperature using an oven thermometer. Expect a faint scent of warmth and a steady heat that signals readiness.
- Whisk the first four ingredients together in a large bowl.: You will notice the dry mix smells faintly of toasted grain and salt, and whisking helps distribute the baking powder evenly so every scone rises uniformly. If you skip thorough whisking, some scones may rise more than others. Look for a homogenous pale mixture with no streaks of salt or clumps of leavening.
- Add the butter to the flour mixture and mix with either your fingertips, a pastry blender, or two knives until it forms the texture of coarse meal.: At this stage you are aiming for small, pea sized bits of chilled butter coated in flour , and the smell will be rich and slightly buttery when you break the mixture between your fingers. Resist overworking or letting the butter warm up, since that will make the dough greasy and affect flakiness. A common misstep is working the butter until it disappears; instead you want visible, cold pieces to create steam pockets while baking.
- Add the milk and cherries and mix gently until just incorporated (the dough may look a bit dry, but allow it sit for a few minutes and the flour will soak up all the milk).: You will feel the dough come together as the milk hydrates the flour , and the aroma will turn milky and slightly fruity from the dried cherries . Gentle mixing preserves those tender layers, so avoid vigorous stirring which can toughen the dough. If you add too much force you risk activating gluten, yielding firmer scones.
- Place dough on a lightly floured surface and gently press into a 1 inch thick circle.: When you press the dough you should sense a cool, slightly tacky texture, and you will see the dough form a smooth surface with embedded dried cherries . Pressing too hard compresses the layers, so be gentle and even. If the dough sticks, dust with a little flour , but avoid adding excessive flour , which will dry the scones out.
- Cut out scones using a heart shaped cookie cutter.: Cutting reveals clean edges and a neat shape, and you may hear a soft thud as the cutter separates the dough. Press straight down without twisting to preserve the height. Twisting can pinch the edges and seal layers, which prevents optimal rise. Arrange the shapes carefully to keep them from sticking together on the baking sheet.
- Place scones on a parchment lined baking sheet and brush with beaten egg or heavy cream, if desired (this will give the scones a golden crust).: Brushing provides an attractive glossy finish, and you will notice a difference in color once baked. The surface will brown evenly because the proteins and sugars in the egg or heavy cream caramelize. A frequent oversight is skipping the brush, which leads to paler tops; if you want deep golden color, do not skip this step.
- Bake in oven for 25 minutes.: The oven will sing with a toasty aroma as the scones rise and the butter melts, and you should see golden edges and a slightly domed top when they are done. Avoid opening the oven repeatedly, as fluctuating heat can cause uneven rise. If the tops brown too quickly, lower the rack slightly or tent loosely with foil for the last minutes of baking.
- Move immediately to a wire cooling rack and serve.: Cooling on a wire rack prevents steam from collecting under the scones, preserving a crisp exterior while the interior sets. You will feel a gentle warmth from the scones and smell concentrated fruit notes from the dried cherries . Leaving them on the hot sheet will steam the bottoms and soften the crust, so transfer promptly to keep texture contrast.
Notes
- Chill the butter: Using cold, chopped butter creates pockets that steam during baking, leading to a flakier interior and a more tender crumb.
- Measure flour correctly: Spoon flour into the measuring cup and level it with the back of a knife to avoid compacting, which can make the scones dense.
- Rest briefly if dough seems dry: Allowing the dough to sit for a few minutes helps the milk hydrate the flour, often eliminating the need to add extra liquid.
- Brush with egg or cream: A thin wash of beaten egg or heavy cream yields a shiny golden top, enhancing both appearance and flavor.
- Use parchment paper: Baking on parchment prevents sticking and promotes even browning without extra greasing.