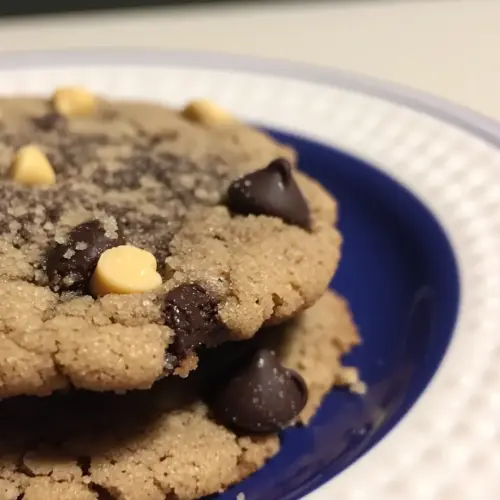
Double Chocolate Chip Butterscotch Cookies
Double Chocolate Chip Butterscotch Cookies are rich and indulgent, marrying deep cocoa flavor with sweet butterscotch chips for a chewy and slightly crisp bite. This easy, crowd pleasing cookie is ideal for casual gatherings or as a comforting treat. Make a batch to enjoy warm from the oven and you will see why it’s a fast favorite.
Equipment
- Baking Sheet
- Parchment Paper
- Mixing Bowls
- Handheld electric beater or stand mixer
- Rubber spatula
- Wire Rack
Ingredients
- 2 cups all-purpose flour Provides structure and bulk to the cookie dough, creating the framework that holds ingredients together and determines texture; sift or whisk to ensure even distribution and prevent lumps. Balances moisture absorption with leavening for proper spread and chew, so measure accurately by spooning into the cup and leveling off. Works with cornstarch and cocoa to influence tenderness and crumb.
- 2 tablespoons cornstarch Lightly thickens the dough and tenderizes by inhibiting gluten development, resulting in softer, more delicate cookies when combined with flour. Dissolves easily and helps create a fine, tender crumb that resists toughness during baking. Use alongside flour to control final cookie texture.
- 1/2 cup unsweetened cocoa powder Introduces deep chocolate flavor and dry richness, contributing both color and a slightly bitter counterpoint to the sugars and chips in the cookies. Absorbs some moisture and affects the overall dryness of the dough, so incorporate evenly to avoid streaks. Enhances the double-chocolate profile when paired with chocolate chips.
- 3/4 teaspoons salt (kosher or finely ground sea salt will work) Enhances overall flavor by balancing sweetness and emphasizing other ingredients; also influences yeast or chemical leaveners for predictable rise and spread. Use the specified salt type to avoid over- or under-salting, and dissolve it into the butter or wet ingredients for even seasoning. Helps strengthen structure in subtle ways while brightening flavors.
- 1 teaspoon baking soda Provides chemical leavening that reacts with dough moisture and acidic components to create lift and spread, contributing to cookie height and lightness when measured correctly. Distributes through the dry ingredients to ensure even rising and to prevent metallic or bitter aftertastes from overuse. Activate at room temperature for consistent results.
- 2 sticks unsalted butter, at room temperature Adds richness, moisture, and tenderness while contributing to spread and mouthfeel due to its fat content; cream with sugars to incorporate air for a lighter texture. Use at room temperature to ensure proper creaming and even distribution throughout the dough. Also carries flavor and helps dissolve salt and vanilla.
- 1 tablespoon vanilla extract Delivers fragrant sweetness and a warm aromatic note that complements chocolate and butterscotch, enhancing overall flavor complexity. Mix into the creamed butter and sugar so its volatile aromatics disperse evenly through the dough. Provides depth without adding moisture.
- 1 cup granulated sugar Sweetens the dough, contributes to structure through creaming with butter to incorporate air, and affects spread and crispness depending on granulation. Dissolves into the butter to help create a tender yet crisp edge, and aids in browning via caramelization during baking. Use measured amount to control sweetness and texture.
- 1 cup light brown sugar, packed Adds deep, molasses-like sweetness and moisture, creating chewiness and a richer flavor profile compared with white sugar alone; packs into the cup to measure accurately. Interacts with creamed butter to retain moisture and produce soft, chewy centers with more complex caramel notes. Balances the bittersweet cocoa and chips.
- 2 large eggs, at room temperature Provides moisture, structure, and binding that helps form the cookie matrix while enabling leavening agents to act; eggs also contribute richness and emulsification for a cohesive dough. Bring to room temperature so they blend smoothly and help incorporate air when beaten with sugars. Two eggs ensure proper moisture and set during baking.
- 1 cup chocolate chips Contributes intense chocolate bursts and melty texture pockets, reinforcing the double-chocolate character and adding textural contrast to the dough. Fold in toward the end to avoid overmixing and to distribute evenly; use quality chips for best flavor and melt behavior. Balances against the butterscotch sweetness.
- 1 cup butterscotch chips Offers sweet, caramel-like pockets of flavor and chewy contrast to the chocolate, creating a complementary counterpoint in every bite. Stir in with chips and fold gently to maintain even distribution without overworking the dough. Adds golden color and chewy texture when baked.
Instructions
- Line a large baking sheet with parchment paper; set aside.: The sheet will feel cool to the touch and the parchment should lie flat without wrinkles, which prevents uneven baking. Using parchment helps cookies release cleanly and promotes even browning on the bottom, so I always line the pan even if I’m in a hurry. If the parchment curls, press it down with a second sheet or a light pan to flatten it out. A common mistake is skipping parchment and placing dough on an unlined pan, which can cause sticking and uneven browning.
- Preheat oven to 375 degrees (F). In a medium sized bowl add the flour, cornstarch, cocoa powder, salt, and baking soda; whisk well to combine and set aside. In a large bowl using a handheld electric beater, or in the bowl of a stand mixer fitted with the paddle attachment, beat the butter and vanilla together on medium-speed until smooth and creamy. Add in both sugars and beat until light and fluffy; about 2 minutes. Add in eggs, one at a time, beating well after each addition. Gradually add in the dry ingredients, mixing until just combined. Using a rubber spatula, fold in chocolate chips and butterscotch chips. Drop 2 tablespoon sized balls of dough onto the prepared sheet, leaving 1" between each cookie for spreading. Bake for 9-12 minutes (depending on your oven), or until the edges are set and centers look just slightly underdone. Cool for 5 minutes on the cookie sheet before transferring to a wire rack to cool completely.: As the oven warms you will notice a faint dry, warm smell and the internal fan may cycle. Hitting the correct temperature ensures the cookies set quickly at the edges while keeping centers tender. I wait until the oven signals ready because baking into a too cool oven causes excess spread. One trap is assuming a preheat is quick; modern ovens can take longer, so use an oven thermometer if you want precision.
- In a medium sized bowl add the flour cornstarch cocoa powder salt and baking soda whisk well to combine and set aside: As you whisk, the cocoa will dust the bowl and the mixture should look uniformly brown with no streaks of flour. This ensures even flavor and leavening in every bite. Whisking aerates the dry mix slightly, which helps incorporation without over mixing later. Avoid over stirring the dry mix for too long, as it can scatter and create a mess, but be thorough enough that there are no lumps.
- In a large bowl beat the butter and vanilla together on medium speed until smooth and creamy: You will hear the mixer hum and see the butter soften into a pale, glossy paste, smelling rich and dairy forward. This step introduces air which builds structure and affects final texture, so beat until light and smooth. Under creaming leaves dense pockets, while over creaming can cause too much spread; aim for a creamy consistency that ribbons slightly when lifted.
- Add in both sugars and beat until light and fluffy about 2 minutes: The mixture will lighten in color and take on a pillowy texture, with a faint granulated sound as the sugars dissolve into the butter . This trapped air is crucial for lift and texture. If the mix still looks gritty, scrape the bowl and beat a few more seconds. A common error is rushing this step, which reduces volume and yields flatter cookies.
- Add in eggs one at a time beating well after each addition: As each egg is incorporated the batter will smooth and become slightly looser, with a glossy sheen. Adding eggs slowly creates an emulsion that holds ingredients together, preventing curdling. If you add eggs too quickly the batter can split; if separation happens, slow mixing and a small splash of flour can help bring it back.
- Gradually add in the dry ingredients mixing until just combined: You will notice the batter thicken and darken as the dry mixture folds in, taking on a slightly stiffer scoopable texture. Mixing just until no streaks remain preserves tenderness; over mixing develops gluten and makes cookies tough. Use a low speed or fold by hand, and stop as soon as the flour is incorporated to avoid a dense result.
- Using a rubber spatula fold in chocolate chips and butterscotch chips: Folding keeps the chips intact and evenly distributed, and you should see glossy chips embedded across the dough. The batter will feel chunky and studded, and the chips will shine against the dark dough. Avoid over folding, which can deflate the batter, and be sure to reach the bottom of the bowl so chips do not clump in one area.
- Drop 2 tablespoon sized balls of dough onto the prepared sheet leaving 1 inch between each cookie for spreading: The dough scooped will be dense and hold shape, with chips peeking through. Spacing is crucial because the cookies will spread; giving them room prevents merging. If the dough is too soft to shape, refrigerate briefly. A frequent mistake is placing scoops too close, resulting in a single merged sheet of cookie.
- Bake for 9 to 12 minutes or until the edges are set and centers look just slightly underdone: As they bake you will smell chocolate and toffee notes, and the edges will take on a matte look while the centers remain slightly glossy. Pulling them at the right moment yields a soft center that firms as they cool. Overbaking leads to a dry interior, so err on the sooner side if you prefer chewiness. If the cookies brown too fast, lower the oven by 10 to 15 degrees next time.
- Cool for 5 minutes on the cookie sheet before transferring to a wire rack to cool completely: During this brief rest the cookies continue to set and the centers reach the perfect texture, firming slightly as steam escapes. The bottoms should feel set but not hard when you move them, and the chips will solidify but remain tender. Moving them too early can cause breakage, while leaving them too long on a hot sheet can make bottoms soggy, so aim for that five minute window.
Notes
- Make them chewier by using more light brown sugar than granulated sugar, and by baking at the lower end of the time range; this increases moisture retention and yields a softer center.
- Create crisp edges by flattening the dough slightly before baking and baking at the higher end of the temperature window, which encourages caramelization on the perimeter.
- Boost chocolate intensity by using a higher percentage unsweetened cocoa powder and adding a few extra tablespoons of chocolate chips to deepen the chocolate notes.
- Even chip distribution by folding the chips in with a gentle motion and scraping the bottom of the bowl so you don’t end up with clumps of chips in only a few cookies.
- Freeze dough balls on a tray, then transfer to a bag for long term storage; bake from frozen adding a minute or two to the bake time for convenience without sacrificing quality.