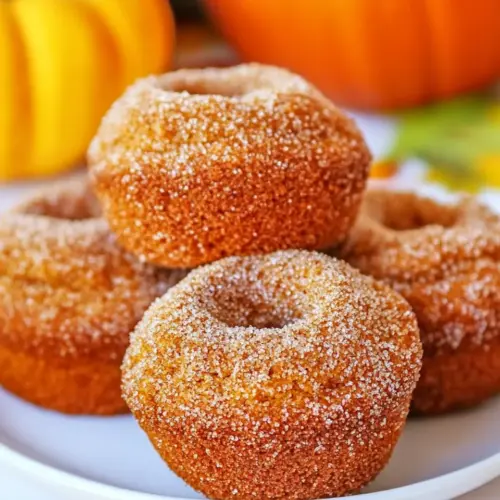
Donut Pumpkin Muffins
Donut Pumpkin Muffins combine tender, moist pumpkin batter with a crisp cinnamon sugar exterior for a cozy autumn treat. These easy to make muffins have warm spices like cinnamon and nutmeg, a soft crumb from vegetable oil, and a playful donut like finish. Perfect for brunches or snack time, they are quick to prepare and irresistible fresh from the oven.
Equipment
- Muffin Pan
- Wire Rack
- Mixing Bowls
- Whisk
- Ice Cream Scoop
Ingredients
- 1 3/4 cups all-purpose flour Sifted to ensure lightness and aeration, provides structure and bulk to the muffin batter while helping create a tender crumb when combined with wet ingredients.
- 2 teaspoons cinnamon Added for warm, aromatic spice notes that complement pumpkin, enhancing overall flavor depth and lending characteristic autumnal warmth to the muffins.
- 1/2 teaspoon nutmeg Ground to contribute subtle earthy sweetness and complexity, balancing the cinnamon while accentuating the pumpkin’s natural flavors without overpowering the batter.
- Pinch of cloves Measured sparingly to add bright, warming spice accents that heighten the overall spice profile and provide a nuanced background note in each bite.
- 1 teaspoon baking soda Activated to help the batter rise and become airy, chemically reacting with acidic components to create lift and a soft, open crumb structure in the muffins.
- 1/2 teaspoon salt Balanced to control overall seasoning, enhances other flavors while preventing the muffins from tasting flat and supporting proper chemical reactions in the batter.
- 15 oz can pumpkin puree not pumpkin pie filling Pure pumpkin puree used for moistness and rich pumpkin flavor, supplying natural moisture, soluble fiber, and a dense, tender texture distinctive to pumpkin muffins.
- 3/4 cup granulated sugar Granulated sugar incorporated to sweeten the batter, promote browning through caramelization, and help tenderize by interfering with gluten formation for a softer muffin.
- 1/2 cup brown sugar packed Packed brown sugar added for deeper, molasses-like sweetness and additional moisture, contributing a caramel undertone and chewier mouthfeel within the muffin crumb.
- 2 large eggs room temperature Beaten into the mixture to bind ingredients, contribute richness and structure, and add moisture and tenderness while aiding leavening through steam and coagulation.
- 1/2 cup vegetable oil Poured in to lend fat for tenderness and moistness, creating a supple crumb and improving shelf life while helping disperse flavors evenly throughout the batter.
- 1 tablespoon vanilla extract Stirred in to provide floral, sweet aroma and enhance overall flavor complexity, rounding out the sweetness and tying the spices and pumpkin together.
- Cinnamon sugar coating: Prepared as a separate coating component that adds a crunchy, sweet-spiced exterior finish; brushed or dipped onto muffins to create donut-like texture and flavor.
- 3/4 cup granulated sugar Used in the coating to provide crisp sweetness and surface crunch, helping create a crunchy, caramelized exterior when applied to warm muffins.
- 1 tablespoon cinnamon Measured to season the coating with warm spice, reinforcing the muffin’s internal spice profile and delivering a uniform spiced-sugar crust for each bite.
- 1/8 teaspoon nutmeg Incorporated into the coating for a whisper of warm nutmeg that mirrors interior flavors, boosting aromatic complexity and continuity between crumb and exterior.
- 1/4 cup butter melted Melted to act as an adhesive for the cinnamon sugar coating, adding richness and a glossy finish while helping the sugar mixture cling to the muffin surface.
Instructions
- Preheat oven to 375 degrees F.: When the oven warms to 375 degrees F , you should feel a wave of dry heat and the small hum of the oven fan or elements cycling on. This precise temperature helps the exterior set quickly, allowing top rise without collapsing. A common mistake is starting with a colder oven, which leads to uneven rise and heavier muffins, so always wait until the oven indicator reaches temperature. If your oven runs hot or cool, use an oven thermometer to confirm the heat. You may notice a faint scent as the oven preheats, and once hot, the air will feel noticeably warmer when you open the door.
- Grease a non-stick muffin pan with nonstick spray. Set aside.: After greasing, run your fingers over each cavity to feel for full coverage, which prevents sticking and keeps the sugared coating intact when you pop muffins out. The pan should be cool to the touch while you fill it, and the spray should leave a thin, even sheen. A common slip is using too little grease or skipping it for an older pan, resulting in broken tops when you remove the muffins. If you notice uneven shine, wipe lightly with a paper towel to spread the spray evenly.
- In a medium bowl, whisk together the flour, cinnamon, nutmeg, cloves, baking soda, and salt until well combined. Set aside.: Whisking dry ingredients distributes the cinnamon , nutmeg , cloves , and baking soda so each bite has balanced spice and proper lift. You will see the dry mix take on a uniform color and smell a burst of warm spice, which is a good cue that mixing is complete. If you skip this step, the batter can have pockets of soda or spice, creating bitter or uneven spots. Sift or whisk until you no longer see streaks of flour, and then give it a final whisk to aerate the mix slightly.
- In a large bowl, whisk together the pumpkin puree, white sugar, and brown sugar. Beat in the eggs, vegetable oil, and vanilla extract. Stop to scrape the sides and bottom of the bowl a few times.: When you mix the wet ingredients, the bowl will fill with a glossy, thick orange batter and a sweet, spiced aroma will rise. Scraping the bowl ensures there are no unmixed streaks of pumpkin or eggs hiding at the edges, which can cause uneven texture. Overbeating is a common error here because it can incorporate too much air, leading to a cracked top that collapses later, so mix until smooth and combined. You should notice the batter is shiny and slightly viscous, with no separate pools of oil or unmixed sugar.
- Slowly whisk in the flour mixture, until there are no lumps and the batter is just fully combined and smooth.: As you add the dry mix, watch the batter thicken and the color mute slightly. Whisk in gently to avoid overworking gluten in the all purpose flour , which would toughen the crumb. The right texture is a cohesive, slightly thick batter with just a few tiny air bubbles, not a runny paste. A mistake here is vigorous mixing that will yield dense muffins, so aim for a few strokes after the last of the flour disappears. If you see large pockets of dry flour, fold those in carefully to avoid clumps in the baked muffin.
- Fill in the muffin tins 3/4 full with the batter mixture.: Filling to about three quarters of each cavity gives the muffins room to rise and form a rounded top. You will notice the batter mounds slightly and holds its shape, glossy on top. Overfilling leads to spillover and underfilling yields flat, small muffins, so use an ice cream scoop or large spoon to get consistent portions. A quick touch to the batter should spring back slowly, which indicates it is the right consistency to bake. If you see bubbles trapped on top, gently pop them with a spoon to avoid large holes in the finished muffin.
- Bake for 18-20 minutes, or until a toothpick inserted in the center comes out clean.: During baking the kitchen will fill with a spicy, pumpkin scent and the tops will gain color and slight firmness. The ideal cue is a top that is springy when lightly pressed and a toothpick that comes out with a few moist crumbs but not raw batter. An error to avoid is removing them too early because residual heat will not finish set the center, leading to a gummy interior. If your oven tends to brown quickly, tent with foil the last few minutes to prevent overbrowning while allowing the centers to finish baking.
- Cool the muffins in the pan on a wire rack for 10 minutes and then pop them out of muffin tins and arrange them on a wire rack.: The initial cooling in the pan lets the crumb set so the removal does not tear the tops. You will feel the warm, slightly springy tops and smell the intensified spice. After ten minutes, the muffins should release easily; use a small offset spatula if they stick. If you rush this, they can fall apart, so patience ensures intact, attractive muffins. Moving them to a wire rack prevents trapped steam that would dampen the exterior, keeping them ready for the buttery coating.
- Combine the sugar, cinnamon and nutmeg in a shallow bowl and whisk.: Mixing the coating creates a fragrant sugar blend that will crisp when it hits the warm muffin. Whisk until evenly combined so each bite has the same spice to sugar ratio. A common oversight is uneven mixing causing pockets of spice that are too strong, so take the extra few seconds to blend thoroughly. The aroma will be very inviting and a good indicator that your finishing step is about to elevate the muffins.
- Then, working take one muffin, brush it all over with melted butter and quickly toss in the cinnamon-sugar mixture until fully coated.: Brushing with warm butter creates a glossy surface that helps the sugar adhere, and the heat melts the granulated sugar slightly so it clings. You should feel the sugar coat the muffin and hear a faint crunch when you press it. Move quickly so the butter does not soak into the muffin and make the coating soggy. If the muffins have cooled too much, briefly warm them so the coating will stick, but avoid making them hot to the touch.
- Serve and enjoy.: As you serve, notice the contrast between the sugared exterior and soft interior. These muffins are best enjoyed warm, when the coating still has a gentle crisp and the crumb is tender. A common mistake is storing them before the coating sets, which dulls the texture, so allow the coating to rest for a moment. Present them on a wire rack or platter, and enjoy how the aroma and texture come together.
Notes
- Room temperature ingredients Help the batter come together more evenly, reducing curdling and allowing the eggs to emulsify with the oil for a consistent texture.
- Don’t overmix Stir only until the flour disappears, this prevents gluten development that makes muffins dense and chewy rather than tender and light.
- Accurate oven temperature Use an oven thermometer because many ovens run hotter or cooler than their dial indicates, affecting rise and browning.
- Consistent scoops Use an ice cream scoop for uniform muffins so they bake evenly and finish at the same time, avoiding some being overbaked while others underbake.
- Warm for coating Brush with melted butter while muffins are warm so the cinnamon sugar adheres and forms a delicate crust rather than sliding off.
- Storage tips Store cooled muffins in an airtight container at room temperature for up to two days, or freeze individually wrapped for longer preservation.