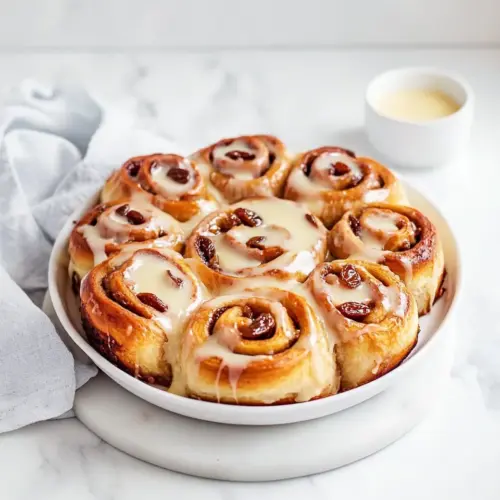
Delicious raisin cinnamon sticky buns
Delicious raisin cinnamon sticky buns are gooey, spiced, and richly caramelized, with soft enriched dough studded with raisins and brightened by orange zest. This easy to follow recipe yields tender, sticky rolls perfect for brunch or festive mornings, offering a balance of deep molasses notes and warm cinnamon. Make them for a crowd and savor why they become an instant favorite.
Equipment
- Stand mixer
- Paddle attachment
- Dough Hook
- Mixing Bowl
- Small pot
- 23 cm x 32 cm baking pan
Ingredients
- 1/4 cup of warm water Hydrate and activate yeast by providing a warm medium that dissolves and awakens dry yeast, initiating fermentation; helps dissolve sugar and start the dough proofing process. Maintain a comfortable temperature to avoid killing yeast and ensure consistent rise for the sticky buns. Use filtered or bottled water if tap water is very chlorinated to protect yeast activity.
- 10 grams active dry instant yeast 1 sachet Provide concentrated leavening agent that converts sugars to carbon dioxide and alcohol during fermentation, creating dough lift and internal structure; measure precisely for predictable rising. Store unopened sachets in a cool, dry place and reseal or refrigerate leftovers to maintain activity. Use at room temperature with warm water to ensure rapid activation.
- 1 tsp sugar Feed the yeast and add a touch of sweetness to balance flavors while supporting fermentation and crumb tenderness; small amounts also contribute to browning during baking. Dissolve thoroughly in the warm water for even yeast activation. Adjust slightly if using very sweet fillings to keep overall balance.
- 1/3 cups ugar Sweeten the dough significantly and aid browning and moisture retention, contributing to a soft, tender crumb; sugar also tenderizes by weakening gluten slightly. Ensure it’s fully incorporated into wet ingredients to avoid gritty spots. Be mindful that different sugars can affect color and flavor intensity.
- 3/4 cup milk Provide moisture, help form gluten, and contribute to a rich, tender crumb while adding flavor from milk solids; warmth improves yeast activation when mixed with yeast. Use whole or full-fat milk for best texture and keep temperature moderate to avoid killing yeast. Can be substituted with alternatives but will slightly alter flavor and texture.
- 50 grams butter plus extra for greasing Enrich the dough with fat that tenderizes crumb, adds flavor, and improves shelf-life while also helping to create a glossy finish when used for greasing. Soften or melt as needed to incorporate evenly into batters and dough. Reserve extra for greasing tins to prevent sticking and encourage even browning.
- 3 large free-range eggs Bind ingredients, add richness, provide structure and moisture, and help with emulsification for a smoother dough; eggs also contribute to color and a soft, tender crumb. Use at room temperature for better incorporation and more even mixing. Large eggs are standard; variations affect hydration slightly.
- The finely grated zest of 1 orange zest Brighten the flavor profile with aromatic citrus oils that cut through sweetness and add fragrant complexity; finely grated zest distributes flavor without adding bitterness. Zest at the outermost colored layer and avoid the white pith to keep a clean citrus note. Add toward mixing to preserve volatile aroma compounds.
- 1 tsp salt Enhance flavor balance by intensifying other ingredients and strengthening gluten structure slightly by regulating yeast activity; salt also controls fermentation rate. Dissolve into dry ingredients to ensure even seasoning throughout the dough. Avoid direct contact with yeast when highly concentrated to prevent inhibition.
- 4 cups flour and extra for dusting Provide the primary structure, bulk, and gluten-forming proteins necessary for dough elasticity and chew; flour also absorbs liquids and determines final crumb texture. Measure by weight for consistency and dust work surfaces to prevent sticking during shaping. Use unbleached all-purpose or bread flour according to recipe needs.
- 3/4 cup Muscavado sugar Deepen the filling and caramel notes while adding moistness and chewiness; muscovado sugar's molasses content imparts richer, toffee-like flavor ideal for sticky buns. Incorporate evenly into cinnamon-sugar mixtures for consistent sweetness and color. Store in airtight container to prevent clumping.
- 1 tbsp ground cinnamon Deliver warming spice and aromatic depth to the filling, pairing with brown sugar to create the classic cinnamon-sugar flavor; ground form disperses evenly. Use measured amounts to avoid overpowering other spices and adjust for personal preference. Freshly ground cinnamon typically offers the best fragrance.
- 1 tsp mixed spice Introduce a complex, warm spice background that enhances cinnamon and adds traditional holiday character; mixed spice blends usually contain nutmeg, allspice, and cloves. Add sparingly to maintain balance with the main flavors and avoid masking citrus or vanilla notes. Sift with dry ingredients for even distribution.
- 2 tbsp finely diced candied citrus peel optional Contribute bright, chewy bursts of candied citrus that add texture contrast and a pleasant bitter-sweetness; small dice ensures even distribution throughout the filling. Optional use offers flexibility for those preferring a simpler raisin profile. Drain excess syrup and pat dry to avoid adding unwanted moisture.
- 1 cup raisins/sultanas Provide soft, fruity pockets of sweetness and chew that plump during proofing and baking, contributing to texture and traditional flavor in sticky buns. Soak or plump briefly in warm liquid if particularly dry to ensure tenderness. Evenly fold into dough or filling to prevent clumping in one area.
- 40 g butter softened, kept separately Soften and enrich the filling with spreadable fat that creates a tender, gooey interior when baked; kept separate so it can be layered or spread at the appropriate stage. Keep at a workable temperature for easy spreading without melting completely. Measure approximate amount to taste and consistency preferences.
- 115 grams butter Add richness and help form the caramelized base or topping with a high butter content that aids flavor and mouthfeel; used where substantial buttery flavor is desired. Use quality unsalted butter for control over salt levels and for the cleanest flavor. Ensure room temperature for easier mixing or melting as required.
- 3/4 cup Muscovado sugar Supply deep molasses-like sweetness and sticky texture for the filling or glaze, enhancing caramel notes and color; muscovado sugar intensifies the bun's flavor profile. Mix thoroughly into butter or warm liquids to dissolve and prevent graininess. Store airtight to retain moisture and prevent hardening.
- 3/4 cup cream Provide a rich, luscious liquid that contributes to a creamy, saucy topping and helps dissolve sugars into a smooth caramel-like glaze; cream adds silkiness and mouthfeel. Heat gently with sugar and butter when making caramel to avoid curdling and to achieve a glossy finish. Use heavy cream for stability and richness.
- 1/4 cup golden syrup Increase gooey, sticky texture and deepen caramel flavor as a viscous sweetener that helps the topping set with shine; golden syrup resists crystallization. Add gradually while heating to achieve desired consistency and to blend smoothly with butter and sugar. Substitute carefully as other syrups will change flavor and texture.
- 1 tsp vanilla extract Enhance and round the overall sweet flavors with aromatic complexity and warmth; vanilla extract lifts other ingredients and adds familiar bakery notes. Add toward the end of cooking or mixing to preserve delicate volatile compounds. Use pure vanilla extract for best flavor intensity.
- 1/2 cup raisins or Christmas cake mix a blend of raisins, sultanas, currant and candied citrus peel Provide a concentrated fruit mix for additional texture and festive flavor, offering a blend of raisins, sultanas, currants, and candied peel to diversify chew and taste. Use in either dough or topping according to recipe instructions and evenly distribute to prevent bunching. Adjust quantity to personal preference for fruitiness.
- 1/4 tsp salt Balance and fine-tune seasoning by slightly suppressing excessive sweetness and enhancing the perception of other flavors; small amounts are used in finishing or filling to round taste. Dissolve evenly into wet components to avoid salt pockets. Use a precise measure as even tiny amounts affect flavor significantly.
- 1/4 cream cheese Add tangy creaminess and slight acidity to frostings or fillings, contributing to a smoother mouthfeel and cutting richness for balance; cream cheese also helps stabilize icings. Soften before mixing to ensure a lump-free, smooth texture and integrate at moderate speed. Use full-fat for best consistency and flavor.
- 1/2 cup icing sugar sifted Sweeten and thicken for a smooth, spreadable icing while adding body and sweetness to balance cream cheese; sifted icing sugar ensures a silky texture without lumps. Gradually add to cream cheese and vanilla to reach desired sweetness and stiffness. Sift to remove any lumps for a polished finish.
- 1 tsp vanilla extract Provide aromatic lift and depth when added to frostings or glazes, complementing cream cheese and sugar with floral, warm notes; vanilla enhances perceived sweetness. Add near the end of mixing to preserve delicate flavor compounds. Use pure extract for richer flavor rather than imitation.
- 2 – 3 tablespoons of milk to loosen to a pouring consistency Adjust consistency to a pourable glaze by loosening thick icings with small amounts of milk until a smooth, glossy flow is achieved; milk also adds subtle dairy flavor and sheen. Add incrementally to avoid over-thinning and aim for a consistency that will drizzle but still cling to buns. Use chilled milk sparingly if the icing becomes too loose.
Instructions
- Combine the water, yeast and 1 teaspoon of sugar in the bowl of a stand mixer and set aside for around 5 minutes to dissolve and become frothy.: As you mix these, you should see small bubbles form on the surface and the liquid will smell slightly yeasty and sweet, signaling that the yeast is alive; this foamy head is what gives the dough its lift and lightness. I like to rest the bowl in a slightly warm corner so the yeast gets comfortable, and if no foam appears within 10 minutes it usually means the yeast is inactive, so check your packet or the water temperature. A common mistake is using water that is too hot, which kills the yeast , so aim for pleasantly warm to the wrist; visually, you want a frothy cap that looks a bit like beer head.
- Add the rest of the ingredients to the bowl, but only 3 of the 4 cups of flour. Fit a paddle attachment and lightly mix until just combined.: The bowl will start to look shaggy and slightly sticky at this stage, with clumps of enriched dough coming together; the initial mixing hydrates the flour and incorporates the eggs , milk , and softened butter . I prefer the paddle for this early phase because it brings the ingredients together gently, preventing overworking the gluten too soon. Watch texture closely, because if you add all the flour at once the dough will be too stiff and dry, making it hard to knead.
- Change to a dough hook attachment and mix. While this is going, slowly add the remaining 1 cup of flour, and continue to mix until you have a smooth dough, about 5 minutes.: You will hear the dough change from a ragged scrape to a quieter, elastic knead, and visually it develops a sheen as the gluten forms; the surface should become smoother and slightly tacky but not sticky. I watch for the dough to clean the bowl sides, that little visual cue that indicates proper gluten development. The trap here is overmixing, which can make the buns tough, so stop when the dough is pliable and springy to the touch.
- Shape the dough into a large ball and grease the mixing bowl with butter. Roll the ball in the butter to coat all sides. Place the ball in the greased bowl, cover with plastic cling wrap and set aside in a draft-free, warm area to rise for about 1 – 2 hours. You want it to double in size. If it is cool, this could take up to 4 hours.: The dough will gradually puff, its surface becoming smoother and slightly domed as air pockets grow; it should roughly double in size, which signals that fermentation has progressed and flavors have developed. I like to mark the bowl with a rubber band so I can tell when it has doubled. If it takes much longer than the window, the room may be too cool; alternatively, if it rises too fast, you may lose some of the nuanced flavor that a slower ferment gives you.
- Tip the dough onto a floured surface and roll into a rectangular shape about 45 cm long and 30 cm wide. Brush / spread the softened butter over the entire surface and sprinkle the sugar and cinnamon filling evenly over this. Scatter the raisins over the sugar.: The dough will feel pillowy under your hands and the act of rolling releases a faint yeasty sweet aroma, while the cinnamon and muscovado sugar perfume the air; spreading softened butter ensures the filling adheres and creates those rich layers when rolled. I work from the center out to avoid tearing the dough; if your dough resists stretching, let it rest a few minutes to relax the gluten. A misstep is over-flouring the surface, which can dry the dough and reduce tenderness.
- Starting from the longest edge, roll the dough and filling up until you have a long log. Keep the join seam underneath. Trim the edges of the roll and then cut it into 16 even pieces.: As you roll, you should feel the layers compress, and visually the spiral pattern becomes clear at the ends; a neat seam underneath helps the log hold shape while slicing. I measure gently with a ruler or visual markers so the buns bake evenly; trimming the ends removes any uneven filling distribution. Cutting with a sharp serrated knife or strong thread prevents squashing the log, a common error that can flatten the swirls.
- While the dough is proving, to make the filling. Combine all the ingredients except the butter and mix. Set aside.: The filling comes together into a grainy, aromatic mixture where cinnamon and muscovado sugar dominate, and the added candied peel or spices add nuance; mixing dry first ensures even distribution when spread. Keep it covered to prevent drying, and taste a tiny pinch to make adjustments if needed, balancing sweetness and spiciness. One misstep is adding wet ingredients too early, which can make the filling slurry-like and harder to roll cleanly.
- While the dough is proving, make the topping. Melt the butter in a small pot over medium heat, and then add all the other ingredients except the salt. Bring this mixture to the boil and then reduce the heat to medium. Simmer until the sauce comes together and is golden brown with a nice sheen, about 3–4 minutes.: The pan will sizzle gently as the butter and sugars marry, releasing a toffee scent; as it boils briefly the mixture darkens to a golden brown and develops glossy body. I stir constantly, watching for a uniform sheen, and simmer until it slightly thickens, about a few minutes. The common trap is letting the sugars burn, which creates bitterness, so lower heat at the first sign of deepening color.
- Pour 3/4 of the glaze into baking pan (about a 23 cm x 32 cm), or 2 smaller dishes, and swirl this around to evenly coat the bottom and some of the sides. Set the rest aside. Sprinkle the raisins over the sauce evenly.: You want a syrup that coats the back of a spoon and glistens under light, the aroma shifting toward caramel and toffee. This glossy stage means the glaze will set but still be pourable; remove from heat if it gets too dark. If it looks grainy, it may have crystallized from stirring too vigorously, in which case you can gently rewarm and stir until smooth.
- Place the 16 cut slices of cinnamon rolls on top of the caramel and raisins, allowing some space in between for expansion during proving. Cover with a tea towel and allow to prove in a warm spot for about an hour.: The warm glaze will pool and mirror light at the pan bottom, and when you scatter the raisins they sink slightly into the syrup, anchoring fruit to each bun. I tilt and rotate the pan to ensure an even layer, because uneven glaze leads to some buns with too much or too little caramel. Pour carefully to avoid splashes on the oven rack later, and wipe any drips.
- Preheat the oven to 180 C / 350 F and bake the buns for 35 minutes until golden brown. If necessary, and to prevent over-browning, loosely cover the tray with tin foil from about 10 – 15 minutes into the baking time.: The rolls will swell and look pillowy as the yeast reactivates, and the dough surface becomes smooth and slightly taut; this second prove builds loft and a tender crumb. I check by pressing lightly; if the indent springs back slowly, they are ready. Overproofing leads to flat buns that collapse in the oven, while underproofing yields dense centers, so timing matters.
- Remove from oven and spread the remaining glaze over the buns followed by the 1/4 teaspoon of salt sprinkled. Allow to cool in the pan on a cooling rack. Tip out onto a large serving place and serve warm or at room temperature.: During baking you will notice a rich caramel aroma and the tops will deepen to a golden sheen; the filling will bubble slightly at the sides, and the buns should sound hollow when tapped lightly. If the tops darken too quickly, tent loosely with foil after 10 to 15 minutes to allow the centers to finish cooking without burning the surface. A typical error is not preheating the oven, which affects rise and crumb structure.
- Mix all the frosting ingredients and beat until smooth and then drizzle over the buns.: The foil softens the direct heat and helps the interior cook through without an overly dark crust, preserving an even golden color. I remove the foil for the last few minutes if I want extra sheen on the top. Be cautious to tent and not press foil onto the buns, as that can mar the surface texture.
- Remove from oven and spread the remaining glaze over the buns followed by the 1/4 teaspoon of salt sprinkled. Allow to cool in the pan on a cooling rack: The residual heat helps the glaze seep into the rolls, creating a sticky, glossy top; the small measure of salt brightens the sweetness and rounds the flavor. Cooling in the pan preserves the drippy edges, and you will see a gentle sheen form as the glaze sets. If left too long before glazing the top may not adhere as well, so apply while warm.
- Tip out onto a large serving place and serve warm or at room temperature: When inverted, the buns reveal a lacquered top and pockets of caramel around each roll; warm servings maximize the gooey texture and accentuate the aromas. I prefer serving slightly warm so the glaze is glossy and the centers are tender, but they remain lovely at room temperature. Avoid reheating in a way that dries them, instead use a gentle oven or microwave with a damp paper towel for moisture retention.
- Mix all the frosting ingredients and beat until smooth and then drizzle over the buns: The frosting becomes silky and pale, adding a tangy counterpoint from the cream cheese and a sweet cloak from the icing sugar . Drizzle while the buns are warm for a soft, slightly melted finish, or wait until cooled for a firmer set. If the frosting is too thick, add milk one teaspoon at a time until pourable, and if it is lumpy, beat longer to smooth.
Notes
- Use softened butter ribbons: Spread the softened butter evenly so each spiral has pockets of richness, which creates distinct layers when baked, giving a flakier mouthfeel.
- Swap or add candied peel: Increase or omit the candied citrus peel to adjust citrus brightness; small pieces add chew and a lovely counterpoint to the raisins.
- Overnight retard for deeper flavor: After shaping, cover and refrigerate overnight to slow fermentation, then bake the next morning for more complex taste and easier morning scheduling.
- Make mini rolls: Cut smaller pieces for individual portions that bake faster and are great for gatherings, just reduce baking time and watch for golden color.
- Double the glaze for extra stickiness: Reserve more topping to pour over immediately after baking for a thicker caramel coat that sets glossy on the buns.
- Lighten the frosting: Whip the cream cheese with a little extra milk for a thinner glaze that drizzles more evenly across warm buns.