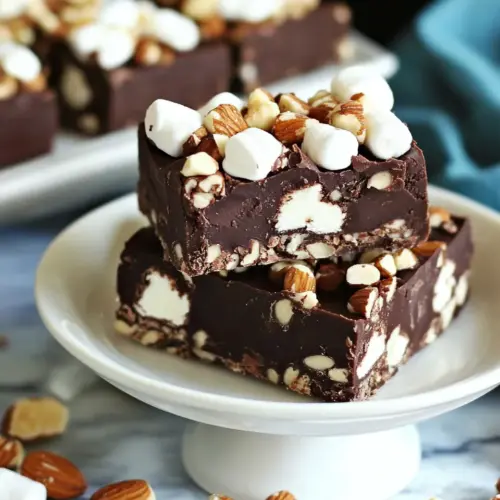
Dark Chocolate Marshmallow Nut Fudge Bars
Dark Chocolate Marshmallow Nut Fudge Bars are a rich, chewy treat with crunchy cookie pieces and toasted nuts. Silky melted chocolate envelopes crispy rice and miniature marshmallows, creating an easy no bake fudge bar that’s perfect for parties or quick dessert trays. Make a pan for gatherings or to enjoy as an indulgent snack, and you’ll see why these bars vanish fast.
Equipment
- 8 inch square pan
- Parchment Paper
- Microwave
- Medium Bowl
- Offset Spatula
- Sharp Knife
Ingredients
- 1 cup bittersweet chips or dark chocolate chips Melted adds rich, deep chocolate flavor and helps bind the fudge bars together when combined with other ingredients; provides a glossy finish and satisfying cocoa intensity to each bite.
- 1/2 cup evaporated milk Creamy contributes moisture and a silky texture while helping dissolve and blend the chocolate chips into a smooth ganache-like layer for the topping or filling.
- 20 vanilla wafers crushed Crushed provides a sweet, crunchy base and light vanilla flavor that creates structure when mixed with other dry ingredients and offers textural contrast beneath the chocolate.
- 1/2 cup crispy rice cereal Crispy offers delicate crunch and airy texture that lightens the bar, helping prevent it from becoming too dense while adding a pleasant cereal bite.
- 3 tbsp powdered sugar Powdered sweetens subtly and helps absorb excess moisture, ensuring the dry mixture binds evenly and the bars set with a smooth, tender crumb.
- 3/4 cup miniature marshmallows Miniature delivers soft, pillowy pockets of chewiness that contrast with the crunchy elements and melt slightly into the warm chocolate for gooey richness.
- 1/2 cup peanut butter chips can replace with chocolate, butterscotch, etc. Buttery supplies a nutty-sweet, creamy morsel that complements the dark chocolate while adding small pockets of flavor; can be swapped for alternate chips to vary taste.
- 1/3 cup pecans chopped, or walnuts or almonds or any nut you like 🙂 Chopped provides crunchy, toasty texture and a warm, nutty flavor that enhances the bars’ complexity while adding visual interest and satisfying bite.
Instructions
- Line 8 inch square pan with parchment paper.: The pan will feel cool to the touch, and the parchment should press smoothly into the corners without tearing. Lining it ensures easy removal and clean edges when you slice the bars. If the paper wrinkles, smooth it gently with dry fingers so the base is flat. A common mistake is using too small a sheet, which can make lifting the set fudge difficult, so ensure you have an overhang to grab when removing from the pan.
- Melt chocolate chips and evaporated milk together in the microwave, in 15 second increments, stirring until smooth.: You will notice the chocolate softening after the first burst, with glossy streaks forming as you stir. Stop microwaving as soon as there are soft pockets, then stir until the mixture is uniformly shiny and thick. The aroma will be intensely chocolatey and slightly caramelized from the evaporated milk. Overheating can cause the chocolate to seize into a grainy mass, so short bursts and vigorous stirring are essential. If you see graininess, remove from heat and stir slowly to try to homogenize; avoid adding cold liquids which will shock the chocolate.
- Combine crushed vanilla wafers, crispy rice cereal, powdered sugar, marshmallows, peanut butter chips and nuts in a medium bowl.: As you fold these dry and chewy elements together, you should hear a soft rustle and see a patchwork of textures, from powdery sugar to glossy chips and white marshmallow specks. This dry mixture forms the structure of the bars, so mix until everything is evenly distributed. Overmixing can break the cereal and crush the marshmallows too finely, so use gentle folds to keep contrasts intact. A frequent slip is forgetting to evenly crush the wafers, leaving large unblended chunks that affect consistency; aim for mostly small pieces with a few larger bits for interest.
- Stir in half of the melted chocolate making sure to coat everything well.: When the warm chocolate meets the dry mixture, you will see it darken as it coats the cereal and wafers, and the aroma will deepen. Use a sturdy spatula to fold so the chocolate envelops each element. This initial coating helps bind the mix and ensures even distribution in the pan. If you stir too aggressively, the cereal will break down and the mixture will become dense. Also avoid adding all the chocolate now, as reserving some allows a glossy top layer later.
- Press into pan firmly.: As you transfer the coated mixture into the lined pan, press with the back of a spoon or an offset spatula until the surface is compact and even, and you feel slight resistance. The sound is a soft compacting thud, and the surface should appear densely packed with visible nuts and marshmallow bits. Firm pressing eliminates air pockets and helps the bars hold shape when cut. A common error is pressing too lightly, resulting in crumbly squares; press firmly but avoid crushing the cereal into powder.
- Pour remaining chocolate over the top and use an offset spatula to smooth.: The warm chocolate will flow and create a glossy sheet over the packed base, reflecting light in a shiny film. Drag the spatula in long, confident strokes to create an even coating. The contrast between the matte base and the shiny top is visually satisfying. If the chocolate sets before you finish smoothing, work quickly or briefly warm the spatula to help spread it. Beware of pouring while the base is too warm, which can cause the top layer to sink into the filling and look uneven.
- Refrigerate until set, 1 to 2 hours. Cut into squares and serve.: You will notice the chocolate go from glossy and slightly soft to a firm, satiny finish when chilled enough. The refrigerator hum is background comfort as the bars solidify. Wait the full time for a clean cut, and test a corner after an hour to check firmness. Cutting too soon is the most common mistake here, leaving sticky, unclean slices; be patient and allow full setting.
- Cut into squares and serve.: The finished bars should give a clean, snappy edge as you cut, and each square will show layers of dark top and textured interior. Use a sharp knife and wipe between cuts for tidy slices. The aroma will be concentrated chocolate with nutty notes, and the first bite should offer a tempered crunch followed by creamy chocolate and a soft marshmallow chew. If squares crumble while cutting, the bars may need more chill time, so return them briefly to the refrigerator.
Notes
- Swap chips carefully: You can replace the peanut butter chips with chocolate, butterscotch, or white chips, keeping the same volume so the balance of sweetness and structure remains consistent.
- Nut variations: Swap pecans for walnuts or almonds, or toast them lightly first to enhance aroma, but keep total nut volume the same to maintain crunch.
- Adjust sweetness: If you prefer less sweet bars, choose bittersweet dark chocolate chips and reduce sweet add ins like certain chips, while keeping the powdered sugar amount the same for texture.
- Texture tweaks: For a chewier interior, reduce crispy rice slightly and increase crushed wafer proportion, but avoid overmixing which can make the bars dense.
- Cutting tips: Chill thoroughly and use a sharp knife, warming the blade under hot water and wiping dry between cuts yields clean edges without tearing the set.