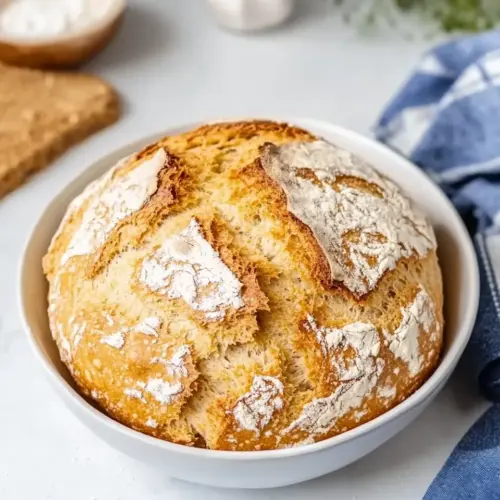
Dairy Free Bread
Dairy Free Bread is a simple, tender loaf made with curdled plant milk, flour, and a touch of baking soda for lift. This easy, quick bread yields a golden crust and soft crumb, perfect for toasting or sandwiches, and it works well as an easy weeknight bread or a cozy weekend bake. Make it for reliable, dairy free comfort and versatile serving options.
Equipment
- Baking Tray
- Parchment Paper
- Large Mixing Bowl
- Small Bowl
- Sharp Knife
- Measuring Cup
Ingredients
- 1 cup milk of choice I used oat milk Choosing a milk of choice provides the liquid base that hydrates dry ingredients and forms the batter; oat milk adds a mild, slightly sweet flavor and tender crumb while keeping the recipe dairy-free. Adjusting liquid volume slightly may be necessary depending on milk thickness, and room-temperature milk mixes more evenly for consistent texture.
- 2 tablespoons white vinegar * See notes Adding white vinegar contributes acidity that reacts with the baking soda to produce carbon dioxide, helping the bread rise and become light; allowing vinegar to sit briefly in the milk creates a simple non-dairy buttermilk substitute. Using the specified amount balances leavening without imparting a sour flavor, and mixing thoroughly ensures even distribution.
- 2 cups all-purpose flour Use gluten-free, if needed Using all-purpose flour supplies structure and gluten (unless using a gluten-free alternative) that traps gas bubbles and creates crumb; measuring by spooning and leveling helps maintain consistent dough texture. Choosing a gluten-free blend when needed keeps the recipe accessible while possibly requiring slight adjustments in hydration or mixing technique.
- 1/2 teaspoon baking soda Including baking soda acts as a chemical leavening agent that reacts with the acidic component to release carbon dioxide, creating lift and tenderness in the quick bread. Measuring accurately is important because excess baking soda can yield a soapy taste and uneven texture, so sift or mix well into dry ingredients.
- 1/2 teaspoon salt Adding salt enhances overall flavor by balancing sweetness and rounding out other tastes, and it also strengthens gluten structure slightly for improved crumb and crust. Dissolving salt evenly in the dry mix prevents pockets of concentrated flavor and ensures consistent seasoning throughout the loaf.
- 1 tablespoon sugar Incorporating sugar provides subtle sweetness, aids browning through caramelization for a desirable crust color, and can tenderize the crumb by absorbing moisture. Using the specified amount keeps sweetness moderate while contributing to texture and helping yeast-free quick breads develop a pleasant taste.
Instructions
- Preheat the oven to 200 C/400 F. Line a large baking tray with parchment paper and set aside.: You should feel the warmth and hear the oven fan settle as the temperature climbs, and the aroma of heated enamel quietly builds. Preheating ensures the loaf meets a hot environment immediately, which helps form a crisp, golden crust. A well lined tray prevents sticking and makes transfer effortless. A common mistake is not waiting for the oven to fully reach temperature, which can lead to a denser loaf and pale crust. If your oven runs cool, consider using an oven thermometer to confirm accuracy.
- In a small bowl, add the milk of choice with vinegar and let sit until it curdles, around 10 minutes.: The mixture will develop tiny curdled bits and a faint acidic scent, similar to buttermilk. This change is subtle, but visible as the surface may become slightly thicker and show small clumps. This acidity is what activates the baking soda and creates lift, so patience here pays off. Avoid rushing the step by using the liquid too soon, as it will not react fully and your loaf may lack its gentle rise.
- In a large mixing bowl, add the flour, salt, sugar, and baking soda and mix well. Using a 1/2 cup, add your curdled milk into it in two increments, and mix gently, until just combined.: You will notice the dry mix loosening as the wet addition binds it. The dough should come together but remain slightly sticky; that tackiness indicates good hydration. Mixing gently preserves some air and prevents overworking the gluten, keeping the crumb tender. A frequent error is overmixing, which tightens the dough and results in a tougher loaf. Stop as soon as there are no dry streaks, even if the surface looks shaggy.
- Lightly flour a kitchen surface. Sprinkle a tablespoon of flour on top of the dough and transfer to the floured surface. Gently knead the dough, around 8-10 times, and form a dome shape. The dough should still be quite sticky. Using a sharp knife, slice twice across the dough, forming a cross shape, around half an inch thick.: The kneading feels tactile and slightly sticky against your palms, but it will form a cohesive dome if handled gently. The light dusting of flour prevents excessive sticking without drying the dough. The cross score lets steam escape and gives the loaf its character when baked. If you press too hard while kneading, you may compress the air pockets and end up with a denser crumb, so be gentle and deliberate.
- Transfer the bread dough onto the lined tray. Bake for 20-25 minutes, checking around the 20 minute mark. The bread is cooked when golden brown on the tops and when tapped, makes a hollow sound from the base.: As the loaf bakes you will smell a toasty sweetness and see the crust deepen to golden brown. The hollow tap is a classic auditory signal of doneness, indicating internal steam has escaped and structure has set. If the top browns too quickly, tent with foil to prevent burning while the interior finishes. A common pitfall is underbaking, which yields a gummy center; if unsure, leave it in for a few extra minutes and check again.
- Remove from the oven and allow to cool on the tray completely, before slicing and toasting.: Cooling lets the crumb finish setting and prevents a gummy texture when sliced. The loaf will emit gentle residual steam and the crust will firm up as it cools. Resist the urge to slice hot bread, as it can compress the interior and become gummy. If you need to serve sooner, slice carefully and allow the internal steam to disperse for a few minutes before spreading with toppings.
Notes
- Oats and texture Swap 2 tablespoons of flour with rolled oats and sprinkle oats on top before baking, which adds a rustic chew and visual appeal.
- Raisin sweetness Fold through 1/4 to 1/2 cup of raisins into the dough, and if you prefer a sweeter loaf, increase the sugar by 1/4 cup for a more dessert like bread.
- Nutty crunch Stir in 1/4 cup of chopped walnuts for contrast in texture and a toasty note when the loaf is baked and cooled, offering pleasant bites against the soft crumb.
- Whole grain swap Replace some or all of the all purpose flour with whole wheat flour and add 1/4 cup mixed seeds to create a heartier, more filling loaf suitable for sandwiches.
- Herb infusion Add 1 tablespoon of chopped rosemary and increase salt by 1/2 teaspoon, finishing with a sprinkle of coarse sea salt for a savory aromatic loaf.
- Freezing for longevity Slice and freeze cooled loaves individually, then toast slices straight from the freezer for quick breakfasts, preserving freshness and crumb structure.