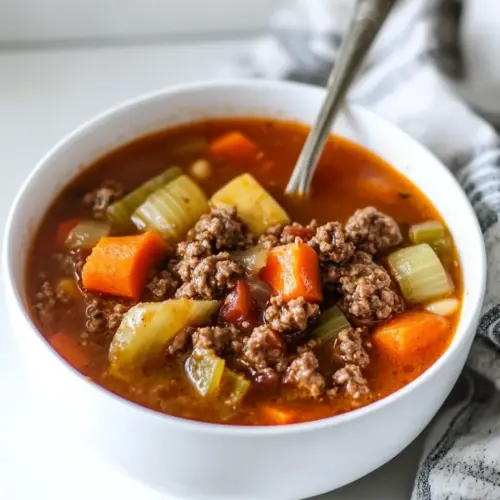
Crock Pot Hamburger Soup
Crock Pot Hamburger Soup is a hearty, savory, and easy weeknight dinner that combines browned ground beef, tender potatoes, and a rich beef broth base with sweet carrots and bright green beans. Slow cooked to meld flavors, this creamy textured bowl is comforting and family friendly, making it a perfect choice when you want something filling and effortless to make.
Equipment
- Slow Cooker (Crock Pot)
Ingredients
- 1 tablespoon butter Melted and fragrant, adds a rich, creamy foundation to sauté aromatics and brown meat; contributes subtle sweetness and helps carry flavors throughout the soup.
- 1 tablespoon olive oil Used to provide a high-heat cooking fat for browning beef and softening vegetables; lends a light fruity note and helps prevent sticking in the pot.
- 1 small onion diced Diced small to release natural sugars and build savory depth; softens during cooking and forms part of the aromatic base that complements the beef.
- 1 pound ground beef Browned to create savory richness and umami, providing the primary protein and meaty texture for the soup; renders fat that enhances overall flavor.
- 2 medium potatoes peeled and chopped into 1-inch pieces Peeled and chopped into 1-inch pieces for hearty body and comforting starch; absorbs broth flavors while adding creaminess and substance to each spoonful.
- 2 large carrots peeled and chopped into 1-inch pieces Peeled and cut into 1-inch pieces to contribute natural sweetness and texture; softens with simmering and balances the savory beef and broth.
- 1 large rib celery diced Diced to add crisp vegetal notes and aromatic depth; softens during cooking and lends a mild celery flavor that brightens the soup.
- 1 large bell pepper any color, diced Diced to provide color, sweetness, and a slightly fruity bite; holds up during simmering and offers a pleasant contrast to root vegetables.
- 1 cup green beans chopped – fresh, canned or frozen Chopped and included for tender-crisp vegetable texture and fresh green flavor; can be used fresh, canned, or frozen to suit convenience and seasonality.
- 4 cups beef broth or beef stock Poured in as the liquid base to supply savory backbone and depth; infuses the ingredients with beefy flavor and creates the soup's broth.
- 1 cup tomato sauce 8 oz can Added for tangy tomato flavor and thickness; contributes acidity and body that balances the richness of the meat and broth.
- 2 whole bay leaves dried Placed whole to impart a subtle herbal, slightly floral aroma during simmering and removed before serving; helps layer in gentle background seasoning.
- 1 1/2 teaspoons garlic powder Sprinkled for concentrated garlic flavor without moisture; provides consistent savory garlicky notes throughout the soup and simplifies seasoning.
- 1/2 teaspoon Italian seasoning Used to introduce a blend of Mediterranean herbs for an earthy, aromatic touch; enhances the overall herbal profile without overpowering other flavors.
- salt to taste Added to adjust and enhance overall taste to personal preference; helps bring out flavors and balance seasoning throughout the finished soup.
- black pepper to taste Cracked over to add sharpness and a warm, slightly spicy finish; brightens flavors and can be adjusted to taste for mild or pronounced heat.
- 1 cup kale fresh, chopped (optional) Chopped and stirred in optionally for leafy green nutrition and texture; wilts into the hot broth to add color, vitamins, and a gentle bitterness that complements the soup.
Instructions
- In a large skillet, over medium-high heat, add butter and olive oil.: The skillet will give you a fragrant sizzle as the butter melts and the olive oil warms, releasing a soft, nutty aroma. This fat combination protects the oils from burning and gives the upcoming onion and ground beef something to glide in. You should hear a gentle hiss that signals the pan is ready, and the surface will shimmer slightly as the oils reach temperature. Paying attention here matters because an evenly heated fat layer promotes uniform browning of the meat, which in turn creates flavorful browned bits. A common mistake is rushing this step on too high heat, which scorches the butter and produces bitter notes. If the fat smokes, lower the heat and start again to preserve a clean, sweet base for the soup.
- Add diced onion and saute for 2-3 minutes.: Once the onion hits the pan you should smell its sweet edge as it begins to turn translucent, and the sound will soften to a gentle whisper. Properly softened onions add a sweet, mellow backbone to the broth, and you should see them take on a faint golden edge at the corners. This brief sauté is important because raw onion can be sharp and intrusive in a slow cooked dish. A typical error is undercooking, leaving the onion with a raw bite; if that happens, continue to cook until the pieces are translucent and slightly glossy. Stir occasionally so no pieces stick or brown unevenly, and scrape up any fond developing on the pan to fold into the pot later.
- Add ground beef, breaking it apart into large chunks as it browns.: When you add the ground beef , the pan will return to an assertive sizzle and you will see juices release. Break the meat into larger chunks at first so it sears and develops caramelized edges, which give the broth richer meatiness. The visual cue to watch for is a deepening of color on the exposed surfaces and a reduction of pink as it cooks through. This technique matters because browned meat creates fond and concentrated flavor that transforms the soup, rather than producing a flat, boiled beef taste. A common pitfall is stirring constantly to make tiny crumbles; that can prevent proper browning and leave the texture mushy. Let the meat sit briefly between turns to allow a brown crust to form.
- Once onions are soft and meat has browned, add to a cold Crock Pot.: You will notice the skillet is streaked with browned bits and a glossy meat fond, which is precisely what you want to capture in the slow cooker. Transferring the contents to the cold Crock Pot lets the accumulated fond come along, infusing the broth with depth as it slowly dissolves. The sound difference is obvious, from the hot pan sizzle to the quiet thud of ingredients settling into the cooker. This step matters because starting with those browned components gives your soup an underlying roasted flavor that a straight raw start cannot match. A mistake here can be leaving too much fond stuck to the pan; use a splash of broth to deglaze and pour those flavors into the Crock Pot.
- Add in celery, bell pepper, carrots, green beans, potatoes, carrots, beef broth, tomato sauce, bay leaves, garlic powder, Italian seasoning, salt and black pepper.: As you add each vegetable and liquid, the pot will begin to look like a hearty mosaic of colors, and the broth will start to tint a warm tomato hue. The combination of hearty potatoes , sweet carrots , and the aromatics builds complexity, while the beef broth and tomato sauce meld it all into a savory, slightly tangy bathing liquid. The bay leaves will infuse a subtle herbal note as the pot simmers. This stage is crucial because proper layering of ingredients ensures the starches and vegetables release their flavors gradually, keeping the texture balanced. A typical mistake is overfilling the cooker, which can prevent even heat circulation; maintain the recommended fill level for your Crock Pot to avoid uneven cooking.
- Set your Crock Pot to low for 6-8 hours or high for 4-5 hours.: As the cooker comes to life you will notice a steady, low bubbling on low and a more lively simmer on high. Slow cooking allows connective flavors to marry and vegetables to soften into a unified, spoonable consistency. I prefer the low setting because it deepens flavor and prevents over softening, but high works when time is limited. The reason this matters is that gentle heat breaks down starch without turning everything to mush, preserving pleasant textures like slightly tender potatoes and intact carrots . A common error is lifting the lid frequently to peek, which releases heat and prolongs cooking time, so avoid unnecessary checks.
- In the last hour, add the kale (if desired).: When you stir in the optional kale during the final hour you will see it wilt into bright green ribbons, and the soup gains a fresh, earthy lift that cuts the meat richness. Adding it late preserves some texture and color so the greens do not turn to an indistinguishable mush. This timing matters because hearty greens can become bitter and overly soft if cooked too long. The common mistake is adding delicate greens at the start, which results in loss of vibrancy and a less appealing mouthfeel.
- Taste for seasoning and add more salt and black pepper if needed. Remove and discard bay leaves. Ladle into bowls and serve.: As you taste the finished pot you should notice a layered savory broth with sweet vegetable notes and a faint herbal background from the bay leaves. Adjusting salt and pepper at the end lets you fine tune balance without overshooting, since flavors concentrate during cooking. Removing the bay leaves prevents accidental, unpleasant bites. Serve while hot, and watch the steam carry the aroma to the table. A typical error is adding too much salt early, which becomes intensified over the long cook, so always reseason at the finish rather than mid simmer.
Notes
- Brown meat properly — Give the ground beef time to develop color for richer flavor, and deglaze the pan to capture browned bits.
- Mind vegetable sizes — Chop potatoes and carrots into similar one inch pieces to ensure even cooking throughout the long simmer.
- Use good broth — A quality beef broth makes a noticeable difference, as it carries and amplifies the other flavors in the pot.
- Season gradually — Add salt in stages, tasting near the end to avoid oversalting from concentrated liquids.
- Add greens late — Stir in the optional kale during the last hour to keep it bright and slightly tender rather than limp.