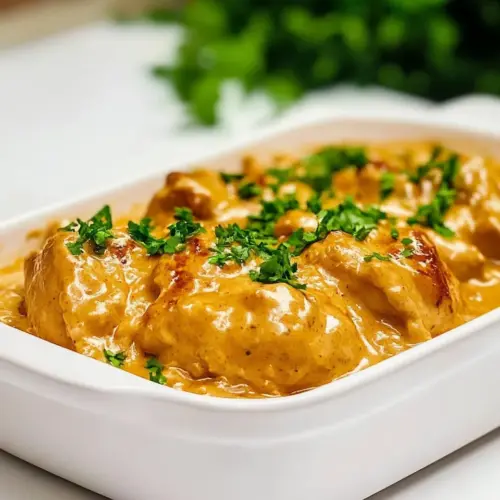
Creamy Chicken Paprika
Creamy Chicken Paprika is a silky, savory weeknight favorite that pairs juicy chicken with a paprika scented cream sauce, caramelized onion, and a tender, saucy finish. This easy weeknight dinner delivers creamy texture, warm spice, and comforting flavors that feel special yet simple to prepare, making it perfect for busy evenings or relaxed weekend feasts.
Equipment
- Large Skillet
- Digital Thermometer
Ingredients
- 1/4 cup all-purpose flour Coat the chicken pieces evenly when combined with the dry mix to create a light crust that helps thicken the pan sauce and adds subtle texture.
- 1/4 cup cornstarch Combine with flour to add extra crispness and stability to the coating, helping achieve a balanced, tender interior and a slightly crisp exterior.
- 1 teaspoon garlic powder, plus more if desired Add savory garlic aroma and depth to the flour-cornstarch mixture, enhancing overall flavor and contributing to the roasted, aromatic profile of the dish.
- 1 teaspoon onion powder, plus more if desired Provide sweet, savory onion undertones to the coating blend, supporting caramelized flavors when the sliced onions cook and enriching the sauce.
- 2 teaspoons paprika, smoked paprika may be substituted Impart warm, slightly sweet paprika character that defines the dish’s signature flavor; smoked paprika may be used for a deeper, smoky note.
- 1 teaspoon kosher salt, or to taste Season early in the preparation to bring out the chicken’s natural flavors and to balance the richness of the cream and butter in the sauce.
- 1 teaspoon freshly ground black pepper, or to taste Introduce pungent, bright heat that sharpens the overall profile and helps counterbalance the creaminess of the sauce while seasoning the chicken.
- 1/2 teaspoon red pepper flakes, optional and to taste Add a controlled, spicy kick to taste that can be sprinkled in the coating or sauce to provide layered heat without overpowering the dish.
- 1/8 to 1/4 teaspoon cayenne pepper, optional and to taste Provide concentrated heat in small amounts for those who prefer a stronger spice presence; use sparingly to avoid masking other flavors.
- 2 large boneless skinless chicken breasts, sliced in half lengthwise (select chicken breasts that are about 3/4 to 1 pound each and then halve them; or use 4 breasts that are about 1/3 to 1/2 pound each; boneless skinless chicken thighs may be substituted) Supply the main protein and bulk of the dish, sliced thin for quick, even cooking and to present tender, juicy pieces that absorb the creamy paprika sauce.
- 2 tablespoons olive oil Sear the chicken and sauté aromatics efficiently due to its high smoke point; also helps create fond that enriches the pan sauce.
- 3 tablespoons unsalted butter Enrich the sauce with silky mouthfeel and provide a rich medium for sautéing the onions, contributing buttery flavor and sheen to the finished dish.
- 1 large yellow onion, sliced into thin rings (sweet Vidalia onion may be substituted) Caramelize to release natural sugars and sweet flavor while contributing texture; thin rings soften into the sauce and add savory complexity.
- 1 1/2 cups low-sodium chicken broth Deglaze the pan and form the base of the sauce, carrying browned bits and concentrating savory chicken flavor while keeping the sauce light and flavorful.
- 1/2 cup heavy cream, (you can add more, up to 1 cup total, if you prefer more sauce) Enrich and thicken the pan sauce for a luxurious, creamy finish; adding more allows customization of sauce richness and consistency.
- Fresh parsley, finely minced for garnishing; optional to taste (or your favorite fresh herbs) Garnish with bright, herbaceous freshness to lift the rich sauce; finely minced parsley or other herbs add color and a clean finish to each serving.
Instructions
- To a large bowl, add the flour, cornstarch, garlic powder, onion powder, paprika, salt, pepper, and optional red pepper flakes, and optional cayenne pepper. Mix lightly with a fork to combine. Transfer and set aside 3 tablespoons of this mixture, which will be used later in the recipe.: Right away you will notice the warm red color from the paprika and the faint aroma of garlic and onion powders; this is the seasoning backbone. As you whisk the dry mix, aim for an even distribution so every piece of chicken will get the same flavor and browning. The sensory cue here is a uniform, reddish dusting on your fork after mixing. Why this matters, the even seasoning ensures consistent crust and sauce thickening when a portion is reserved for the roux. A common mistake is skipping the step of reserving the mixture; if you forget, the sauce may lack enough thickening power and seasoning balance later on. Keep the reserved three tablespoons in a small bowl at room temperature so it is ready when the butter and pan are hot.
- Add the chicken to the bowl, and dredge to coat it on all sides with the flour mixture.: When you dredge, you should feel a fine, slightly tacky coating form on the chicken . The tactile cue is that the surface looks matte rather than wet, indicating the flour and cornstarch have adhered. This coating creates a thin crust when seared and provides the base for the roux. The reason this technique matters is it both seasons the protein and supplies starch to thicken the sauce later. A typical slip up is overloading the chicken so pieces clump together; dredge in batches if needed and shake off excess before the pan to avoid sogginess.
- To a large skillet, add the oil, chicken, and cook over medium-high heat for about 8-10 minutes or until chicken is done. Flip once midway through cooking. Chicken is done when a thermometer reads 160 F degrees, allow it to rest on a plate while you continue with the recipe, the temp will increase to 165 F which is when it's safe to consume.: As the chicken fries, listen for a steady sizzle and watch for a golden brown color at the edges, this indicates the Maillard reaction is happening. The smell will be nutty and toasty as those crusted bits develop. Cooking to 160 F internal allows for carryover to 165 F during resting, which keeps the meat juicy and prevents overcooking. Important technique note, use a digital thermometer to gauge doneness rather than relying solely on time. A frequent error is overcrowding the pan which reduces heat and prevents proper browning; cook in batches if your skillet is crowded so each piece gets direct heat.
- Add the butter to the skillet (do not wipe it out – that's where the flavor is) and allow the butter to begin to melt for about 30 seconds and add the onions. Turn the heat to medium-low or low, and saute the onions for about 20 minutes, or until caramelized. Stir and toss very frequently. Tip – Caramelizing onions is a labor of love but worth it! However, if you don't care about having onions in the dish, you can skip them. Still melt the butter, and then move onto the next step and add the flour for the roux.: When the butter melts, you'll see it foam slightly and smell a rich, creamy aroma; that fond left behind from the chicken will dissolve into the butter, building deep flavor. As the onion softens, it will first become translucent, then take on a warm golden hue, and finally a deep brown as sugars caramelize. The sizzling should quiet down to gentle swirls as moisture leaves the pan. This stage is crucial because the sweet, savory caramelized onion balances the cream and paprika. Common mistake, rushing this step by turning the heat too high leads to bitter burnt edges instead of sweet caramelization. Stir frequently and be patient; the aroma will guide you when it is done.
- Add 3 tablespoons of the flour mixture you set aside to the skillet and cook for 1 minute over medium to medium-high heat; whisk continuously. Tip – This is how you make a roux, which helps the sauce to thicken later on, so don't shortcut this step. You also want to cook the flour long enough so there's no raw flour taste in the finished dish.: As you sprinkle the reserved mix into the butter and caramelized onion , the pan will thicken into a paste and release a toasted aroma. Whisking keeps lumps from forming and ensures the starches begin to cook, removing any raw flour flavor. The cue you want is a smooth, glossy paste that smells faintly toasted but not burnt. This roux matters because it creates a stable thickening agent for the sauce. A typical blunder is skipping the minute of cooking, which can leave a raw flour taste in the finished dish. Keep whisking and watch the color, it should deepen slightly but remain warm not dark brown.
- Slowly add the chicken broth and whisk until thickened, about 1 to 2 minutes over medium to medium-high heat. Whisk continuously.: Pour the broth in a thin stream while whisking to encourage a smooth emulsion; you will see the paste dissolve into the liquid and the mixture will go from opaque to glossy and slightly thick. The aroma will shift to a savory, broth forward scent with a nutty undertone from the cooked flour. This step stabilizes the sauce and integrates seasoning. Watch for lumps as the most frequent error is adding liquid too quickly which can create a grainy texture; steady pouring and continuous whisking prevent that.
- Add the heavy cream to the skillet and whisk for another 1 to 2 minutes, or until combined and thick. Tip – If you want more sauce, add additional cream, as desired; up to about 1/2 cup additional.: The cream will enrich the sauce immediately, and you will notice a silky sheen and thicker consistency as it cooks. The smell becomes richer, and the sauce should coat the back of a spoon. This step matters because it balances the savory broth and spices into a cohesive, luxurious sauce. A common oversight is boiling the cream which can separate it; maintain a gentle simmer and steady whisking to keep it smooth. If the sauce seems too thin, a small pinch of the reserved flour mixture can be whisked into a slurry and added gradually.
- Taste and check for seasoning balance and if desired, add additional salt, pepper, red pepper flakes, cayenne, paprika, etc. Flavor Tips – If it tastes at all flat, it likely needs more salt so don't be afraid to add it. I usually add another 1/2 to 1 teaspoon. The dish shouldn't be overly spicy but should have a slight amount of heat so add red pepper flakes and/or cayenne carefully but appropriately for flavor.: Give the sauce a careful taste. The sensory goal is a creamy mouthfeel with a balanced savory backbone, a warm paprika note, and a gently persistent heat. Adjusting seasoning at this stage lets you correct the dish based on the actual saltiness of your broth and butter. Why this step is key, it ensures the final plate is lively rather than flat. A frequent misstep is over seasoning with heat; add spicy elements slowly and taste after each addition so you preserve the cream's balance.
- Add the chicken back into the skillet, toss around in the sauce, flipping a few times, and cover with the onions, before optionally garnishing with parsley and serving.: As you return the chicken to the pan, it will sizzle softly and the sauce will cling to the pieces, creating glossy, sauced morsels. Tossing a few times ensures even coating and reheats the chicken through without overcooking. When the onion is layered on top and you garnish with fresh parsley, the dish visually pops and gains a fresh herbal note. The reason this finish matters is it unifies all cooked elements into a composed plate. A common mistake is leaving the chicken in too long which can dry it out; simply warm through until the sauce bubbles gently and serve immediately.
Notes
- Use a thermometer to avoid overcooking the chicken; pull it at 160 F and let it rest to reach 165 F which keeps the meat tender and juicy.
- Do not rush the onions, cook them on low and stir often so they become deeply caramelized and sweet rather than bitter.
- Reserve flour mixture for the roux so the sauce thickens evenly; whisk it well into the fat before adding liquid to prevent lumps.
- Choose smoked paprika if you want a smoky depth, but if you prefer a milder profile stick with sweet paprika for a bright, peppery note.
- Warm your broth slightly before adding to the roux to keep the sauce smooth and to avoid temperature shock that can cause separation.
- Finish with fresh herbs like parsley for brightness, adding them at the end preserves their color and fresh flavor.