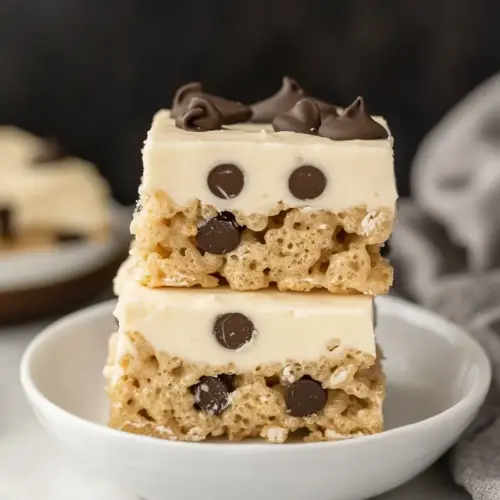
Cookie Dough Rice Krispie Treats
Cookie Dough Rice Krispie Treats combine a crispy Rice Krispies cereal base with a rich cookie dough layer and glossy ganache, delivering a creamy, crispy, and utterly irresistible bar. These easy to make treats are great for parties and weeknight baking, offering familiar flavors with a playful twist. Try them when you want a dessert that looks impressive but comes together quickly.
Equipment
- Microwave-safe Bowl
- 9 x 13 pan
- Nonstick foil
- Mixer
- Heat safe bowl
- Spatula
Ingredients
- 5 tablespoons salted butter Melted and rich, provides the necessary fat to bind ingredients and adds a golden, tender mouthfeel once cooled; helps prevent marshmallows from sticking and promotes even melting when heated gently.
- 8 cups mini marshmallows Sticky and sweet, supplies the bulk of the binding matrix by melting into a gooey, cohesive mass that holds the cereal together; contributes chewiness, sweetness, and glossy appearance to the finished treats.
- 6 cups Rice Krispies cereal Light and crunchy, offers structure and crisp contrast to the soft marshmallow mixture while absorbing some of the melted binder; keeps each bite airy and provides the classic cereal texture in every square.
Instructions
- Line a 9 x 13 pan with nonstick foil.: The pan should be prepared so the final bars lift out cleanly, the foil creates a smooth release surface and helps you slice neat squares. When I line the pan, I press the foil into the corners and leave an overhang to use as handles later. You want the surface taut, because wrinkles can translate into uneven edges on the bars. A frequent oversight is not securing the foil, which causes it to shift when you press the cereal in, making the layer uneven.
- In a microwave-safe bowl, combine marshmallows and butter. Heat in 30-second increments until melted and smooth.: As the butter and marshmallows melt, they bubble and become glossy; that shine tells me they are ready for the cereal. I heat in 30 second bursts, stirring between each one so the mixture warms through without burning. The aroma will turn rich and sweet, and you should see the marshmallows collapse into a homogeneous mass. Avoid heating continuously, which can lead to scorching and a grainy texture in the binder.
- Stir in the cereal to coat evenly and spread into the pan. Use an offset spatula to make an even layer.: When you fold in the Rice Krispies cereal , the sound changes to a muted crackle as the cereal becomes fully coated. I use a spatula to fold until there are no dry patches, then press the mixture into the pan using a buttered spatula or parchment to prevent sticking. Press with even pressure so the layer sets uniformly, you should notice the surface flatten and compact slightly but not become dense. Pressing too hard crushes the cereal and yields a gummy bite, which is the common misstep here.
- To make the cookie dough, beat butter, salt, and both sugars in the mixer. Add milk & vanilla, then add the flour on low speed. Fold in the chocolate chips. Spread over the Krispie treats layer.: The creaming stage should look pale and slightly aerated, this change in texture is crucial for a light, spreadable dough. I add the milk and vanilla next to achieve a smooth, pipeable consistency, then fold in the flour slowly on low speed so the dough remains tender. When you fold in the chocolate chips , you should see little pockets of chocolate that will melt slightly under the ganache later. A pitfall is overworking the dough, which develops gluten and makes it tough instead of tender.
- To make the ganache, chop milk chocolate and place it in a heat-safe bowl.: Finely chopping the chocolate helps it melt quickly and emulsify smoothly with hot cream. The chopped pieces should look even so the heavy cream can melt them uniformly when poured. If the chocolate pieces are uneven, some will remain unmelted and create grainy spots in the ganache. Avoid adding cold liquid to the chopped chocolate, which can seize it.
- Heat heavy cream in the microwave until very hot, then pour over the chocolate. Let stand one minute, then whisk until smooth.: When the cream is nearly simmering and you pour it over the chocolate, you will see the first few bubbles settle and the chocolate begin to soften, that is the cue to let it sit for one minute before whisking. After resting, whisk gently from the center outward until the ganache becomes glossy and smooth. The smell will turn rich and cocoa forward, signaling it has emulsified. Stirring too vigorously right away can incorporate air, making the ganache less silky.
- Let cool for just a few minutes and spread over the cookie dough layer.: The ganache should be warm and pourable but not hot, so it smooths the surface of the cookie dough without melting the chips completely. As you spread, you will feel the ganache thicken and set into a shiny, even coat; the surface will reflect light when it sets properly. If it is too hot, it will seep into the dough and make the top soggy, which is the mistake to watch for.
- Place the pan into the freezer until the chocolate is set. Cut and serve.: Chilling firms all layers quickly, which makes clean slicing possible. In the freezer the ganache tightens and the dough chills, resulting in crisp edges when you cut. Once set, lift the foil overhang to remove the slab and slice with a hot, dry knife for clean cuts. A common problem is trying to cut too soon, which squashes the layers and creates crumbly pieces.
Notes
- Adjust sweetness Use a slightly smaller amount of sugar in the cookie dough if you prefer the bars less cloying, this balances well with the sweet marshmallows and chocolate.
- Firmness control Chill the pan longer for firmer bars that cut cleanly, especially useful when transporting to a party or packing in a container for gifting.
- Improve sliceability Use nonstick foil with an overhang to lift the entire slab from the pan, this prevents the need to dig bars out and keeps edges tidy.
- Prevent sogginess Allow the cookie dough layer to cool briefly before pouring the warm ganache, which stops the top from softening and keeps distinct layers.
- Storage tip Store in an airtight container with parchment between layers to keep surfaces from sticking, and bring to room temperature before serving so flavors bloom.