Coconut Yogurt
Coconut Yogurt is a creamy, dairy free yogurt made from full fat coconut milk and live probiotic cultures. This easy homemade recipe yields a silky, tangy result that is perfect for breakfast bowls, snacks, or as a versatile creamy base. With minimal ingredients and gentle fermentation, it is an approachable project for anyone seeking a rich, plant based alternative to traditional yogurt.
Equipment
- Glass jar
- Non metal spoon
- Cheesecloth or clean dish towel
- Rubber band
Ingredients
- 1 can full-fat coconut milk 13.5 ounces Provide a rich, creamy base for the yogurt with high fat content that yields a smooth texture and helps fermentation proceed evenly; shake the can well before opening to recombine separated cream and water, and warm slightly to improve probiotic activity during incubation.
- 2 probiotic capsules vegan-friendly Introduce live cultures necessary to ferment the coconut milk, supplying beneficial bacteria to sour and thicken the mixture; choose vegan-friendly strains, open capsules to release powder, and whisk into warm milk to distribute cultures evenly for consistent tang and texture.
- Maple syrup or preferred sweetener, to taste Adjust sweetness and flavor to taste, balancing the natural coconut flavor and the tang from fermentation; add sparingly before or after culturing depending on desired ferment activity, and use maple syrup or another preferred sweetener to enhance palatability without inhibiting probiotics.
Instructions
- Shake the can of coconut milk well to mix. Pour into a clean glass jar. Open the probiotic capsules and empty the powder into the jar. Stir with a non-metal spoon.: You will notice a dense cream at the top and thinner liquid beneath, and shaking blends these layers into a uniform base. The sound is subtle as the liquid moves, and visually you want a homogenous pale mixture with no separated pools. This evenness helps the probiotics disperse consistently, ensuring uniform fermentation. A typical mistake is leaving the can sitting after shaking, which allows separation to begin again. If you see streaks of clear liquid, shake again until the texture looks silky and consistent.
- Cover the jar with cheesecloth or a clean dish towel. Secure with a rubber band. Place in a warm area of your kitchen, such as the oven with the light on, for 24 to 48 hours, depending on your taste preference for tanginess.: As you pour, observe the flow, which should resemble a thick cream rather than a watery stream. Using a glass jar helps stabilize temperature and prevents flavor transfer from plastic. The jar should be spotless, no soap residue, because that can interfere with culture activity. If the jar smells faintly soapy or has residue, wash and rinse it thoroughly. A common error is using a warm jar straight from hot water, which can accelerate fermentation unpredictably; aim for a neutral room temperature vessel.
- Once the desired tanginess is achieved, cover the jar with its lid and refrigerate to thicken the yogurt. This will take a few hours.: When you tap the capsule and sprinkle the powder, it should look like fine white dust sitting on the surface for a moment before you stir. This powder contains the live cultures that feed on the coconut sugars. Ensure your probiotic capsules are fresh, since expired cultures may not activate properly. One pitfall is allowing moisture into the powder before using it, which can clump and reduce effectiveness, so open and use immediately.
- Once thick, add maple syrup or other preferred sweetener, mixing to combine until well blended. Serve or store.: Use a wooden or silicone spoon to combine the powder into the coconut milk , watching the ingredients unite into a smooth, slightly glossy mixture. The non metal utensil prevents any potential reaction with the cultures, and stirring until you no longer see the powder dispersed on the surface helps avoid pockets of unfermented milk. If you still see visible clumps, stir gently until the texture is uniformly smooth. Avoid vigorous whisking, which can introduce excess air and alter fermentation behavior.
- Cover the jar with cheesecloth or a clean dish towel: The cover should let air in while keeping dust and insects out, so the fabric draping softly over the jar is ideal. You want the surface to breathe because the cultures need oxygen to thrive, and the warm kitchen air will interact with the mixture. If you cover it too tightly, you risk suffocating the cultures; conversely, leaving it fully open invites contamination. A common mistake is using a lid at this stage, which can trap pressure and affect texture, so use breathable fabric secured with a rubber band.
- Secure with a rubber band: The rubber band holds the cover in place while allowing some airflow. It should be snug but not crushing the rim of the jar, and you will feel the gentle tension when you press it. This small step prevents the cloth from slipping, which would expose the surface. If the band is too loose, drafts can disturb the fermenting surface; if it is too tight, the fabric may not sit properly. Replace a cracked rubber band, as it might snap and leave the jar uncovered.
- Place in a warm area of your kitchen such as the oven with the light on: The chosen spot should be consistently warm but not hot, typically around room temperature up to about 80 degrees Fahrenheit. When you use the oven light method, check that the warmth is gentle, and you may feel a faint cozy heat when you open the oven door. This steady warmth encourages the cultures to metabolize sugars, producing tang and thickening. A frequent error is placing the jar in direct sunlight, which can overheat the surface and create off flavors, so choose a stable, mild warmth.
- Ferment for 24 to 48 hours depending on taste preference for tanginess: During fermentation you will notice a subtle change in aroma, from neutral coconut to a mild tang. Around 24 hours the yogurt tends to be gently tart, and as time extends to 48 hours the tang intensifies and the texture may become firmer. Trust your nose and taste a small spoonful toward the end of your chosen window to decide. Over fermenting can make the yogurt too sour for some palates, so check periodically to avoid an overly sharp result.
- Once the desired tanginess is achieved cover the jar with its lid and refrigerate to thicken the yogurt: Cooling the yogurt in the fridge slows fermentation and encourages the fats to firm up, which deepens the texture into a spoonable consistency. You will feel the jar cool and see a slight condensation before it settles into a denser body. Refrigeration for a few hours yields the best set, and I often leave it overnight for maximum thickness. A common pitfall is skipping refrigeration and expecting immediate firmness; chilling is essential to finishing the process.
- Refrigeration will take a few hours: As the jar chills, the surface becomes less glossy and more matte, indicating the fats are stabilizing. I pay attention to how the yogurt feels on a spoon, aiming for a luxurious coating feel rather than runny liquid. If after several hours it remains loose, allow more time in the cold, as different brands of coconut milk set at different rates. Avoid quick freezing to speed this up, as that can create icy textures and damage the live cultures.
- Once thick add maple syrup or other preferred sweetener mixing to combine until well blended: When you stir in Maple syrup , notice the aroma shift and the way the sweet liquid streaks through before dissolving. Add sweetener sparingly, tasting as you go, because a little enhances flavor without masking the cultured tang. Stir gently to preserve the yogurt's body, and use a wooden or silicone spoon. A mistake to avoid is adding sweetener before fermentation, which can feed unwanted microbes and alter the process; always sweeten after the yogurt has set.
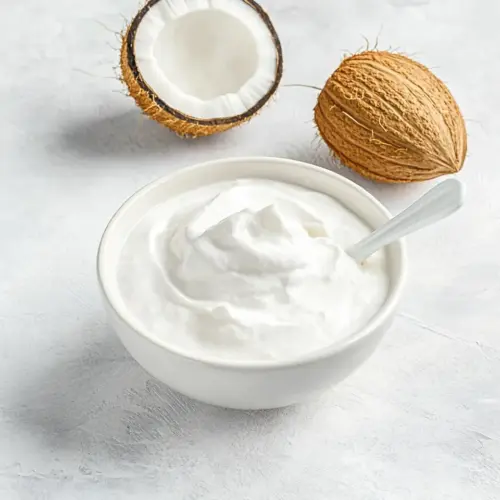
- Serve or store: The final yogurt should be chilled, creamy, and have a pleasant sour note balanced by any sweetener you added. Serve it in bowls with fruit or keep it sealed in the fridge for several days. When storing, use an airtight container and label with the date, because homemade fermented foods have a shorter shelf life than commercial versions. A common error is double dipping with utensils that have been in other foods, which can introduce contaminants; always use a clean spoon.
Notes
- Choose quality coconut milk Use a full fat brand without additives for the best texture; canned options with just coconut and water set more consistently and give the richest mouthfeel.
- Select reliable probiotics Look for capsules labeled with live cultures and strains known for yogurt making, and store them in a cool place to preserve potency.
- Maintain consistent warmth Fermentation prefers steady, mild warmth; try the oven light trick or a warm corner to prevent temperature swings that can slow or unevenly ferment the yogurt.
- Sweeten mindfully Add Maple syrup sparingly after chilling to enhance flavor without overpowering the cultured tang, tasting as you go to get the balance right.
- Adjust thickness naturally If the yogurt is too thin, refrigerate longer; some brands of coconut milk simply need extra chill time to firm up fully.