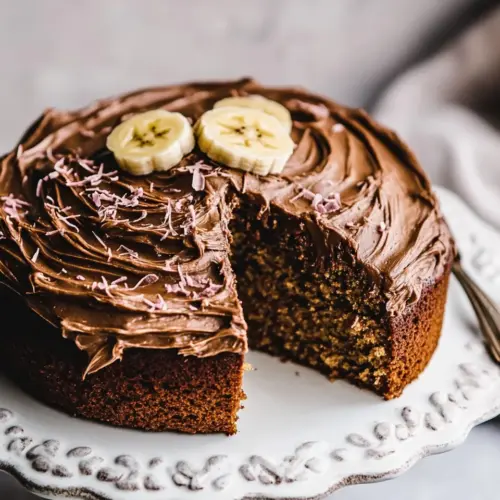
Coconut Banana Cake with Chocolate Frosting
Coconut Banana Cake with Chocolate Frosting is a moist, tender layered cake bursting with roasted banana flavor and tropical coconut texture, finished with a rich chocolate frosting made silky with coconut cream. This creamy and slightly tangy cake is perfect for weekend baking or easy weeknight dessert, offering comforting flavors and crowd pleasing slices you will want to make again.
Equipment
- Stand mixer or hand mixer
- Mixing Bowls
- Three 8 inch round cake pans
- Parchment Paper
- Baking Sheet
- Cooling rack
- Offset Spatula
- Serrated Knife
Ingredients
- 6 ripe bananas, peel on Provide ripe banana sweetness and moisture while adding natural fruit flavor and body to the batter; mash thoroughly to integrate and create a tender crumb. Enhance caramelized notes during baking for depth and to reduce added sugar needs when balanced with other sweeteners.
- 1 cup canola oil Contribute neutral fat that enriches texture and keeps the cake tender without overpowering other flavors; measure precisely to maintain proper batter consistency. Promote even baking and a moist mouthfeel while allowing other ingredients like bananas and coconut to shine.
- 1 cup plain greek yogurt Add tangy creaminess and acidity that brightens the batter and helps tenderize the crumb; stir smooth to avoid lumps and to incorporate evenly. Provide additional moisture and a slight tang that balances sweetness and complements the banana and coconut flavors.
- 3 large eggs Bind ingredients together and provide structure through protein coagulation; beat with sugars until just combined to avoid overmixing. Contribute to leavening, color, and richness, improving overall texture and volume of the cake.
- 1 cup granulated sugar Supply primary granulated sweetness and assist with tenderization when creamed with fats; dissolve into the batter for even sweetness distribution. Promote browning and slight caramel notes during baking, complementing banana flavor.
- 3/4 cup light brown sugar Impart deeper, molasses-like sweetness and extra moisture to the cake due to its higher moisture content; cream with butter or oil for uniform distribution. Enhance richness and add subtle caramel complexity that pairs well with bananas and chocolate.
- 1 tablespoon vanilla extract Deliver aromatic vanilla warmth that enhances overall flavor perception; measure and add to wet ingredients for even flavoring. Tie together banana, coconut, and chocolate notes for a cohesive taste profile.
- 2 teaspoons lemon juice Provide mild acidity that brightens flavors and reacts slightly with baking soda for lift; add to mashed bananas or wet mix to distribute. Help balance sweetness and refresh the palate between rich elements like frosting and coconut.
- 3 1/2 cups all purpose flour Form the bulk of the dry structure and supply gluten to develop the cake's crumb; sift or whisk to remove lumps and ensure even incorporation. Control density and texture when combined with leaveners and liquids for a tender yet stable cake.
- 2 teaspoons baking soda Act as a primary leavening agent that reacts with acidic components to produce carbon dioxide and lift the cake; mix into dry ingredients for even rise. Calibrate amount carefully to avoid overexpansion and coarse crumb.
- 1 teaspoon baking powder Provide additional leavening and subtle lift through heat-activated chemical reaction; combine with baking soda for balanced rise. Help create a finer crumb and ensure the cake is not overly dense.
- 1 teaspoon kosher salt Enhance and season the overall batter by balancing sweetness and intensifying flavors; dissolve thoroughly into dry ingredients. Moderate measurements ensure the cake tastes well-rounded without salty notes becoming dominant.
- 1 cup shredded sweetened coconut Contribute chewy texture and tropical coconut flavor while adding visual interest; fold in gently near the end to preserve shredded integrity. Offer a sweet, toasty note when slightly toasted during baking or on top of the frosted cake.
- 4 ounces cream cheese, at room temperature Bring creaminess and tang to the frosting, creating a smooth, spreadable texture when beaten with butter and sugar. Soften fully to avoid lumps and help stabilize the chocolate frosting while adding subtle richness.
- 2 sticks butter, at room temperature Provide fat, structure, and aeration in the frosting when creamed with sugars; allow to come to room temperature for optimal whipping. Contribute richness, mouthfeel, and stability so the frosting holds peaks and spreads smoothly.
- 1 1/2 -2 cups powdered sugar Add sweetness and structure to the frosting while helping achieve the desired thickness; sift if needed to prevent graininess. Adjust quantity between 1 1/2 and 2 cups to reach targeted consistency and sweetness level for spreading.
- 1 cup unsweetened cocoa powder Deliver concentrated chocolate flavor and deepen frosting color while contributing a dry, intense cocoa backbone; sift before mixing to avoid lumps. Balance with powdered sugar and fats to prevent dryness and ensure a silky frosting.
- 2 teaspoons vanilla extract Provide warm vanilla aroma that complements cocoa and ties flavors together in the frosting; add while mixing to distribute evenly. Enhance perceived sweetness and complexity without increasing sugar content.
- 1/2 cup canned coconut cream Introduce rich coconut flavor and additional creaminess to the frosting, boosting tropical notes and smoothing texture; whisk into frosting for a silky finish. Use measured amount to avoid thinning the frosting too much while amplifying coconut presence.
Instructions
- Preheat oven to 350 degrees F. Grease three 8-inch round cake pans. Line with parchment paper, then butter/spray with cooking spray. Line a baking sheet with parchment paper and place the whole bananas on the baking sheet. Transfer to the oven and roast for 20-25 minutes or until the tops of the bananas are blackened on the outside. Remove from the oven and let cool. Once cool enough to handle, remove the peel, and mash the bananas. In the bowl of a stand mixer (or use a hand-held mixer) beat together the oil, yogurt, eggs, sugar, brown sugar, vanilla, and lemon juice. Beat in the bananas, mixing until combined. Add the flour, baking soda, baking powder, and salt and mix until just combined. Stir in the shredded coconut. Pour the batter among the 3 cake pans and bake 30-35 minutes, until the tops are just set and no longer wiggly in the center. Remove and let cool five minutes, then run a knife around the edges of the pan and turn the cakes out onto a cooling rack. Cover and let the cakes cool completely before assembling. To make the frosting, add the cream cheese and butter to a large mixing bowl. Using an electric mixer beat until the mixture is light and fluffy, about 2 minutes. Add the powdered sugar, cocoa powder, and vanilla. Beat another 2-4 minutes or until the frosting is light and fluffy. Beat in the coconut cream until combined. Place one cake layer on a serving plate or cake stand. Spread with frosting. Repeat with the remaining 2 cake layers. Frost the cake sides. Serve or store in the fridge for up to 2 days. Bring to room temp. before serving.: The moment you set the oven, you should smell a faint warm metal scent as the air heats, which signals even cooking later. Ensuring the oven reaches a steady 350 degrees F prevents underbaked centers and promotes even browning. A common mistake is not waiting for a full preheat, which can make layers bake unevenly, so I always give my oven a few extra minutes and use an oven thermometer when I can.
- Grease three 8-inch round cake pans: Greasing and lining pans with parchment ensures the cakes release easily, and when you run a knife around the edges after cooling you'll see clean sides. If pans are not properly prepared, cakes can stick and tear, so take the time to butter or spray the pans and press the parchment flat into the bottom for a neat removal.
- Line a baking sheet with parchment paper and place the whole bananas on the baking sheet: Placing whole bananas on a lined sheet for roasting creates concentrated caramelization on the skins and a soft interior. The visual cue is the skins turning blackened, and the smell will be intensely sweet and warm. Avoid slicing the bananas before roasting, as exposed fruit can dry out and caramelize unevenly.
- Transfer to the oven and roast for 20 to 25 minutes or until the tops of the bananas are blackened on the outside: During roasting you will hear and then notice no sound, but the aroma will become deeply fragrant and sticky on the peel. This step intensifies flavor and changes texture, making the flesh very soft for mashing. A mistake here is under roasting, which yields less flavor, so wait for the skins to blacken thoroughly.
- Remove from the oven and let cool: After removing the roasted bananas , let them cool until you can handle them safely, which also makes them easier to peel without burning your fingers. Cooling slightly prevents residual oven heat from cooking the batter prematurely if mashed too hot. If you skip cooling, the hot fruit can affect batter temperature and texture.
- Once cool enough to handle, remove the peel, and mash the bananas: The mashed roasted bananas should be soft and jammy, with visible dark flecks from caramelization, and they release a syrupy sweetness. Mash to a consistency with some texture remaining so the cake has body. Overmashing into a completely smooth puree can change moisture distribution slightly, so stop when mostly smooth with small chunks.
- In the bowl of a stand mixer beat together the oil, yogurt, eggs, sugar, brown sugar, vanilla, and lemon juice: When mixing the wet ingredients, aim for a homogenous glossy mixture, about one to two minutes on medium speed, which emulsifies fat and water for even crumb. You will notice the batter become lighter and slightly aerated, which supports lift. A common error is under beating, leaving the mixture separated and causing uneven texture in the cake.
- Beat in the bananas, mixing until combined: Adding the mashed roasted bananas will thicken the mixture and add moisture, so mix just until incorporated to keep crumb tender. The batter will smell deeply banana forward and slightly caramelized. Overmixing at this stage can break down the structure and lead to a gummy cake, so stop when uniform.
- Add the flour, baking soda, baking powder, and salt and mix until just combined: Dry ingredients should be added and mixed briefly to avoid developing gluten, which keeps the cake soft rather than chewy. The batter should look cohesive with no streaks of dry flour . Mixing too long here is the most common mistake, as it makes the cake dense and tough, so fold gently and stop when combined.
- Stir in the shredded coconut: The shredded sweetened coconut disperses into the batter, providing bits of chew and bursts of sweetness. Visually you will see specks of white distributed throughout, and the mouthfeel improves as the coconut softens during baking. Adding coconut too late or in clumps can create uneven texture, so fold it in gently until evenly distributed.
- Pour the batter among the 3 cake pans and bake 30 to 35 minutes, until the tops are just set and no longer wiggly in the center: As the cakes bake the kitchen will fill with a roasted fruit and sugar aroma, and the tops will shift from glossy to matte, signaling doneness. A toothpick inserted into the center should come out mostly clean. Avoid overbaking, which dries the crumb; if the toothpick is clean but the cake still feels slightly springy, remove it and allow residual heat to finish the set.
- Remove and let cool five minutes, then run a knife around the edges of the pan and turn the cakes out onto a cooling rack: After a short rest, loosening the edges prevents tearing and encourages an even release, and cooling on a rack avoids steam building up that can make the bottom soggy. Let them cool completely before assembling so the frosting does not melt. Rushing assembly while still warm is a common error that leads to sliding layers.
- Cover and let the cakes cool completely before assembling: Cooling fully ensures a stable crumb and prevents the frosting from becoming runny. You should be able to touch the cake without leaving an impression when it is ready. Assembling warm layers will cause the frosting to soften and weep, so patience here is key.
- To make the frosting, add the cream cheese and butter to a large mixing bowl: Starting with room temperature cream cheese and softened butter allows them to blend smoothly, creating a light base for the frosting that feels creamy rather than dense. If one ingredient is too cold, you risk lumps. Avoid using ingredients straight from the fridge for this reason.
- Using an electric mixer beat until the mixture is light and fluffy, about 2 minutes: Beating introduces air, making the frosting whipped and spreadable; you'll see volume increase and a pale color develop. This texture helps the frosting hold shape between layers. Overbeating can warm the mixture and make it softer than desired, so stop when light and airy.
- Add the powdered sugar, cocoa powder, and vanilla: Sifting powdered sugar and unsweetened cocoa powder prevents lumps and ensures an even chocolate flavor. Mix until smooth and adjust sweetness to your taste. Adding these dry ingredients gradually helps maintain texture and avoids a gritty finish.
- Beat another 2 to 4 minutes or until the frosting is light and fluffy: This step whips the frosting to a stable consistency, giving it structure for spreading or piping. The frosting should form soft peaks and carry a rich chocolate aroma. If it seems too stiff, a splash of coconut cream can loosen it gently.
- Beat in the coconut cream until combined: Incorporating canned coconut cream adds silkiness and a subtle coconut note without thinning the frosting excessively. Mix until fully integrated and taste to ensure balance. Adding too much liquid at once can make the frosting runny, so add slowly and check consistency.
- Place one cake layer on a serving plate or cake stand: Selecting a stable base helps with even layering, and you should feel confident when spreading frosting so the layer stays centered. A flat top is ideal for neat stacking; if a layer domed, level it slightly with a serrated knife. Failing to level can create a wobbly cake.
- Spread with frosting: Use an offset spatula to apply an even layer of frosting, which helps each layer adhere and keeps slices tidy. Aim for consistent thickness so each bite has the intended balance of cake and frosting. Applying too much frosting at once can squeeze out the edges, so work in thin layers.
- Repeat with the remaining 2 cake layers: Stack carefully, aligning edges as you go to keep the cake balanced and visually pleasing. If the layers shift, pause and adjust before adding more frosting. Rushing stacking can lead to a leaning cake, so take your time.
- Frost the cake sides: Once stacked, apply a crumb coat, chill briefly if needed, then finish with a final smooth layer for presentation. The sides should be even and clean; using a bench scraper gives a polished look. Not chilling between coats can cause crumbs to mix into the final layer.
- Serve or store in the fridge for up to 2 days: Chilling firms the frosting and keeps slices neat, and letting the cake come to room temperature before serving brings out flavor and softness. Store covered to prevent drying. Leaving it unrefrigerated too long can cause the frosting to soften excessively.
- Bring to room temp before serving: Allowing the cake to sit for about 30 minutes at room temperature softens the crumb and lets flavors open up, making slices more flavorful and the frosting less firm. Serve when the cake feels tender but still stable. Serving straight from the fridge will mute flavor and firm the frosting too much.
Notes
- Roasting timing Roasting the bananas until the skins are blackened is crucial, it concentrates sugars and adds caramel notes. If you stop too early the banana flavor will be mild, and if you over roast they can become watery, so aim for that sticky jammy interior.
- Room temperature ingredients Make sure the cream cheese, butter, and eggs are at room temperature, they incorporate more smoothly and create a uniform frosting and batter. Cold ingredients can produce lumps and uneven mixing, which affects texture.
- Adjusting frosting sweetness Start with 1 1/2 cups powdered sugar and add up to 2 cups if you want a firmer, sweeter frosting. Taste as you go and remember the unsweetened cocoa powder balances sweetness, so keep that in mind before adding more sugar.
- Use an oven thermometer Oven temperatures vary, so confirm your 350 degrees F setting with a thermometer for even baking. This avoids under or overbaking which can ruin crumb structure, especially with layered cakes.
- Leveling layers If your cake layers dome slightly, trim them with a serrated knife for even stacking and a professional look. Doing this ensures the frosting layer is even, and prevents the finished cake from leaning.
- Storage advice Store the assembled cake in the fridge for up to 2 days, and bring to room temperature about 30 minutes before serving to let flavors bloom and the frosting soften slightly.