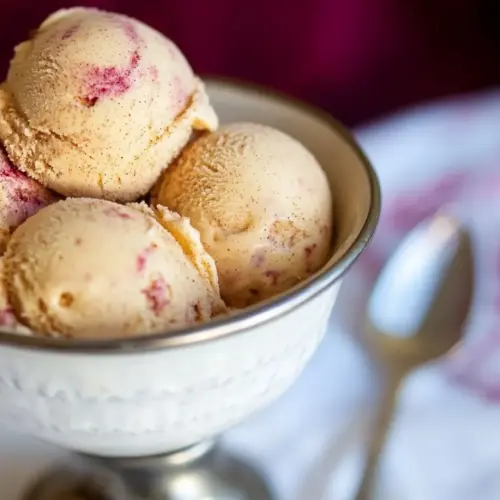
Cinnamon Ice Cream
Cinnamon Ice Cream is a creamy, custard style frozen dessert infused with whole cinnamon sticks for deep aromatic flavor. This silky, rich ice cream balances warm spice and dairy for an indulgent yet approachable treat, perfect for easy weeknight desserts or special occasions. Make it ahead to let flavors meld, then churn for a scoopable, comforting finish you will want to serve again.
Equipment
- Medium Saucepan
- Mesh strainer
- Ice Cream Maker
- Mixing Bowls
- Heatproof spatula
- Mortar and pestle or hammer and ziptop bag
Ingredients
- 1 cup (250 ml) whole milk Heat gently and provide the liquid base for the custard, helping dissolve sugar and carry cinnamon flavor throughout the mixture; contributes to a lighter mouthfeel compared with using only cream and prevents the final custard from being overly heavy.
- 3/4 cup (150 g) sugar Sweeten and balance flavors while aiding in texture by slightly lowering the freezing point of the mixture, which helps produce a smoother, scoopable ice cream; dissolves into the warm milk to create an even sweetness.
- pinch of salt Enhance and balance sweetness by amplifying flavors and rounding out the profile; a small amount intensifies the perception of other ingredients and brightens the custard’s overall taste.
- 10 cinnamon sticks, broken up (in a mortar & pestle, or with a hammer in a ziptop bag) Infuse intense warm, aromatic spice when broken to expose more surface area, releasing essential oils into the milk and cream during heating; provide a more complex cinnamon character than powdered spice when steeped and later strained out.
- 2 cups (500 ml) heavy cream Enrich and add fat for a creamy, luxurious mouthfeel while carrying flavor and stabilizing the frozen texture; combining with milk creates a balanced fat content ideal for smooth custard-based ice cream.
- 5 large egg yolks Thicken and create a custard base by adding richness and structure when tempered into warm milk and cream; gently coagulate proteins upon cooking to produce a silky, stable foundation for freezing.
- ground cinnamon: optional Garnish and add a finishing aromatic note when lightly dusted over scoops, offering optional extra cinnamon fragrance and a hint of spice to complement the infused custard.
Instructions
- Heat the milk, sugar, salt, cinnamon sticks, and 1 cup (250 ml) of the heavy cream together in a medium saucepan. Cover, remove from heat, and let steep 1 hour.: As the mixture warms you will notice the aroma of cinnamon sticks becoming more pronounced, a fragrant sweetness that signals the extraction of essential oils. Aim for gentle heat so the sugar dissolves and the dairy heats evenly, stirring occasionally to avoid scorching. The surface should shimmer but not boil, as a true simmer can create undesirable dairy proteins and change the flavor. If you see small bubbles forming at the edges, lower the heat. A common mistake is rushing to a boil, which can lead to a burnt or cooked milk taste.
- Rewarm the mixture and remove the cinnamon sticks with a slotted spoon.: The steeping period allows time for the cinnamon sticks to infuse the liquid fully, yielding a layered spice character rather than a surface level hit. While it steeps the kitchen will fill with a warm, woody scent that becomes richer over time. Keep the pot covered to trap aromatics and prevent skin from forming on the milk surface. Resist the urge to shorten this wait, because under-steeping results in a weak, flat flavor.
- Nest a medium-sized bowl in a larger bowl that’s partially filled with ice water, to create an ice bath. Set a mesh strainer over the medium bowl and pour the remaining cream into the medium bowl.: Gently reheat until the liquid is warm enough to strain easily, but avoid boiling. When you lift out the cinnamon sticks they should look darker and slightly softened, evidence that oils have been released. Using a slotted spoon prevents carrying solids into the next stage, which keeps texture clean. A frequent mishap is leaving broken bark behind, so inspect the pot and remove any stray fragments before proceeding.
- Whisk together the egg yolks in a small bowl and gradually add some of the warm cinnamon-infused milk to the yolks, whisking constantly. Scrape the warmed yolks back into the saucepan and cook over medium heat, stirring constantly and scraping the bottom with a heatproof spatula, until the custard thickens and coats the spatula.: This setup readies you for immediate cooling of the custard later and keeps the chilled heavy cream cold while you temper the yolks. The sound of the ice clinking in the outer bowl and the sudden chill when you touch the inner bowl are cues that your ice bath is effective. Proper cooling prevents bacterial growth and ensures a quick drop in temperature for smoother texture. Skipping an effective ice bath can make the chilling process slow and invite graininess.
- Remove from heat and immediately pour the custard through the strainer into the cream. Stir the custard until cool, then chill thoroughly in the refrigerator, preferably overnight.: The act of tempering protects the egg yolks from scrambling by slowly bringing them up to temperature. As you add warm liquid drop by drop at first, you will feel the yolks loosen and thicken into a satiny ribbon. Keep whisking with steady motion to maintain a smooth emulsion. If you dump hot liquid too quickly, the yolks can curdle, creating a lumpy texture that is hard to fix.
- Taste the mixture before churning, and add a bit of ground cinnamon, if desired, then freeze the custard in your ice cream maker according to the manufacturer’s instructions.: At this stage the mixture will change from glossy to more viscous, and you can test by dragging the spatula across the bottom, leaving a clean line. Listen for a gentle, quiet simmer and watch for steam; avoid vigorous bubbling which signals overheating. The smell will deepen into a creamy, spiced custard. The reason this step matters is that proper thickening gives the base structure so the finished ice cream is rich and not runny. A common error is stopping too soon, which yields a thin, unstable custard.
- Remove from heat and immediately pour the custard through the strainer into the cream: Passing the hot custard through a fine mesh removes any coagulated bits and captures stray cinnamon fragments, ensuring velvet smoothness. As the custard flows, you will notice it moves more slowly, reflecting the thicker consistency. Stirring as it lands into the chilled cream helps begin the cool down and integrates textures. Neglecting to strain can leave grainy particles that spoil the final mouthfeel.
- Stir the custard until cool, then chill thoroughly in the refrigerator, preferably overnight: Stirring over the ice bath helps bring the temperature down quickly, and once cool, refrigeration deepens flavors and improves freeze quality. The custard will smell faintly spiced and look glossy and settled when ready. I always prefer overnight chilling because it allows molecular bonds to stabilize, yielding a creamier churn. If you rush this step you risk a softer, icier texture when frozen.
- Taste the mixture before churning, and add a bit of ground cinnamon, if desired, then freeze the custard in your ice cream maker according to the manufacturer’s instructions: A final taste test lets you calibrate seasoning, and a small pinch of ground cinnamon can brighten the top notes if the infusion feels muted. As you churn, listen for a change in sound as the mix thickens and watch the texture transition from liquid to soft scoop. Churning incorporates air and sets the structure; follow your machine’s timing for best results. Over-churning can make it grainy, while under-churning yields a too-soft consistency, so stay attentive.
Notes
- Add a citrus twist: Fold in a bit of finely grated orange zest to the chilled base for a bright counterpoint to the warm cinnamon.
- Adjust sweetness: If you prefer less sugar, reduce the sugar by up to a quarter and taste before churning to ensure the balance still supports the spice.
- Boost spice: Stir in a small dash of ground cinnamon after chilling if you want a more immediate cinnamon punch.
- Make it extra creamy: Increase the ratio of heavy cream slightly for a denser mouthfeel, but note it will also increase richness and calories.
- Infuse longer: For deeper spice, let the mixture steep for several hours or overnight in the refrigerator, covered, to extract more flavor from the cinnamon sticks.
- Serve warm pairing: Spoon warm fruit compote over chilled scoops for a contrast of temperature and texture that elevates simple bowls.