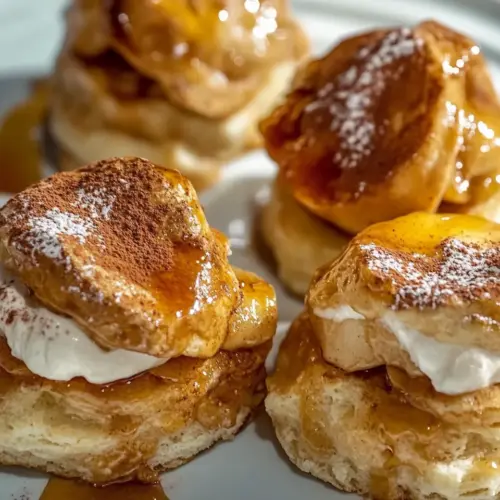
Cinnamon Apple Shortcakes
Cinnamon Apple Shortcakes blend flaky, buttery biscuits with warm, cinnamon spiced apple topping and cloud like whipped cream. This easy favorite delivers crisp edges, tender crumb, and cozy autumnal flavors, perfect for brunch or a relaxed holiday dessert. Make ahead elements keep it approachable, and the result is an irresistible treat worth sharing.
Equipment
- Oven
- Baking Sheet
- Parchment Paper
- Pastry blender
- Mixing Bowls
- Saucepan
- Hand Mixer
- Serrated Knife
Ingredients
- 2 and 1/2 cups (300 grams) all-purpose flour Provide structure and bulk to the shortcakes while developing gluten for a tender crumb; measure precisely by weight for consistent texture. Combine with dry ingredients and fat to form a cohesive dough that rises and holds shape during baking.
- 1/4 cup (49 grams) granulated sugar Add sweetness and help tenderize the dough by slightly weakening gluten; dissolve into dry ingredients for even distribution. Sprinkle some on top before baking if desired to create a light caramelized crust.
- 1 tablespoon (15 grams) light brown sugar Contribute a deeper, molasses-like sweetness and slightly more moisture than granulated sugar; fold into the dough to enhance flavor complexity. Use packed measurement to ensure consistent caramel notes throughout the shortcakes.
- 1 and 1/2 Tablespoons (18 grams) baking powder Leaven the shortcakes to provide lift and a light, fluffy interior; mix thoroughly with dry ingredients to ensure even rising. React with liquid and heat to create air pockets that improve texture.
- 1/4 teaspoon (1.5 grams) salt Enhance overall flavor balance by reducing bitterness and highlighting sweetness; incorporate with dry ingredients. Also helps control yeast or chemical leavening reaction and supports gluten development.
- 1/2 cup (113 grams) unsalted butter very cold, cut into 1/2" cubes Introduce cold fat to create flaky layers and tender pockets by cutting into the flour until pea-sized pieces form; keep chilled to prevent melting. Ensure cubes remain cold to maximize steam generation and flakiness during baking.
- 2/3 cup (170 grams) heavy cream cold Provide moisture and richness to the dough while contributing to tender crumb and browning; keep cold to maintain flakiness. Combine with egg and dry ingredients to form the shortcake dough.
- 1 large egg cold Bind ingredients, add richness, and contribute to structure and color; use cold to keep dough temperature low for flaky results. Whisk with cream before incorporating into dry mixture for uniform hydration.
- 1 teaspoon water Loosen and thin the egg for an egg wash that promotes even browning and sheen; mix with the egg until smooth. Brush onto tops of shortcakes briefly before baking for a golden finish.
- 3 tablespoons granulated sugar Add granulated sugar for sprinkling to create a sweet, slightly crunchy topping that caramelizes during baking. Evenly coat shortcake tops to achieve a pleasant textural contrast.
- 1 teaspoon ground cinnamon Impart warm, aromatic spice to both dough and filling, enhancing apple flavor and warmth; blend with sugars for uniform distribution. Adjust amount to taste to avoid overpowering delicate flavors.
- 6 medium apples peeled, cored, and cut into 1/4" slices Provide the primary fruit component with sweetness, texture, and moisture; slice uniformly for even cooking and presentation. Cook with sugar and spices to create a tender, saucy filling for assembling shortcakes.
- 1 tablespoon (15 grams) lemon juice freshly squeezed Brighten apple filling with acidity that balances sweetness and prevents oxidation; stir into sliced apples before cooking or serving. Fresh lemon juice maintains color and adds a clean, tangy note to the compote.
- 3 tablespoons (43 grams) unsalted butter Contribute richness and a silky mouthfeel to the cooked apple filling; melt with sugars to create a glossy sauce. Add near the end of cooking to enrich flavor and help coat apple slices evenly.
- 1/4 teaspoon (1.5 grams) salt Support seasoning in the filling by enhancing flavor balance and mimicking savory notes; add with other dry spices. Small amounts help control overall taste and bring out apple sweetness.
- 1/4 cup (53 grams) light brown sugar packed Provide molasses-like sweetness and help form a caramel sauce with butter for the apple filling; pack for accurate measurement and even melting. Stir into cooking apples to create depth and glossy texture.
- 1/4 cup (49 grams) granulated sugar Sweeten the filling directly and assist with caramelization during cooking; sprinkle gradually to taste. Granulated sugar also helps draw juices from apples to form the syrup.
- 2 teaspoons (3 grams) ground cinnamon Deepen spiced flavor in the filling with a warm, aromatic profile; mix thoroughly with sugars and apples for even spice coverage. Use sparingly to complement rather than overpower the fruit.
- 1 tablespoon (15 grams) all-purpose flour Thicken the apple juices slightly and help bind the filling to shortcakes; toss with apples to prevent an overly runny compote. Cook briefly after adding to activate starch and achieve proper consistency.
- 2 teaspoons (6 grams) vanilla extract Add floral, sweet aromatics to the filling and whipped cream, enhancing overall flavor complexity; stir in toward the end to retain delicate notes. Use a good-quality extract for best results.
- 1 cup (227 grams) heavy cream cold Enrich and stabilize whipped cream for topping with high fat content, producing a light but sturdy finish; keep cold for optimal whipping volume. Whip with sugar and vanilla to soft or medium peaks for dolloping onto shortcakes.
- 2 tablespoons (14 grams) confectioners' sugar sifted Lightly sweeten and stabilize whipped cream while adding a silky finish; sift to remove lumps and ensure smooth incorporation. Dust over whipped cream or fold gently in for balanced sweetness.
Instructions
- Preheat oven to 400 degrees (F). Line a medium-sized baking sheet with parchment paper and set aside.: The smell of warming oven air signals readiness, and a properly preheated environment ensures the biscuits start setting immediately at the edges for lift and flake. You should feel a slight heat radiate from the oven when you carefully open it, and the parchment should sit flat and unwrinkled on the sheet. One reason this matters is that if the oven is not hot enough, the biscuits will spread instead of rising. A common mistake is placing the pan while the oven is still warming, which causes uneven browning and reduced rise, so wait until the set temperature is reached.
- In a large bowl, combine the flour, both sugars, baking powder, and salt.: The dry mixture will look uniform and slightly powdery, and whisking these ingredients distributes the leavening evenly so every biscuit rises the same. When you lift the bowl, you might see a faint dusting cling to the sides, which is normal. Mixing thoroughly prevents pockets of baking powder that would create uneven pockets and bitter spots. Avoid the temptation to add wet ingredients too soon, because incomplete distribution of the dry components leads to inconsistent texture.
- Add in the cold, cubed butter, and using a pastry blender, cut the butter into the dry ingredients until it resembles a coarse meal. The butter should be no smaller than the size of peas, and no larger than the size of hazelnuts.: As you cut the butter, you will hear a soft rasping sound and see small flakes of butter coated in flour; these create steam during baking for flakiness. The size of the butter pieces matters, because pea sized bits create tender layers, while too fine means a denser biscuit. A pitfall is overworking the butter into the flour, which warms it and ruins the structure, so stop as soon as the mixture looks coarse and speckled.
- Add in the cream and, using a rubber spatula, stir it into the mixture. It will be very shaggy.: The dough will look rough and slightly sticky at first, with bits of flour still visible; that is exactly what you want for a tender crumb. You may smell the faint dairy scent as the cream hydrates the flour, and the dough should hold together when pressed. If it seems overly wet, pause and dust a touch more flour rather than kneading vigorously. Over kneading will develop gluten and lead to tough biscuits, a common misstep at this stage.
- Pour the dough out onto a lightly floured surface and gently knead it together. Use your hands to shape the dough into a 3/4" thick circle.: The tactile feedback is crucial here, you will feel the dough come together and notice it becoming smoother without becoming elastic. Press gently with your fingertips to avoid warming the butter. The 3/4" thickness gives the biscuits body and room to rise, and if the circle is too thin the biscuits will bake flat, which people often do when they roll too aggressively.
- Using a 3" biscuit cutter, cut out 4 biscuits. Gently re-roll any scraps of dough, if needed.: The cutter should glide with a slight pressure, and you may hear a soft thump as it slices cleanly. When re rolling scraps, handle them briefly to avoid toughening, and align the seams so the biscuits hold shape. Cutting in a single motion preserves flaky layers, while twisting the cutter can seal edges and reduce rise, which is a common mistake to avoid.
- Gently transfer the biscuits onto the prepared baking sheet.: When sliding the biscuits, keep them spaced to allow air circulation, and you might notice small crumbs clinging to the parchment which will bake to a pleasant crunch. Transfer carefully so the edges remain tall and uncompressed. Pressing the biscuits down when placing them on the sheet will flatten them and reduce lift, so handle with a light touch.
- In a small bowl, whisk together the egg and water. Lightly brush the top of each biscuit with the egg wash.: The glossy sheen from the egg wash promotes an even, golden brown exterior and a beautiful finish when paired with the cinnamon sugar. Brush with a soft pastry brush for gentle, even coverage. Avoid pooling the wash in crevices, as excess can cause overly browned or sticky spots, which is a frequent oversight.
- In a small bowl, combine the sugar and cinnamon. Sprinkle the top of each biscuit with a teaspoon or two of this mixture.: The scent of cinnamon will lift immediately and the sugar creates a crisp, caramelized top. Sprinkle evenly to avoid concentrated spots that can burn. A common error is adding too much topping in one area, leading to uneven sweetness and texture.
- Bake in the preheated oven for 20 to 22 minutes, or until puffy and golden brown.: As they bake, you will hear a quiet settling and see the biscuits puff and develop a deep golden color, especially at the edges. The aroma of baked butter and cinnamon will fill your kitchen. Use a visual check rather than relying solely on time, because oven temperatures vary; underbaking yields doughy interiors, while overbaking results in dry biscuits, so watch closely near the end of the window.
- Remove from the oven and allow biscuits to cool completely on the baking sheet.: Cooling on the sheet helps the interior set while the exterior remains crisp. You may feel warmth radiating when you lift them, and steam should subside, indicating the crumb has finished setting. Resist cutting into them hot, as this can release steam and make the interiors gummy, which many home bakers do out of impatience.
- In a large mixing bowl, combine the sliced apples with the lemon juice and toss well to coat. Set aside.: The lemon juice adds brightness and prevents browning, and the apples will glisten slightly when well coated. Tossing ensures the citrus is evenly distributed so every slice cooks consistently. A slip is failing to coat thoroughly, which can lead to uneven color and flavor in the final topping.
- In a large saucepan over medium heat, melt the butter. Add the apples, salt, and both sugars and, using a wooden spoon, mix well to combine. Cook, stirring occasionally, until the apples have softened and have begun to release some of their juices, about 10 minutes.: You will hear a gentle simmer as the apple juices release and the sugars dissolve, and the aroma will shift to warm caramel notes. The apples should soften but retain shape; they will shed liquid that becomes the base of your sauce. Stirring occasionally prevents sticking and ensures even caramelization. A common mistake is cooking too high and scorching the sugars, so maintain a moderate heat.
- Add in the cinnamon and flour, mix well, and continue cooking, stirring almost constantly, until the mixture thickens, about 2 minutes. Remove from heat.: You will notice the sauce thicken and cling to the apples, with a glossy sheen forming. The flour eliminates excess runniness, creating a spoonable topping. Stirring almost constantly prevents flour lumps and scorching, while overcooking will dry the apples and concentrate sugars too far, which is a common pitfall.
- Stir in the vanilla and set aside until needed.: The aroma of vanilla extract will bloom as it mingles with warm apples, rounding the flavor and adding depth. Letting it rest cools the filling slightly, which helps when assembling so the whipped cream does not melt immediately. A mistake is adding vanilla too early over high heat, which can drive off its volatile aromatics.
- In a large bowl using a handheld electric mixer, or in the bowl of a stand mixer fitted with the whisk attachment, beat the cream on medium speed until soft peaks form.: Watch for the cream to thicken and form soft peaks that gently fold over when the whisk is lifted. The sound changes from liquid to a gentle whipping whisper. Stop at soft peaks for structure before adding sugar, because overbeating can lead to grainy curds. A common error is leaving the mixer on too long and ending up with butter.
- Add in the confectioners' sugar and continue beating until well combined.: The sifted confectioners' sugar dissolves smoothly into the cream, sweetening and slightly stabilizing it. The mixture will look glossy and slightly stiffer. Ensure the sugar is fully incorporated to avoid grittiness. Using unsifted sugar can leave lumps, which many overlook.
- Increase the speed to high, and beat just until stiff peaks begin to form.: The cream will take on firm structure, holding its shape when the whisk is lifted, and it should be smooth and billowy. Watch closely, because the transition from perfect peaks to overwhipped happens quickly. A frequent mistake is walking away, which risks ending up with grainy, overbeaten cream.
- Turn mixer off and use whipped cream at once!: The whipped cream should be cool and dense enough to sit atop the warm apple topping without immediately melting. Use it promptly for best texture; if left standing it will loosen slightly. If it begins to weep, a brief rewhip can help but avoid overworking it.
- Using a serrated knife, cut each biscuit in half horizontally.: The clean, sawing motion prevents crushing the airy interior, and you will see a soft, layered crumb inside. Cutting cleanly creates a stable base for the filling. A common error is pressing down hard with a straight blade, which compresses the layers and flattens the biscuit.
- Place about 1 cup of the apple topping on top of the bottom biscuit.: Spoon the warm apple mixture so it spills slightly over the edges, offering both sauce and fruit in every bite. The contrast of temperature and texture is part of what makes this dessert sing. Avoid piling too heavily which can make the shortcake soggy; if the topping is very runny, let it cool a touch before assembling.
- Add a dollop or two of whipped cream. Then top with the top of the biscuit. Repeat with all shortcakes.: The cool whipped cream softens the warm apples and adds a velvety mouthfeel, while the final biscuit cap completes the bite. Press lightly to set, but not so hard that the cream squeezes out. Assembling too far in advance can cause steam to soften the biscuit, so assemble close to serving time for best texture.
- Serve and enjoy at once!: The moment you bring these shortcakes to the table the kitchen will smell of butter and cinnamon, and the contrast of warm apple and cool cream invites immediate sharing. Enjoy the layered textures while they are at their peak, because the biscuits are especially lovely the first hour. Waiting too long can reduce the contrast and make the biscuit interior slightly softer.
Notes
- Spiced Apple Filling: Increase the cinnamon in the apple mix and add a pinch of freshly grated nutmeg for extra warmth and complexity, which deepens the aroma and pairs wonderfully with the buttery biscuits.
- Extra Crisp Tops: After brushing the biscuits with the egg wash, sprinkle a mix of granulated sugar and cinnamon for a sparkly, crunchy finish that provides a satisfying contrast to the soft interior.
- Smaller Shortcakes for Parties: Use a smaller cutter to make bite sized shortcakes so guests can sample without committing to a full portion; they are easier to serve and look charming on a platter.
- Make Ahead Filling: Prepare the apple topping a day in advance and refrigerate; rewarm gently before assembly to preserve texture and make serving stress free for gatherings.
- Stabilized Whipped Cream: Add a teaspoon of sifted confectioners' sugar and a splash of cold heavy cream to help the whipped cream hold its shape longer for buffet style service.