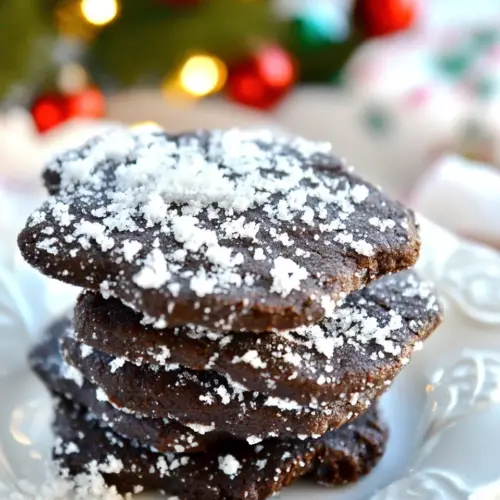
Chocolate Shortbread Snow Cookies
Chocolate Shortbread Snow Cookies are buttery and tender with a delicate chocolate backbone and a snowy dusting of confectioners sugar. These cookies are crisp at the edges and sandy in the center, making them perfect for winter gatherings or gifting. Easy to make and forgiving, theyre an approachable treat that rewards patience and chill time, offering a reason to bake and share during the holidays.
Equipment
- Mixing Bowl
- Sifter
- Mixer
- Plastic Wrap
- Rolling Pin
- cookie cutter or pie crimper
- Baking Sheet
- Parchment Paper
- Wire Rack
Ingredients
- 1 3/4 cup all purpose flour Provide structure and bulk to the cookie dough, creating a tender crumb when combined with fat and proper mixing. Bind with the other dry ingredients to achieve the shortbread's characteristic crumbly texture while supporting the cocoa's flavor.
- 3/4 cup granulated sugar Add sweetness and help tenderize the dough by interacting with fat and egg yolk, contributing to a delicate texture. Also assist in slight spreading and browning during baking for balanced sweetness.
- 1/2 cup cocoa powder Impart rich chocolate flavor and a deep color while absorbing some moisture from the dough, intensifying the cookie's cocoa profile. Work with the flour and butter to produce a fudgy, bittersweet base typical of chocolate shortbread.
- 12 oz . butter softened Provide fat that coats flour proteins to inhibit gluten development, resulting in tender, crumbly shortbread texture. Contribute flavor, richness, and help the dough hold together while promoting proper mouthfeel and bake characteristics.
- 2 tsp . vanilla Contribute aromatic, sweet vanilla notes that enhance and round out the chocolate flavor. Provide subtle depth and complexity, elevating the overall taste profile of the cookies.
- 1 egg yolk Help enrich the dough and add binding power without the full liquid of a whole egg, contributing to a firmer yet tender texture. Aid in emulsifying fats and providing a richer color and mouthfeel.
- 1/4 tsp . salt Enhance overall flavor by balancing sweetness and intensifying other ingredients, while also slightly tightening the dough by affecting protein interactions. Improve the finished cookie's taste harmony with just a small amount.
- confectioners sugar for sprinkling snow Create a snowy visual finish and add a touch of extra sweetness when dusted over the baked cookies. Provide a delicate contrast in texture and appearance, reinforcing the winter-themed presentation.
Instructions
- In a medium bowl sift the flour, salt and cocoa powder. Set aside.: The first sensory cue to notice is the dry, cocoa aroma and the fine, powdery texture as you sift together the all purpose flour , salt , and cocoa powder . Sifting removes lumps and aerates the mixture, which helps produce an even crumb in the finished cookie. You should feel a light, almost dusty texture on your fingers and see a uniform chocolate tone across the bowl. This step matters because if the dry ingredients are not well combined, you may end up with pockets of salt or cocoa, causing uneven bites. A common mistake is skipping sifting; that can leave clumps that do not incorporate and create unpleasant gritty spots. Take your time to gently tap the sieve and use a spoon to encourage stubborn bits through, ensuring a smooth base for the dough.
- Beat the butter on low speed until creamy and whipped (about 1 minute).: As you start beating the butter , listen for a steady, quiet thrum from the mixer and watch the butter turn paler and softer, developing a satiny sheen. The goal here is not a glossy peak, but a light, whipped texture that helps the sugar dissolve and traps air for a delicate crumb. If the butter looks greasy or starts separating, it is too warm and you should chill it briefly. A common pitfall is using butter that is too cold, which will not cream properly, leaving a lumpy base; alternatively, overbeating can melt the butter, affecting dough structure. Keep the speed low and check after about a minute to ensure the texture is creamy but not oily.
- Add the sugar in 3 portions to the butter until well combined, about 2 minutes after each addition.: You will notice a gradual change in sound and texture as the granulated sugar dissolves into the butter. After each addition the mixture will lighten in color and feel smoother to the touch. Adding sugar in portions helps the crystals dissolve without leaving a grainy mix, which is important for a tender shortbread. If the mixture seems gritty after two minutes, scrape the bowl and continue mixing a bit longer. A common error is dumping all the sugar in at once, which can overwhelm the butter and leave a coarse, uneven texture that affects how the cookie bakes.
- Add in the egg yolk and vanilla and beat until well blended.: When you incorporate the egg yolk and vanilla , notice the mixture gaining a glossy, cohesive look, signaling proper emulsion. The scent of vanilla will lift the chocolate and the yolk will add a richer mouthfeel. Blend until the mixture looks uniform and there are no streaks of yolk. If you add the yolk to cold butter, it may not incorporate smoothly, so ensure the butter is at the correct softness. Avoid overmixing here, as it can add unnecessary air and change the texture of the dough later on.
- Add the flour mixture in, in stages until blended either low speed on a mixer or by hand.: As you fold in the sifted flour , cocoa , and salt in stages, you will see the batter transform from glossy and soft to a cohesive dough. Adding in stages prevents overworking the dough and helps maintain a tender crumb. The sound changes to a denser, quieter mix, and visually you will see pockets of dry ingredients disappear. Overmixing at this moment can develop gluten and make cookies tougher, so stop mixing once no streaks remain. If the mixture seems dry, a brief gentle knead by hand can rescue it without overworking.
- Gather the dough and place on plastic wrap forming three separate discs. Place the disks in the refrigerator for at least two hours. Overnight is best.: Forming the dough into discs chills it evenly and makes rolling easier. You should feel a cool, firm dough that holds shape yet yields slightly to pressure. Chilling solidifies the butter, which helps maintain cookie shape during baking and develops flavor. If you try to roll warm dough, it will be sticky and tear, so chilling is essential. A common mistake is skipping sufficient chill time, which can cause spreading in the oven and a denser texture. I like to wrap each disc tightly so they do not dry out in the fridge.
- Remove one disk of the dough from the refrigerator, rest to slightly soften. Place the dough between two sheets of waxed paper the size of the baking sheet (lightly sprinkle paper with flour) and roll to 1/8 – 1/4 inch thick.: When you take a disc from the fridge, allow it to sit for a few minutes so it softens just enough to roll without cracking. The tactile cue is a dough that moves under the rolling pin but springs back slightly. Rolling between waxed paper keeps the surface clean and reduces sticking, while a light dust of flour prevents tearing. Aim for a uniform thickness so cookies bake evenly; anything uneven will produce cookies with mixed textures. A typical error is rolling too thin, which yields overly crisp cookies, or too thick, which makes them underbaked in the center.
- Remove top layer and cut into squares with a pie crimper or use a cookie cutter. Place the cookies on a parchment paper lined baking sheet. They don’t spread so you can have them fairly close.: As you cut shapes, you will hear a clean, satisfying sound and see neat edges. Transfer the pieces gently to the lined sheet; they should hold their contours well because of the chilled butter. Because these cookies do not spread much, you can arrange them relatively close, which is efficient for baking. Watch for any dough that becomes warm and floppy during cutting, that will need a quick chill before baking. A frequent slip is crowding the pan too tightly if using thicker cuts, which can limit airflow and unevenly bake the cookies.
- Bake in a pre heated 350° oven for 10-12 minutes.: You will notice the oven scent change within minutes, a rich cocoa aroma filling the kitchen. Look for slightly set edges and a firm surface, the visual cue that they are done. The goal is not deep browning, but a light, even bake that preserves the tender interior. If you wait for deep color you risk drying them out. A common mistake is not preheating the oven, which leads to inconsistent baking and possible underdone centers. Keep the temperature steady and check the cookies around the ten minute mark.
- Let them rest for a few minutes on the cookie sheet then gently transfer them to a wire rack to cool.: As they rest, you will feel the residual warmth and smell the concentrated chocolate. Leaving them to cool briefly on the sheet lets them firm up, making transfer safer without breakage. Move them carefully to a wire rack so air can circulate and cool the bottoms, preserving crispness. If you try to move them while too warm, they can break or deform. A common oversight is stacking warm cookies which traps steam and softens texture; always cool completely before storing.
- Just before they are completely cooled, sprinkle with confectioner’s sugar.: The final dusting should be done when the cookies are mostly cooled to prevent the sugar from melting away. You will see a delicate white contrast against the chocolate surface, like a light snowfall. This finishing touch adds a soft sweetness and a visual flourish. If you sift the sugar too early, it will dissolve on the hot surface and lose the pretty snowy effect. Aim for a gentle, even dusting to maintain that classic look.
Notes
- Chill time matters: Allow at least two hours of chilling, or preferably overnight, because chilling firms the butter which prevents spreading and deepens flavor. Overnight chilling lets the flour hydrate slightly, producing a more cohesive dough and a better shortbread texture.
- Use room temperature but not warm butter: Butter should yield with a gentle press but not be soft to the point of greasy. Properly softened butter creams smoothly with sugar to create an aerated base, whereas over softened butter can lead to a greasy, slack dough and under softened butter will not incorporate properly.
- Roll evenly: Aim for a uniform thickness of about 1/8 to 1/4 inch so cookies bake consistently. If parts of the dough are thinner, those cookies will be crispier and may overbake before larger pieces are done. Rotate the dough and check thickness visually as you roll.
- Keep a light hand with flour for dusting: A minimal dusting prevents sticking without drying the edges. Too much flour on the rolling surface can work into the dough, changing the texture and making cookies tougher. Use just enough to keep things moving smoothly.
- Store properly: Once cooled, keep cookies in an airtight tin at room temperature for up to five days for best texture. If you need longer storage, freeze baked cookies in a single layer on a tray, then transfer to a sealed container; they thaw quickly at room temperature.