Chocolate Reindeer Bark
Chocolate Reindeer Bark is a festive, crunchy treat featuring glossy dark chocolate, crunchy pretzels, and bright candy accents. This easy to assemble no bake dessert offers a balance of sweet and salty textures, ideal for holiday gifting or quick party platters. Make a big batch for gatherings, or wrap pieces for heartfelt presents to share the season.
Equipment
- Microwave-safe Bowl
- Baking Sheet
- Parchment Paper
- Offset Spatula
- Sharp Knife
Ingredients
- 212 ounce bags dark chocolate chips Melted to create a glossy, rich base that binds toppings and provides deep chocolate flavor; melts smoothly when combined with coconut oil and sets firmly when cooled. Enhances texture and mouthfeel while carrying the sweetness and cocoa notes throughout each bark piece.
- 1 tablespoon coconut oil Added to thin and gloss the melted chocolate, improving pourability and resulting in a shiny, smooth finish; also helps prevent the chocolate from seizing. Contributes a subtle hint of coconut aroma and creates a more manageable consistency for spreading and coating.
- small pretzels Broken or halved to lend a crisp, salty crunch that contrasts the sweet chocolate; provides visual interest and a familiar snack texture for added enjoyment. Acts as small anchors in the bark to hold other toppings and create bite-sized pieces.
- holiday sprinkles Sprinkled over the surface to add color, festive flair, and a slight sugary crunch; helps make the bark visually seasonal and attractive for holiday serving. Comes in various shapes and sizes that distribute sweetness and decorative texture across the chocolate.
- red candy coated chocolate Scattered to provide pops of bright color and a familiar chocolatey interior; helps create the reindeer nose effect and adds small bursts of candy shell crunch. Offers both decorative appeal and additional sweetness that kids and adults recognize and enjoy.
- candy eyes Placed to create whimsical facial features and enhance the holiday theme; adds a playful look while contributing a tiny bit of sugary texture. Helps turn simple chocolate pieces into characterful treats that are fun to serve and gift.
Instructions
- To make pretzel antlers, cut mini pretzels in half lengthwise. Use a small knife to trim them into antler shapes, similar to the images above.: The air will smell faintly of salt and baked dough as you trim the pretzels , and the thin crisp edges will glint in the light. Use a small, sharp knife to slice each mini pretzel down the middle, then gently wedge pieces apart to reveal antler like shapes. The tactile feedback is important, you want neat, curved arms that resemble antlers. Why this matters, the antler shapes provide the visual reindeer identity and the right balance prevents the antlers from sinking into the chocolate. One common mistake is applying too much pressure and shattering the pretzels , so take small, deliberate cuts and keep your fingers clear of the blade. If a piece cracks, set it aside for a smaller reindeer or use it to decorate the edges of the bark. The crisp snapping sound tells you the pretzel is fresh and will hold its shape once assembled.
- Combine chocolate and coconut in a bowl. Microwave for 1 minute, stir, and microwave for an additional 30 seconds or until the chocolate is fully melted.: The moment you begin gently heating the dark chocolate chips with the coconut oil , the room takes on a warm cocoa aroma that feels cozy. Microwave in short bursts while stirring between each burst to coax the chocolate into a velvet smooth pool. Stirring brings out the glossy sheen and ensures the oil emulsifies into the chocolate for an even texture. This technique prevents overheating which can make the chocolate grainy. A common pitfall is leaving the bowl unattended in the microwave, causing the chocolate to scorch, so use 20 to 30 second intervals and stir until the mixture is fully fluid and lustrous. You want it glossy and thick enough to coat a spoon without running off too quickly.
- Pour the melted chocolate mixture onto a parchment-lined baking sheet, spreading it evenly to form a quarter-inch thick rectangle.: When you pour the glossy melted chocolate, it should flow like a dark ribbon and pool into a smooth layer on the parchment. Tilt the sheet gently or use an offset spatula to spread it into a uniform quarter inch thick rectangle, watching for even edges and a level surface that will set predictably. The visual cue to stop spreading is when the chocolate reflects light evenly without visible streaks. This even thickness ensures consistent snap and bite across all pieces. A common mistake is spreading too thinly, which yields fragile shards, or too thickly, which takes much longer to set. If edges look uneven, nudge them inward quickly for a harmonious shape.
- Sprinkle holiday sprinkles over the melted chocolate.: As soon as the chocolate surface is glossy and still tacky, scatter the holiday sprinkles so they adhere. The contrast of colors against the deep chocolate creates immediate festive energy. While sprinkling, think about distribution, leave space for facial features and avoid clumping. This step matters because sprinkles that are applied while the chocolate is too cool will not stick, and if applied too early they may melt into the surface. A frequent slip up is waiting until the chocolate is mostly set; work while it is still slightly soft for best adhesion. The sound of the tiny sugar pieces landing is almost like confetti, and visually you should see them nestle on the surface rather than sink.
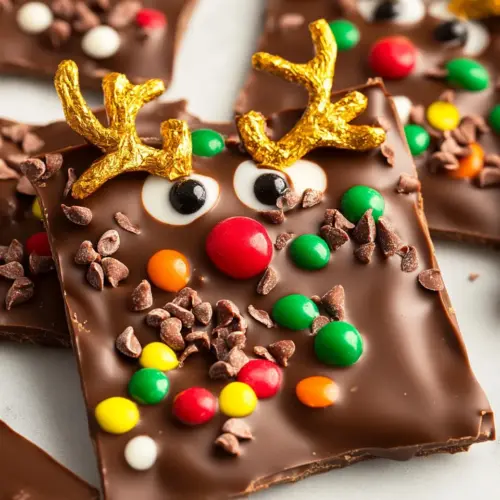
- To make the reindeer faces, place a red chocolate candy on the chocolate piece to represent the reindeer’s nose. Position two eyes closely together just above the chocolate piece. Attach the pretzel antlers above the eyes.: Focus on placement precision here, because the red candy coated chocolate nose defines the face. Gently press each nose into the chocolate, then position two candy eyes closely above it, followed by affixing the prepared pretzels as antlers above the eyes. The tactile process of pressing candies gives you a satisfying slight resistance that tells you they are seated but not submerged. This matters because correct placement ensures the character of each reindeer reads clearly after cutting. One common mistake is crowding features too tightly which can cause cracking when the bark is sliced, so allow a little breathing room between faces. The visual satisfaction of a completed face is immediate and rewarding.
- Freeze the chocolate sheet for 15 minutes or overnight. Once set, cut the chocolate into pieces. Refrigerate, freeze, or arrange in gift boxes for a delightful holiday treat.: When you transfer the sheet to the freezer, you will notice a sudden firming, and within 15 minutes the chocolate should set to a clean snap. Quick chilling helps the dark chocolate chips harden evenly and keeps embellishments in place. If you have more time, chilling overnight produces the firmest results and makes cutting neater. A common issue is removing the sheet too soon which leads to smudged edges and loose toppings, so err on the side of extra chilling if you are unsure. Once set, use a sharp knife or a sturdy bench scraper to cut the bark into pieces, and you will hear a satisfying crunch as the chocolate gives way.
- Once set, cut the chocolate into pieces: After chilling, the surface will be matte and the edges will cleanly fracture when cut. Use a steady hand and a heavy blade to slice through the sheet, aiming for varied sizes to make the presentation playful. The why is practical, smaller pieces are great for gifting while larger ones are ideal for sharing at parties. A troubleshooting tip is to briefly warm the knife under hot water and dry it before each cut for smoother lines, but avoid letting the knife get so hot it melts the edge of the bark. The sound and feel of slicing finished bark is a final small joy in the assembly process.
- Refrigerate, freeze, or arrange in gift boxes for a delightful holiday treat: Storing the pieces properly keeps them crisp and prevents blooming. I like to layer pieces in an airtight container with parchment between layers, and for longer storage place them in the freezer. Presenting them in clear boxes with a festive ribbon makes for an irresistible gift. The decision to refrigerate versus freeze depends on how soon you plan to serve them; refrigeration is quick and accessible, freezing maximizes shelf life. A common mistake is exposing the bark to fluctuating temperatures which can cause surface bloom, so maintain steady cold storage until serving. The final sensory moment is opening the box and inhaling rich chocolate aroma mixed with the scent of salt from the pretzels .
Notes
- Polished Perfection: Give the bark a quick thaw after freezing before cutting to achieve smooth, clean edges and a refined presentation.
- Velvety Chocolate Bliss: Melt the chocolate in short bursts and stir between each to maintain a silky texture and avoid burning the dark chocolate chips.
- Whimsical Pretzel Fun: Experiment with pretzel shapes to craft unique antlers, and reserve broken pieces for accenting the edges of the bark.
- Family Style Decorating: Turn decorating into a group activity, letting kids place the red candy coated chocolate and candy eyes for personal, memorable touches.
- Gift Worthy Presentation: Ensure the bark is fully firm before packaging, then use clear boxes and festive ribbons to make a charming homemade gift.