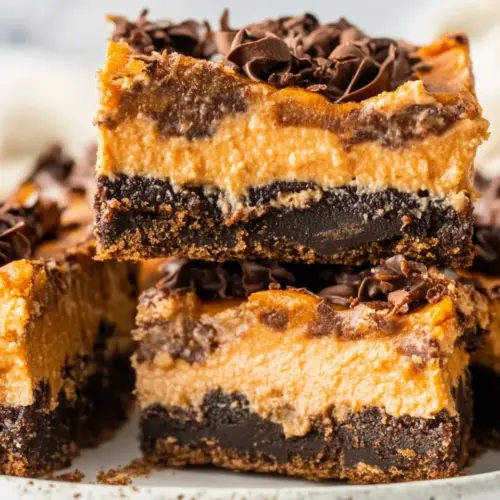
Chocolate Pumpkin Cheesecake Bars
Chocolate Pumpkin Cheesecake Bars blend a fudgy chocolate base with a creamy, spiced pumpkin cheesecake layer and a crunchy crumble topping. Rich, creamy, and easy to slice, these bars offer cozy autumn flavors ideal for gatherings or make ahead desserts. They balance spice and chocolate beautifully, making them a must make this season for a reliable crowd pleasing treat.
Equipment
- 9×13 baking dish
- Mixing Bowls
- Stand mixer or hand mixer
- Offset Spatula
- Measuring Cups and Spoons
Ingredients
- 15.25 ounces chocolate cake mix boxed Provide structure and cocoa flavor to form the brownie-like base and contributes sweetness; use straight from the box and press into the pan to create an even crust for the cheesecake bars. Enhances chocolate notes and shortens prep time compared to making cake batter from scratch.
- 1 large egg Bind the cake mix and melted butter together to form a cohesive crust; incorporate at room temperature and beat briefly for even distribution. Adds richness and helps the base set during baking for easy slicing.
- 1/2 cups salted butter melted Melt into the cake mix to moisten and enrich the crust with fat, creating a tender, sliceable bottom layer. Use salted butter for a subtle savory balance against the sweet batter.
- 8 ounces cream cheese softened to room temperature (1 brick) Provide creamy richness and a smooth, tangy profile to the cheesecake layer; ensure fully softened for lump-free mixing and a velvety texture. Supplies structure and moisture that set during baking for the classic cheesecake mouthfeel.
- 15 ounces pumpkin puree 1 can Add a dense, earthy pumpkin flavor and moisture to the cheesecake layer; use canned puree for consistent texture and convenience. Contributes to the batter’s body and pairs with warm spices to define the seasonal character.
- 2 large eggs room temperature Help set and stabilize the cheesecake filling while adding richness; beat in at room temperature for a silky, homogenous texture. Eggs also help bind ingredients and create a tender, custard-like interior.
- 1 teaspoon vanilla extract Enhance overall sweetness perception and round out flavors with warm, aromatic vanilla; stir in during mixing for even distribution. Elevates the pumpkin and chocolate elements without overpowering them.
- 2 teaspoons ground cinnamon Provide warm, aromatic spice that complements pumpkin and deepens flavor complexity; measure carefully and mix thoroughly into the filling. Cinnamon adds cozy, familiar notes that carry through baking.
- 1/2 teaspoons salt Balance sweetness and enhance other flavors while controlling overall seasoning; add to both filling and dough as specified to moderate sweetness. Salt also strengthens the perception of chocolate and spices.
- 1 teaspoon ground nutmeg Introduce a warm, slightly sweet nutty aroma and mellow heat to the pumpkin cheesecake; use ground nutmeg sparingly for best results. Works in concert with cinnamon and cloves to create a traditional autumn spice blend.
- 1 teaspoon ground cloves Contribute a sharp, warm spice that intensifies the spiced pumpkin profile; incorporate into the filling for depth and complexity. Cloves are potent, so a small amount is sufficient to add distinctive warmth.
- 3 cups powdered sugar Sweeten and sweeten further while contributing lightness to the filling when sifted in; powdered sugar dissolves quickly for a smooth, glossy texture. Adds sweetness and helps achieve the desired consistency without graininess.
- 3/4 cup all purpose flour Provide structure and a slight chew to the streusel or topping layer; use all-purpose flour as the neutral base for crumbly mixtures. Helps bind sugars and butter into desirable crumbles that brown in the oven.
- 3/4 cup brown sugar Add deep, molasses-like sweetness and moisture to the crumble or topping; brown sugar contributes both flavor and chew due to its molasses content. Press into the topping mixture to create caramelized notes when baked.
- 2 teaspoons ground cinnamon Enhance the spiced profile in the topping or filling by repeating warm cinnamon notes; sprinkle into the crumble or mix into batter for a cohesive spice experience. Reinforces cinnamon presence so it carries through every bite.
- 8 tablespoons salted butter very soft Provide rich fat and softness to form a cohesive streusel topping; use very soft butter for easy incorporation into dry ingredients. Encourages browning and a tender, melt-in-mouth crumble texture atop the bars.
- 1/2 cups semi-sweet chocolate chips or chunks Melt into pockets or sprinkle across the top to deliver bursts of chocolate and textural contrast; use semi-sweet for balanced bitterness and sweetness. Adds visual appeal and flavor pockets that complement both pumpkin and cheesecake layers.
Instructions
- Preheat your oven to 350°F. Grease a 9×13 baking dish with nonstick cooking spray or butter OR line with parchment paper. Set aside.: You will notice the anticipation in the air as the oven warms, a faint dry heat that promises browning. Getting the temperature right matters because it determines how the base and center set, and ensures the top develops color without overbaking. A common mistake is skipping the parchment or not greasing well, which can cause the bars to stick and break when removed; take an extra moment to line the pan carefully. The oven hum will become steady and you may smell faint toasty notes as it reaches 350°F, which is your cue to move on to mixing the base.
- In a medium bowl or the bowl of a stand mixer, combine the chocolate cake mix, egg and melted butter. Mix until smooth.: Right away you will feel the batter change from powdery to glossy, and the aroma of cocoa will become noticeable. Mixing until smooth helps the base bind uniformly so there are no dry pockets that won’t bake through. If you mix too long at high speed you can incorporate excess air, which may create larger holes or cause the base to rise oddly, so mix just until unified. The batter should be thick and slightly shiny, with no streaks of flour or butter.
- Press the cake mixture into the bottom of the baking dish.: As you press, you will feel the texture firm under your palms or the back of a spoon, and the surface should become compact and even. Pressing evenly is why this step is important, it guarantees a consistent base thickness and prevents thin spots that bake faster than the center. A common error is leaving the edges thinner than the center, which can lead to uneven texture; use even pressure and check corners carefully. The surface will look matte but held together when you are done.
- Add the softened cream cheese and pumpkin puree to a separate medium bowl or the bowl of a stand mixer. Mix until no lumps remain.: You should see the mixture become glossy and homogenous, with the cream cheese losing its stiffness and the pumpkin folding in smoothly. This matters because lumps can create pockets of uneven texture in the baked layer, affecting the final mouthfeel. If the cream cheese is not fully softened, you risk a lumpy filling, so take the time to bring it to room temperature. The aroma will be neutral now but rich and creamy in appearance.
- Add the eggs, vanilla extract, ground cinnamon, salt, nutmeg and cloves and mix to combine.: As the spices blend, the bowl will begin to smell warmly aromatic, and the filling will gain a silky sheen. These spices create the pumpkin profile, so even distribution is crucial for balanced flavor in every bite. Overmixing can aerate the filling, which might lead to cracking, so stir until smooth and just combined. Watch the color shift to a uniform tan, which signals the ingredients are incorporated properly.
- Add the powdered sugar a little at a time and mix until everything is smooth.: Incorporating the powdered sugar gradually prevents graininess and ensures the filling thickens uniformly, contributing to a creamy, stable texture. The mixture will become denser and smoother, and you may detect a sweeter lift in the aroma. A typical pitfall is dumping all the sugar in at once, which can create pockets that do not dissolve; take your time and scrape the bowl frequently to ensure an even result.
- Stir together the flour, brown sugar and cinnamon in a bowl.: This dry combination will become the base for your crumble, and mixing these ingredients yields an even color and flavor. The brown sugar lends moisture and a deep sweetness, while the flour gives structure so the crumble bakes into golden clumps rather than melting away. A common oversight is not breaking up clumps in the brown sugar, which can lead to uneven streusel texture; use a fork or whisk to blend thoroughly.
- Add the softened butter and mix it in with a fork until clumps form.: The tactile action of mashing soft butter into the dry mix encourages small pebble like clumps to form, which will bake into crisp, caramelized bits. The temperature of the butter is key; too cold and you cannot create clumps, too warm and the topping will spread. Overworking will create a paste rather than clumps, so gently press until coarse pieces appear. The topping should hold its shape when pinched between fingers.
- Pour the pumpkin batter over the cake batter and smooth until it evenly covers the chocolate cake layer.: When you spread the filling across the chocolate base you will notice a distinct separation of color, a pleasing contrast that indicates even layering. Smooth the surface so the filling bakes uniformly and the middle sets at the same pace as the edges. If you leave the filling uneven, thinner spots will bake faster and may crack, so use an offset spatula or the back of a spoon to level the top carefully. The surface should look satin smooth once finished.
- Next, evenly sprinkle the top with the chocolate chips.: As you scatter the semi-sweet chocolate chips , they will nestle into the filling and create melty pockets when baked. Even distribution ensures every square will have a pleasant chocolate surprise. A common issue is clumping the chips in one area, which makes pieces inconsistent; take the time to dot them uniformly. The chips will glisten slightly against the pumpkin layer before baking.
- Sprinkle the top with the crumble mixture.: Gently press a few clumps into the surface so they adhere, but leave some loose pieces for crunch. The crumble will brown and caramelize, offering texture contrast to the smooth filling. Avoid smashing the crumble completely flat, because that removes the clumpy texture that gives visual and mouthfeel interest. The streusel should sit in clumps and cover the top in an even but rustic pattern.
- Bake at 350°F for 50 to 60 minutes or until the center isn’t jiggly and everything looks golden brown.: During baking you will see the edges pull slightly away from the pan and the top will take on a warm golden brown tone, with small bubbling around the chocolate chips. The center should no longer jiggle when gently nudged, a sign the filling has set without drying out. Overbaking will lead to a dry texture, so start checking near 50 minutes and use a gentle jiggle test. The aroma at this stage is rich, aromatic, and deeply comforting.
- Remove from the oven and let cool before serving.: Cooling allows the bars to finish setting, making cleaner slices and a firmer texture. As they cool you will notice the steam fade and the layers knit together, which improves the final mouthfeel. A common error is cutting too soon, which can cause the filling to run; wait until they are thoroughly cool or chilled for neat squares. Once cooled, the bars will hold their shape and be easier to transport or store.
Notes
- Bring dairy to room temperature: Let the cream cheese and eggs sit at room temperature for about 30 minutes so they incorporate seamlessly into the filling, preventing lumps and ensuring a silky texture.
- Use an even press for the base: When pressing the chocolate cake mix base into the pan, use the bottom of a measuring cup to get uniform thickness, which helps the bars bake evenly from edge to center.
- Add powdered sugar gradually: Incorporate the powdered sugar in small increments to prevent a gritty filling and to monitor sweetness and texture, stopping when the mixture becomes glossy and smooth.
- Form crumble clumps intentionally: Use a fork to cut the softened butter into the crumble ingredients until you have pebble like clumps, these will bake into delightful crunchy pockets instead of melting flat.
- Watch the oven near the end: Start checking at 50 minutes and use the gentle jiggle test rather than relying solely on color, which ensures the center is set without drying the bars.
- Store properly: Refrigerate the cooled bars in an airtight container for up to five days, or freeze layers between parchment for longer storage to protect texture and prevent sticking.