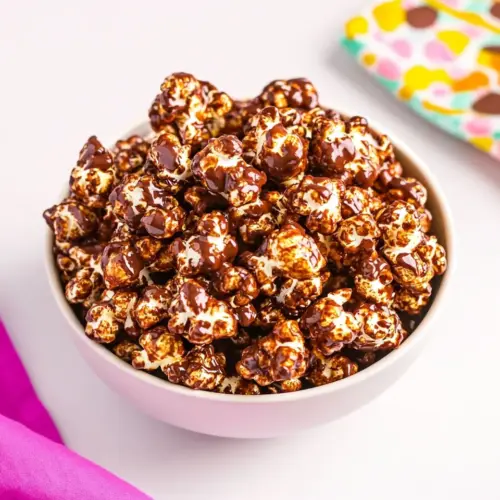
Chocolate Popcorn
Chocolate Popcorn brings together crispy popped popcorn and a glossy chocolate caramel for a crunchy, slightly salty snack. This easy treat is perfect for movie nights, parties, or quick homemade gifts, combining toasted sugar depth with cocoa warmth. Make a big batch fast and enjoy a delightful sweet and salty bite that keeps people reaching for more.
Equipment
- Kitchen Scale (optional)
- Baking Sheet
Ingredients
- 190 grams popped popcorn about 24 cups Provide light, airy crunch and serve as the base vehicle for the chocolate coating; measure popped popcorn carefully so pieces fit the batch and avoid unpopped kernels to prevent tooth damage. Store in a large bowl while preparing the candy coating to ensure even tossing and coating coverage. Break up any large clusters gently so chocolate adheres uniformly to individual pieces.
- 1/2 cup brown sugar 107 grams Add sweet, caramel-like depth and help create a glossy, slightly chewy coating when combined with butter and corn syrup; stir until sugar dissolves to avoid grainy texture. Brown sugar also balances cocoa bitterness and enhances overall flavor complexity in each bite. Use slightly packed measurement if recipe specifies for consistent sweetness.
- 1/2 cup unsalted butter 113 grams, slightly melted (1 stick) Provide rich, creamy fat that melts into the sugar mixture, lending a smooth mouthfeel and helping to form a cohesive chocolate glaze; melt gently to avoid browning. Butter also contributes to flavor richness and helps the coating set with a tender snap rather than being overly hard. Slightly cooled melted butter is easiest to incorporate without seizing the cocoa.
- 1/4 cup light corn syrup 78 grams Act as a binding sweetener that prevents crystallization and keeps the coating glossy and pliable; heat gently with sugar and butter until combined. Corn syrup improves texture by providing chewiness and stabilizing the candy, ensuring it adheres evenly to the popcorn. Measure carefully for consistent candy structure and avoid substituting if possible.
- 1/4 cup unsweetened cocoa powder 21 grams Contribute intense chocolate flavor and deepen color while keeping the coating dry and powdered rather than liquid; whisk into the hot sugar-butter mixture until fully dissolved and smooth. Cocoa powder adds concentrated chocolate bitterness that balances the brown sugar's sweetness and enhances overall cocoa profile. Sift if clumpy to ensure a uniform, lump-free sauce.
- 1 teaspoon pure vanilla extract 4 grams Impart warm, aromatic lift and round out the chocolate notes; stir in after removing the mixture from heat to preserve volatile flavors. Vanilla enhances perceived sweetness and complexity, making the chocolate popcorn taste fuller and more balanced. Use pure vanilla for best, natural flavor impact.
- Sea salt optional, to taste Enhance and balance sweetness by providing occasional savory contrast; sprinkle lightly to taste after coating to brighten flavors and prevent the snack from tasting cloying. Sea salt also accentuates chocolate depth and creates a pleasing sweet-salty interplay that many prefer in confectionery popcorn. Adjust quantity carefully to avoid overpowering the chocolate.
Instructions
- Line a baking sheet with parchment paper and place the popcorn in an extra large bowl. Set both aside.: The first sensory cue is the quiet rustle of parchment as you prepare the sheet, followed by the hollow, airy scent of popped popcorn when you transfer it to the bowl. This setup step matters because it gives you an organized workflow, preventing rushed coating that leads to clumps. A common mistake is using a bowl that is too small, which makes stirring messy and leads to uneven coverage, so choose a roomy vessel to allow for patient folding.
- Add the brown sugar, butter, corn syrup, and cocoa powder to a large microwave safe bowl. Mix well and heat on high for 3 minutes.: As the mixture heats, you will hear a soft bubbling and begin to smell warm brown sugar and cocoa mingling. Stirring before microwaving helps the components begin to integrate, ensuring an even heat distribution. This technique matters because it avoids hot spots that can scorch the sugar. A frequent error is under-mixing before heating, which leaves pockets of dry cocoa and causes an uneven texture in the final sauce.
- Remove the bowl from the microwave and stir. The mixture should be boiling. If not, place the bowl back in the microwave and continue to heat on high in 30-second intervals until the mixture comes to a boil.: When you stir the heated mixture you should see active bubbling and steam rising, and the sound will be a steady, lively simmer. That boil indicates the sugar has reached the correct stage to form a glossy coating, which is essential for crispness. If you stop too early the coating will be sticky and soft, while overheating will darken the sugars and introduce bitterness. Troubleshoot by pausing and stirring frequently to judge the boil visually, rather than relying solely on time.
- Stir in the vanilla extract and salt (if using).: Adding the vanilla extract releases a fragrant note that mellows the cocoa, and the optional sea salt will pop against the sweet backdrop. The aroma should lift and become more complex, signaling that flavors are balancing. This step matters because it rounds the sauce and prevents a flat, one dimensional taste. A common slip is adding salt too late, which can cause it to clump; dissolve it while the mixture is still warm so it incorporates evenly.
- Pour the butter/sugar mixture over the popcorn and use a rubber spatula to stir the popcorn until it is evenly coated.: When you pour, you will hear a soft splash and then the satisfying scrape of the spatula as you fold the sauce through the popped popcorn . Aim for a steady, patient motion so each kernel gets a light, even glaze rather than thick pools of sauce. This technique is crucial for maintaining crispness, because heavy clumps trap moisture. Avoid overcrowding the bowl, and if you notice clusters forming stop and gently separate them to ensure uniform coverage.
- Spread the coated popcorn in an even layer onto the prepared baking sheet.: As you transfer the coated kernels, they should glisten and hold a thin shell of chocolate caramel. Spreading them in a single layer allows hot air around each piece as it cools, ensuring a crisp set. If you heap the popcorn it will trap steam and become chewy, so take the time to distribute it evenly. A typical error is leaving it in a deep pile, which leads to uneven texture and sticky centers.
- Let the popcorn cool at room temperature for 2 hours before serving or packaging.: During cooling you will notice the glossy coating dull slightly and harden, and the sound of breaking pieces becomes crisp and snappy. This rest is why the final texture is satisfyingly crunchy, and rushing to eat it while warm will yield sticky clumps instead of distinct kernels. If you are impatient, refrigerating to speed the set can introduce condensation and compromise crispness, so resist the urge and let it cool slowly at room temperature.
Notes
- Slightly melt the butter before mixing. Warming the butter to a softened state ensures it emulsifies with the brown sugar and corn syrup, creating a smoother sauce that coats evenly.
- Confirm a rolling boil in the sugar mixture. You want active bubbling which indicates the sugars have reached the right stage to set crisp, avoiding a sticky final product.
- Stir frequently when reheating in 30 second intervals. This prevents scorching and ensures the cocoa powder fully dissolves into the sauce without lumps.
- Use a rubber spatula to coat, not a wooden spoon. The flexible edge helps scrape every last bit of sauce and fold it gently through the popped popcorn without crushing the kernels.
- Sprinkle salt while warm if using. The warmth helps the sea salt adhere, distributing savory contrast evenly across the batch.
- Allow full cooling time on a single layer. Two hours at room temperature makes the difference between a soft cluster and crisp, shatterable pieces.