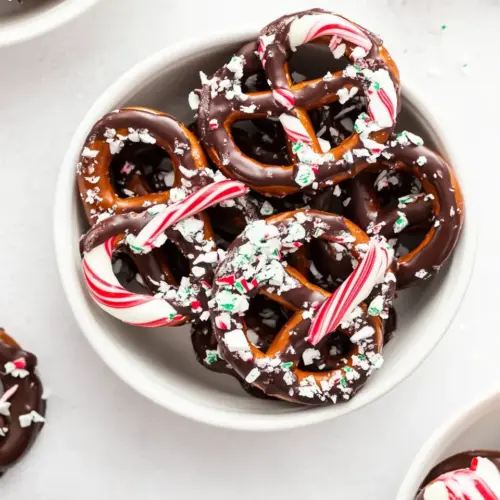
Chocolate Peppermint Covered Pretzels
Chocolate Peppermint Covered Pretzels are crunchy, festive, and easy to make, combining glossy semisweet chocolate, creamy white chocolate, and crushed peppermint for a perfect sweet and salty holiday snack. These bite sized treats are ideal for parties, gifts, and cookie exchanges, delivering an irresistible snap and minty finish that keeps everyone reaching for more. Make a batch for gatherings or to share with neighbors.
Equipment
- Microwave safe bowls
- Large rimmed baking sheet
- Parchment Paper
- Forks
- Knife
Ingredients
- 8 ounces semisweet chocolate chopped (about 1 1/3 cup) Provide rich, bittersweet structure and smooth melting properties when chopped and melted; contributes deep chocolate flavor and helps coatings set with a glossy finish once tempered or cooled.
- 1 tablespoon coconut oil divided Add a small amount of fat to thin melted chocolate and improve shine; divided use permits adjusting texture and viscosity for easier dipping and a smoother coating.
- 1 teaspoon pure peppermint extract divided Impart bright, cooling peppermint aroma and flavor; divided addition allows subtle mint notes in both the dark and white chocolate layers without overpowering sweetness.
- 8 ounces white chocolate chopped (I recommend Baker’s chocolate, which melts very nicely) Deliver creamy sweetness and a milky texture when chopped and melted; melts smoothly to create a contrasting white coating that pairs well with peppermint and aids in adhesion to pretzels.
- 70 to 80 mini hard pretzels about half a 16-ounce bag, give or take a handful Provide a crisp, salty crunchy base for dipping; mini hard pretzels offer uniform bite-sized pieces that contrast the sweet chocolate coatings and hold up well during dipping.
- 1/2 cup crushed peppermint candies or candy canes Supply crunchy, minty topping and decorative color contrast when crushed; sprinkled over warm chocolate, they add texture, festive flavor, and visual appeal to the finished pretzels.
Instructions
- Line a large rimmed baking sheet with parchment paper and set aside.: The surface should feel cool and dry under your hands and the parchment creates a nonstick bed so the coated pretzels release cleanly once set. You want the sheet to be flat so pieces do not slide and collide, which can smudge the finish. A common mistake is skipping parchment, which leads to chocolate sticking and broken pieces when you try to lift them.
- Place the semisweet chocolate and 1 1/2 teaspoons coconut oil in a microwave-safe bowl. Heat for 30 seconds, stir, then continue heating in 15-second bursts, stirring between each. Repeat until the chocolate is almost but not entirely melted. Remove from the microwave, add 1/2 teaspoon of the peppermint extract, and stir, letting the residual heat melt the chocolate the rest of the way.: You will smell the chocolate as it starts to warm, releasing a deep, roasted aroma that signals gentle melting is underway. Stirring between short bursts helps distribute heat and prevents hot spots that can burn the chocolate. Avoid overheating, which causes grainy, separated chocolate; patience and stirring are your friends here.
- Place the white chocolate and remaining 1 1/2 teaspoons coconut oil in a separate microwave-safe bowl and melt, following the same process above. Stir in the remaining 1/2 teaspoon peppermint extract.: The sound is quiet, just the faint clink of a spoon against glass as you stir, and the chocolate should transform from chunky to glossy. The goal is to leave small unmelted bits so residual heat finishes the job, preventing scorch. A rookie error is using long bursts, which can make the chocolate seize and become grainy.
- Dip half of the pretzels into the white chocolate, leaving one corner undipped. Shake off any excess and use a knife or fork to wipe some of the excess chocolate off of the back of the pretzels so that the holes are open. Place on the prepared baking sheet. With the tines of a separate fork, drizzle with semisweet chocolate and immediately sprinkle with the crushed candy pieces. I was able to dip about four pretzels in a row before sprinkling and have enough time before the coating hardened.: Visual cues matter, you should still see small slivers of chocolate that melt with stirring, and the texture should already look silky. This method helps maintain a smooth sheen and avoids burning. If you go too far and it becomes stiff, you can sometimes coax it back with a tiny splash more coconut oil , but avoid this if possible.
- Dip the second half of the pretzels in the semisweet chocolate, following the same method as the above. Lay on the parchment paper, then with the tines of a clean fork, drizzle with white chocolate, and then sprinkle with crushed peppermint candy.: A puff of mint aroma will lift the chocolate fragrance into something festive, and the final stir should leave the mixture smooth and satiny. The residual heat approach preserves the volatile peppermint oils, keeping the flavor bright. Overmixing vigorously can incorporate air bubbles which show up when coating.
- Let the pretzels set until the chocolate is hardened, about 30 minutes. You can also place them in the refrigerator to speed the process.: The white chocolate gives off a sweeter, creamier aroma and will appear paler and glossier when ready. Using a separate bowl ensures clear color contrast and prevents flavor bleed. White chocolate is more temperature sensitive, so reduce burst times if needed to avoid graininess.
- Stir in the remaining 1/2 teaspoon peppermint extract: When you add the extract the kitchen fills with a cool, minty scent that pairs beautifully with the creamy white chocolate . Incorporate gently so the texture stays smooth. If the white chocolate tightens up after adding liquid, warm it briefly in very short bursts while stirring.
- Dip half of the pretzels into the white chocolate, leaving one corner undipped: The tactile feedback is satisfying, you will feel the crisp pretzel give under the chocolate and see the coating cling. Leaving a corner undipped creates a handle and an attractive visual contrast. Dunking too deeply can fill the pretzel holes and hide their shape, so aim for control rather than speed.
- Shake off any excess and use a knife or fork to wipe some of the excess chocolate off of the back of the pretzels so that the holes are open: The motion creates a clean edge and the sound is a soft scrape as excess chocolate falls back into the bowl. Open holes keep the pretzel shape visible and make the bite less dense. Rushing this step leads to lumpy backs and uneven setting.
- Place on the prepared baking sheet: Arrange them with space so they do not touch, and you will notice the chocolate begin to dull as it cools. Proper spacing prevents sticking and keeps each piece pristine. Clustering pieces too close will result in fused edges when they harden.
- With the tines of a separate fork, drizzle with semisweet chocolate and immediately sprinkle with the crushed candy pieces: The drizzle creates fine lines of dark chocolate, adding visual interest and a second layer of flavor. The crushed peppermint should be applied right away while the drizzle is wet so it adheres. If you wait, the peppermint will not stick well and will fall off when moved.
- I was able to dip about four pretzels in a row before sprinkling and have enough time before the coating hardened: Work rhythmically in small groups so you can drizzle and top before the coating sets. You will notice if you overwork the chocolate it may thicken, so keep a steady but unhurried pace. Trying to do too many at once is a common pitfall that causes uneven toppings.
- Dip the second half of the pretzels in the semisweet chocolate, following the same method as the above: The darker coating offers a different flavor profile and the technique remains identical, so the process feels familiar the second time through. Matching motions help maintain consistency. A frequent mistake is switching tools mid process, which can slow you down and make coatings uneven.
- Lay on the parchment paper, then with the tines of a clean fork, drizzle with white chocolate, and then sprinkle with crushed peppermint candy: The final drizzles should be rapid and confident, producing fine ribbons. The contrast of white against dark makes each piece look professional. If the white chocolate begins to set in the fork, pause and clean it to avoid clumps of set chocolate dropping onto the pretzels.
- Let the pretzels set until the chocolate is hardened, about 30 minutes: As they cool the sheen dulls and the coating becomes firm to the touch, and you will hear only the faint clink as you test one. Setting at room temperature preserves a slightly softer snap, while refrigeration speeds the process and gives a crisper bite. Putting them away too early risks smudging, while leaving them uncovered can invite dust or humidity to affect texture.
- You can also place them in the refrigerator to speed the process: Chilling shortens set time and creates a brisk, clean snap, and you will notice condensation is usually not an issue if you cool briefly. If you refrigerate for longer periods, allow them to come to room temperature before packaging to prevent sticky surfaces. The main error here is overchilling which can draw moisture onto the surface if returned to warm air too quickly.
Notes
- Mix up the chocolate ratio Try dipping more in white chocolate than semisweet chocolate for a sweeter bite, or reverse for a deeper cocoa flavor. Small adjustments change the overall balance and allow you to tailor the treat to your guests.
- Use flavored peppermint If you want a stronger mint presence, increase the peppermint extract slightly, adding in very small increments and tasting if possible. Too much can become medicinal, so proceed cautiously.
- Change the candy topping texture Swap crushed peppermint for finely chopped peppermint bark to add a little chew along with crunch. The larger pieces create a different mouthfeel that some guests prefer.
- Make assorted patterns Alternate drizzles so some pretzels have stripes, while others are half dipped, creating a decorative platter that looks intentional and varied.
- Gift wrap with care Layer parchment between stacks when packing in tins or boxes to prevent sticking and protect the finish, keeping them presentable for gifting.