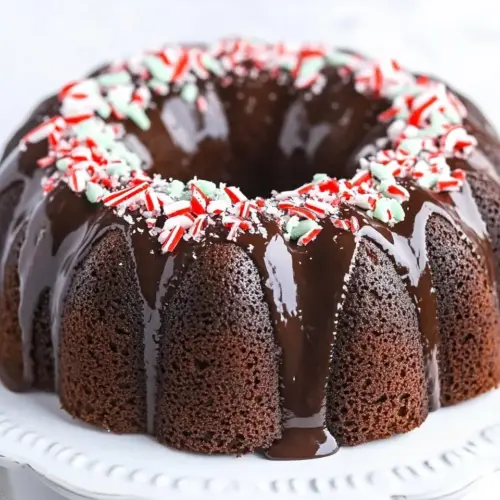
Chocolate Peppermint Bundt Cake
Chocolate Peppermint Bundt Cake delivers a rich, tender chocolate crumb with a silky peppermint infused ganache, offering creamy texture and a festive crunch. This easy holiday dessert combines classic baking pantry staples with a bright peppermint finish, making it ideal for celebrations and easy weeknight indulgence. Make it to impress guests with minimal fuss and a maximum of seasonal flavor.
Equipment
- Mixer
Ingredients
- 2 tablespoons vegetable shortening like Crisco Provides surface lubrication and contributes to tender crumb; melt into batter to help distribute fat for moist texture and prevent sticking in the bundt pan.
- 1 cup butter Adds rich buttery flavor and structure; cream with sugar to incorporate air and create a tender, flavorful cake base.
- 1/3 cup cocoa powder Imparts deep chocolate flavor and color; sift into dry ingredients to ensure even distribution and avoid lumps for a smooth batter.
- 1/2 cup milk Introduces moisture and helps dissolve sugar; warm slightly if needed and combine with cocoa and fats to create a cohesive batter.
- 1 teaspoon salt Balances sweetness and enhances overall flavor; measure precisely to maintain proper leavening and avoid overly flat taste.
- 1/2 cup strongly brewed coffee Boosts chocolate depth and intensifies flavor; use cooled strongly brewed coffee to blend into batter without altering liquid balance.
- 2 cups all-purpose flour Provides the primary structure and body; whisk with leaveners to create a uniform dry mix that supports the cake's rise.
- 1 3/4 cups sugar Contributes sweetness and tenderization; cream with fats to trap air and yield a light, sweet crumb throughout the bundt cake.
- 1 1/2 teaspoons baking soda Promotes rise and lightens texture; mix into dry ingredients to react with acidic components and create appropriate leavening during baking.
- 2 eggs Adds richness, moisture, and structure; beat into the batter to emulsify fats and liquids for a cohesive, stable crumb.
- 1/2 cup sour cream or plain nonfat Greek Yogurt Adds tang, moisture, and tender crumb; combine with batter to react with baking soda and contribute to a moist, slightly tangy profile.
- 1 teaspoon vanilla extract Enhances flavor complexity and aroma; add to batter to round flavors and complement chocolate and peppermint notes.
- 4 ounces semi-sweet chocolate chips Intensifies chocolate intensity and provides pockets of melted chocolate; fold into batter or sprinkle for bursts of semi-sweet richness.
- 1 1/2 tablespoons corn syrup You can use golden syrup (cane syrup) Contributes gloss and chew to the peppermint glaze; combine with chocolate and cream to create a silky, stable finish for the cake.
- 1 1/2 tablespoons sugar Adds subtle extra sweetness and helps stabilize the glaze; dissolve into warm chocolate mixture for smooth sheen and texture.
- 1/2 cup heavy cream Creates a rich, pourable ganache for glazing; heat cream and combine with chocolate and corn syrup to make a glossy topping.
- 1/4 teaspoon peppermint extract Delivers concentrated peppermint aroma and cooling flavor; add sparingly to the glaze and taste to avoid overpowering the chocolate.
- 1/4 cup candy canes, peppermint sticks, or peppermint candies. Provides crunchy peppermint garnish and festive texture; crush and sprinkle over glaze for color contrast and refreshing bite.
Instructions
- Preheat oven to 350°F.: When you feel the first warmth of the oven and the air inside becomes steady, you know the environment is ready to promote even rise and proper crumb setting. A well preheated oven ensures the leavening reacts consistently, producing a uniform dome and preventing an overly dense center. You should also notice a faint dry heat without hotspots, which is ideal. A common mistake is placing the cake in before the oven is fully warmed, which can lead to uneven texture and longer bake times.
- Grease the bundt pan with vegetable shortening.: Greasing the pan fills every groove so the cake releases cleanly and develops a gently crisp exterior where batter met the tin. As you press the shortening into creases with your fingers or a brush, the surface will feel satiny, and that tactile step helps the cake unmold without tearing. If you skip thorough greasing, the cake can stick and break, so be generous in the creases. Avoid using only a light spray on an intricate pan, because it may not reach tight corners.
- In a small saucepan heat the butter, cocoa, salt, milk and coffee over medium heat, stirring to combine, just until the butter is just melted. Take off the heat and set aside.: As the mixture warms, you will see the butter melt into a glossy, chocolatey slurry and the cocoa bloom into deeper color, releasing an intense aroma. The steam rising will carry chocolate notes, and the coffee will subtly lift them. Heat just until the butter melts to avoid scorching the cocoa or curdling the milk. Overheating can alter the batter’s texture and flavor, so remove from heat promptly.
- In the bowl of a stand mixer, combine the flour, sugar, and baking soda, whisk to combine (see notes if you are not using a stand mixer).: Whisking these dry ingredients fluffs the flour , evenly distributes the baking soda , and merges the sugar for consistent sweetness. The dry mixture should look homogenous and slightly aerated, which sets the stage for even rise. If you don’t mix thoroughly, pockets of leavening can create uneven texture, so take the extra minute to ensure they are blended.
- Add half of the chocolate mixture, and mix using the stand mixer on a low speed, until combined, then add the rest and mix again.: Adding the warm liquid in two stages prevents the batter from becoming too loose at once and helps achieve a smooth emulsion. At low speed, you will hear a gentle hum and see the batter slowly darken and become glossy, indicating proper integration. If you pour all the liquid at once, the mixer can struggle to incorporate evenly, leading to lumps or a thin batter, so stagger the additions for best texture.
- Add the eggs, sour cream, and vanilla extract, mix again.: Once the eggs and sour cream go in, the batter will take on a silkier, slightly thicker consistency and a richer aroma; the vanilla lifts the fragrance. Mixing until just combined keeps the crumb tender, because overmixing develops gluten and can make the cake chewy. Watch for a uniform color and texture, and stop mixing when streaks disappear.
- Pour the cake batter into the greased bundt pan.: As you pour, you will hear the batter settling and notice it level itself in the pan, filling crevices gently. Tap the pan lightly on the counter once or twice to release large air bubbles; this helps avoid big tunnels in the crumb. Pour carefully to keep the edges neat. Avoid overfilling the pan, since too much batter will lead to overflow and a misshapen cake.
- Bake until a toothpick comes out clean, 30-40 minutes.: During baking you will smell the chocolate intensify and a thin crust will form along the top. Check for doneness by inserting a toothpick in the center; when it comes out clean or with a few moist crumbs, the cake is done. Resist opening the oven too often, which can cause the cake to collapse. If you notice excessive browning before the center is set, tent the top with foil.
- After the cake has cooled for a good 30 minutes, turn over onto a wire rack to cool completely.: Letting the cake rest allows internal steam to redistribute, preventing a gummy center, and the surface firms slightly for easier unmolding. When you invert the pan, you should hear a gentle release as the cake drops free, revealing a satiny exterior. If it clings, run a thin knife around the edges before inverting. Premature unmolding can cause cracking or breakage, so be patient.
- Place on a platter until ready to add the ganache.: Moving the cooled cake to a serving platter gives you a stable base for glazing and ensures any excess ganache drips onto a plate for easy cleanup. The cake should be fully cool to touch, as warm cake can cause the ganache to run too thin. If the cake is still warm, wait longer; glazing too soon will result in thin coverage and less defined drips.
- In a small bowl, add chocolate chips and corn syrup.: Combining the chocolate chips and corn syrup readies them to form a glossy ganache when warm cream is added. The corn syrup helps keep the sheen and prevents crystallization as the ganache cools. Use a bowl that retains heat to help melting. A common slip is using a bowl that conducts heat away too quickly, making melting slower and uneven.
- Heat the heavy cream and sugar either over the stove or in the microwave until hot and steaming a bit, but do not boil.: As the heavy cream heats, it will steam and release a sweet dairy aroma; heating just until steaming ensures the chocolate melts smoothly without seizing. Boiling can change the texture and separate fats, so avoid a rolling boil. If small bubbles appear at the edge, that is the right cue to stop heating.
- Pour the cream over the chocolate chips and set a plate over the top of the bowl to keep the heat in. Let it stand for about 5 minutes.: Covering traps heat so the chocolate softens uniformly, and after a few minutes you will see it slump into a glossy pool. This rest forms the basis of a silky emulsion, and rushing to stir too soon can make the mixture grainy. If the chips haven’t softened after the wait, microwave briefly in short bursts rather than stirring aggressively.
- Stir until the ingredients are well combined, add the peppermint extract, and stir again.: As you stir, the ganache will become shiny and thick, with a velvet texture. Adding peppermint extract here lets its aroma infuse the ganache; stir to distribute evenly. Taste a small amount carefully to ensure the peppermint is balanced. Too much extract can impart a medicinal note, so add sparingly.
- Let the ganache stand until you reach desired consistency (see notes).: The ganache will cool and thicken, going from pourable to more viscous depending on how long you wait. For drips that cling to the top without running far down the sides, wait until it is slightly thicker. If you want dramatic drips, pour while it is just warm. Avoid waiting so long that the ganache sets fully, as it will then be difficult to spread smoothly.
- Drizzle the ganache over the cake and top with crushed peppermint candy. Serve immediately.: As the ganache hits the cake, you will see it pool then slowly cascade into the Bundt crevices, creating glossy ribbons of chocolate. The crushed peppermint candy adds a sparkling finish and a crisp contrast to the silky ganache. Serve promptly so the candies stay crisp. If left too long, the candy can soften from moisture.
- Store on the counter for 2-3 days, or in the refrigerator for 4-5 days. You can let it come to room temperature before serving.: Proper storage preserves texture and flavor; the ganache keeps the crumb moist while refrigeration extends shelf life. When refrigerated, bring the cake to room temperature for about 30 minutes for the best flavor and texture. Avoid leaving it uncovered, which can dry the surface and dull the ganache sheen.
Notes
- Warm the pan by softening a tablespoon of shortening in your hands or briefly melting it so it spreads into crevices, ensuring a neat release.
- Bloom the cocoa by stirring it into the warm butter and milk mixture until glossy, which deepens chocolate flavor and eliminates dry pockets.
- Stagger liquids by adding the chocolate mixture in two portions so the batter emulsifies smoothly and avoids curdling or separation.
- Control ganache thickness by letting the ganache cool before pouring; thicker ganache yields controlled drips and a cleaner presentation.
- Fresh leavening matters, so check your baking soda for activity if your cakes are failing to rise properly.
- Room temperature ingredients such as eggs and milk help the batter come together more evenly and prevent a tight crumb.