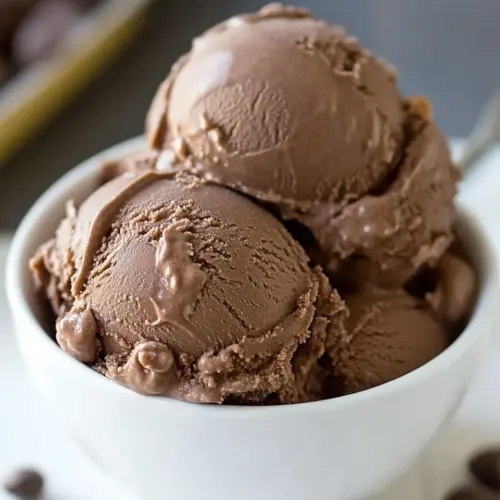
Chocolate Peanut Butter Cup Ice Cream
Chocolate Peanut Butter Cup Ice Cream is a creamy, indulgent dessert combining deep chocolate custard with ribbons of peanut butter and chopped candy for texture. This easy to impressive treat offers velvety mouthfeel, nutty pockets, and playful bites, perfect for summer gatherings or anytime you want a nostalgic scoop. Make it for guests and it will disappear fast.
Equipment
- Medium Saucepan
- Whisk
- Mesh strainer
- Ice Cream Maker
- Heatproof spatula
- Small Saucepan
- Airtight Container
- Instant read thermometer
Ingredients
- 2 cups (476 ml) heavy cream Whip into a rich base by combining with milk and sugar to create a creamy custard foundation; heavy cream provides luxurious mouthfeel and stabilizes fat for smooth freezing. Chill the mixture thoroughly before churning to ensure optimal texture and to prevent ice crystal formation during freezing.
- 3 tablespoons unsweetened Dutch-process cocoa powder Add deep chocolate flavor and a touch of bitterness while enhancing color; Dutch-process cocoa blends smoothly into warm cream for an intensified chocolate profile. Sift into the warm base to avoid lumps and bloom briefly in the liquid to release maximum cocoa aroma.
- 5 ounces (141.75 g) bittersweet or semisweet chocolate Melt into the hot cream to create a glossy chocolate custard and contribute cocoa solids and cocoa butter for richness and structure. Chop or finely grate before warming to ensure even melting and incorporate fully for a silky, cohesive ice cream base.
- 1 cup (244 ml) whole milk Loosen the custard and balance the richness from cream by adding fluid and lowering overall fat concentration; whole milk contributes lactose for sweetness and helps create scoopable texture. Heat with cocoa and sugar to dissolve solids and temper into egg yolks to form a smooth custard.
- 3/4 cup (150 g) granulated sugar Sweeten the custard, aid in freezing point depression to keep the ice cream scoopable, and offer structure when creamed with eggs; granulated sugar also helps create a fine crystal network. Dissolve fully into warm milk and cream so the sugar integrates and prevents grittiness in the finished ice cream.
- Pinch of salt Enhance overall flavor by brightening sweetness and balancing bitterness; a pinch of salt enhances chocolate and peanut flavors and the custard’s complexity. Add early in the cooking process so it disperses uniformly throughout the base.
- 5 large egg yolks Thicken and enrich the custard, adding emulsifying lecithin and proteins that create stability and a luxurious, custardy mouthfeel once cooked and cooled. Temper carefully with warm cream and milk, gently cooking to 170–175°F (77–80°C) to safely thicken without scrambling.
- 1/2 teaspoon (0.5 teaspoon) vanilla extract Round and deepen flavor with a subtle floral-vanilla note that complements chocolate and peanut butter; vanilla enhances perceived sweetness and aroma. Stir in off-heat to preserve the pure vanilla fragrance and avoid diminishing its volatile compounds.
- 20 regular-size peanut butter cups, chopped Provide pockets of peanut-chocolate texture and bursts of candy-sweet contrast when folded into churned ice cream; chopped peanut butter cups add chew and variety. Fold in near the end of churning or gently swirl into partially frozen ice cream to distribute evenly without melting.
- 1/2 cup (129 g) peanut butter Supply concentrated peanut flavor, richness, and a silky mouth-coating quality that ties into the peanut butter cup mix-ins; peanut butter also contributes emulsifying oils that help texture. Warm slightly to loosen before swirling or ribboning through the churned ice cream for even distribution.
- 1/2 cup (119 ml) heavy whipping cream Create a fluffy, aerated peanut sauce or ganache component for ribbons and swirls; heavy whipping cream whipped or warmed with peanut butter yields a luscious texture contrast. Combine with peanut butter and sugars to form a pourable swirl that sets softly in the frozen ice cream.
- 1/4 cup (55 g) light brown sugar Add deep, caramel-like sweetness and moisture that complements peanut butter and chocolate; light brown sugar brings molasses notes and helps inhibit large ice crystals. Dissolve into warm cream mixtures or the peanut ribbon to integrate flavor and improve scoopability.
- 2 tablespoons light corn syrup Improve sheen and prevent crystallization in sauces and swirls by adding viscosity and inhibiting sugar recrystallization; light corn syrup keeps chocolate and peanut ribbons smooth. Stir into warm sugar or peanut mixtures so it blends uniformly and produces glossy, stable ribbons.
Instructions
- Warm 1 cup of the cream with the cocoa powder in a medium saucepan, whisking to thoroughly blend the cocoa. Bring to a boil, then reduce the heat and simmer at a very low boil for 30 seconds, whisking constantly. Remove from the heat and add the chopped chocolate, stirring until smooth. Then stir in the remaining 1 cup cream. Pour the mixture into a large bowl, scraping the saucepan as thoroughly as possible, and set a mesh strainer on top of the bowl.: As you heat this mixture, you will notice the aroma of toasted cocoa rising, and the surface will develop tiny steam bubbles around the edge, a sign that it is getting hot but not boiling. The whisking is important because it evenly disperses the cocoa , preventing clumps and ensuring a smooth, even color. You want to bring it to a gentle boil then reduce to a very low simmer, whisking constantly for about thirty seconds, which helps to bloom the cocoa for deeper flavor. A common mistake here is letting the cream scorch, which creates bitter notes; to avoid that, keep the heat low and stir frequently, scraping the bottom of the pan so nothing sticks. The texture should be glossy and fragrant when you remove it from heat.
- Warm the milk, sugar, and salt in the same saucepan. In a separate medium bowl, whisk together the egg yolk. Slowly pour the warm milk into the egg yolks, whisking constantly, then scrape the warmed egg yolks back into the saucepan.: In this phase, the brief simmer extracts and melds flavors, letting the cocoa integrate with the cream . You will hear a gentle bubbling sound, not a roaring boil, and the surface should remain smooth. The whisking keeps the mixture uniform and prevents localized overheating. Overdoing the boil can cause separation or a cooked taste, so watch closely and time the thirty seconds with a clock. Once complete, remove from the heat promptly to stop further cooking and preserve the creamy mouthfeel.
- Stir the mixture constantly over the medium heat with a heatproof spatula, scraping the bottom as you stir, until the mixture thickens and coats the spatula (170°F on an instant-read thermometer). Pour the custard through the strainer and stir it into the chocolate mixture until smooth, then stir in the vanilla. Stir until cool over an ice bath.: When you fold in the chopped chocolate , the residual heat melts it into a glossy emulsion, and you will see the mixture thicken and shine. Stirring gently encourages a uniform melt and keeps air from being whipped in, which helps the custard retain a dense, silky texture. If any specks remain, let it sit briefly off heat and stir until they melt; avoid overheating at this point. A common misstep is adding chocolate to a boiling pot, which can seize it; always ensure the temperature has been reduced before adding the chocolate.
- While the custard cools, make the peanut butter swirl. Combine the peanut butter, whipping cream, corn syrup, and the brown sugar in a small saucepan. Heat over low heat, stirring, until smooth and sugar is dissolved. Transfer to an airtight container.: Adding the second cup of cool cream lowers the temperature and adds volume, creating a balanced base before combining with the custard. You will see the mixture soften and become more pliable, and the scent of chocolate will deepen. Stir until homogeneous, scraping the sides and bottom to incorporate any residual bits. If you add cold cream too quickly to an overly hot mixture, the temperature shock can cause slight separation; temper by stirring slowly and steadily.
- Chill both the custard and the peanut butter swirl thoroughly, at least 8 hours.: Pouring off the saucepan ensures you capture every bit of the chocolatey base, and the mesh strainer will catch any stubborn solids or tiny coagulated bits later. Visually, the mixture should be glossy and even in color. Scraping the saucepan helps avoid waste and preserves flavor. One thing to avoid is skipping the strainer, because unstrained bits can give a grainy mouthfeel in the finished ice cream.
- Freeze the custard mixture in your ice cream maker according to the manufacturer’s instructions. (If the cold mixture is too thick to pour into your machine, whisk it vigorously to thin it out.) During the last two minutes, add in the chopped peanut butter cups. When packing the ice cream into its container, alternate layers of the ice cream and peanut butter swirl, ending with the ice cream.: Reusing the pan, warm the milk with the granulated sugar and pinch of salt until the sugar dissolves and the liquid is steamy. You will notice the sugar disappearing as it dissolves, and the aroma becomes subtly sweet. This hot milk is essential for tempering the egg yolks , and bringing the sugar into solution prevents graininess later on. Do not bring it to a rolling boil; a steady simmer is sufficient to dissolve the sugar evenly.
- In a separate medium bowl, whisk together the egg yolk: Whisking the egg yolks makes them uniform and ready to accept warm liquid without curdling. The yolks should become slightly paler and a bit thicker as air is incorporated. This step is crucial for creating a stable custard because uniform yolks temper more predictably. A frequent error is adding hot liquid too quickly, which can scramble the yolks; to prevent that, whisk continuously while slowly adding warm milk.
- Slowly pour the warm milk into the egg yolks, whisking constantly, then scrape the warmed egg yolks back into the saucepan: When you add the warm milk to the whisked yolks, do so in a slow stream while whisking; you will see the yolks gently warm and loosen without curdling. This careful tempering prevents scrambled eggs and creates a cohesive base. After combining, transfer the mixture back into the saucepan so you can gently cook it to the proper thickening temperature. If you rush this transfer, hot spots can form and cause uneven thickening, so move with steady hands and constant stirring.
- Stir the mixture constantly over the medium heat with a heatproof spatula, scraping the bottom as you stir, until the mixture thickens and coats the spatula (170°F on an instant-read thermometer): As you cook the custard, you will notice it gradually thicken and take on a soft coat on the spatula; that is your visual cue that it has reached the correct custard stage. The sound will be a gentle simmer, and steam will rise lightly. Scraping the bottom prevents sticking and ensures even cooking, which contributes to a smooth, non grainy finish. The key mistake to avoid is overheating past one hundred seventy degrees Fahrenheit, which causes curdling and a broken texture; use an instant-read thermometer and remove it at the right moment.
- Pour the custard through the strainer and stir it into the chocolate mixture until smooth, then stir in the vanilla: Passing the custard through the mesh removes any possible cooked bits, leaving a silky liquid that blends seamlessly with the chocolate base. As you stir them together, the combined aroma becomes richer and more rounded, and the color deepens to a uniform shade. Fold in the vanilla after straining to preserve its delicate fragrance. Skipping the strainer risks a slightly grainy texture, so always strain for best results.
- Stir until cool over an ice bath: Cooling the custard rapidly over an ice bath stops the cooking process and locks in a smooth texture, preventing further thickening or curdling. You will feel the temperature drop as the bowl chills, and condensation may form on the exterior, signaling effective cooling. Stir occasionally to encourage even cooling and to keep the mixture homogeneous. A common oversight is leaving the custard at room temperature to cool, which can encourage bacterial growth and affect texture; use an ice bath and stir until cool.
- While the custard cools, make the peanut butter swirl: As the custard comes down in temperature, combine the peanut butter , whipping cream , corn syrup, and brown sugar in a small saucepan and heat gently until everything is glossy and the sugar dissolves. You will notice the mixture becoming silkier and slightly looser as the peanut butter warms. Heating melds the flavors and creates a pourable swirl that keeps its ribbon shape when layered. Avoid boiling, which can cause separation; low heat and steady stirring are essential.
- Transfer to an airtight container: Once the swirl is smooth and glossy, move it to a container that seals well to preserve texture and prevent crusting. The swirl will thicken slightly as it cools, making it easier to ribbon through the frozen ice cream. Label and date the container if you plan to store it for later. A mistake to avoid is leaving it uncovered in the fridge, which can form a skin and make it difficult to pour later.
- Chill both the custard and the peanut butter swirl thoroughly, at least 8 hours: Time is a crucial ingredient here, because chilling lets the flavors meld and the custard fully hydrate. Overnight is ideal and will ensure a dense, scoopable texture after churning. You will notice the aroma mellows and the mouthfeel improves after proper chilling. Do not rush this step; insufficient chilling can lead to a greasy or icy final texture, so plan ahead for the best outcome.
- Freeze the custard mixture in your ice cream maker according to the manufacturer’s instructions: When you churn, the machine aerates and freezes the custard to a soft serve consistency, and you will hear a steady hum and see the mixture thicken and climb the dasher. Follow the manufacturer guidelines for timing and bowl temperature, because these details affect the texture. If the mixture is too thick to pour, whisk it vigorously to loosen it so the machine can handle it. Do not overrun the machine; overchurning can lead to a dense, buttery texture rather than a light, scoopable one.
- During the last two minutes, add in the chopped peanut butter cups: Adding the chopped candies near the end preserves their structure while ensuring they are well distributed. You will see bits of candy swirled through the soft ice cream, and the contrast in texture will be apparent. If you add them too early, they can dissolve or soften excessively; add at the end to keep enjoyable chunks in every scoop.
- When packing the ice cream into its container, alternate layers of the ice cream and peanut butter swirl, ending with the ice cream: Layering creates beautiful ribbons of peanut butter and ensures each scoop has both cream and swirl. Use a spatula to gently create even layers and avoid compacting the ice cream too tightly, which can make it dense. Finish with a top layer of ice cream for an attractive presentation. A common misstep is stirring the swirl in too aggressively while packing, which loses the ribbon effect; instead, layer gently for visual impact.
Notes
- Prep your chilling time: Plan for at least eight hours of chilling so the custard and swirl fully cool and integrate; overnight chilling yields the creamiest texture and allows flavors to mellow and harmonize.
- Use quality chocolate: Choosing good bittersweet or semisweet chocolate makes a noticeable difference in depth and mouthfeel; chop it finely for quick, even melting and a glossy finish when incorporated into the warm cream.
- Watch temperatures carefully: Use an instant read thermometer and remove the custard at one hundred seventy degrees Fahrenheit to prevent overcooking the egg yolks and to ensure a smooth, stable custard without a cooked flavor.
- Make the swirl stable: Heat the peanut butter, cream, corn syrup, and brown sugar gradually until the sugar dissolves; this creates a stable, ribbonable swirl that remains pourable but does not freeze rock hard.
- Store properly: Pack the finished ice cream into an airtight container and press a piece of parchment directly on the surface to minimize ice crystals; freeze at a consistent, cold temperature for best scoopability.