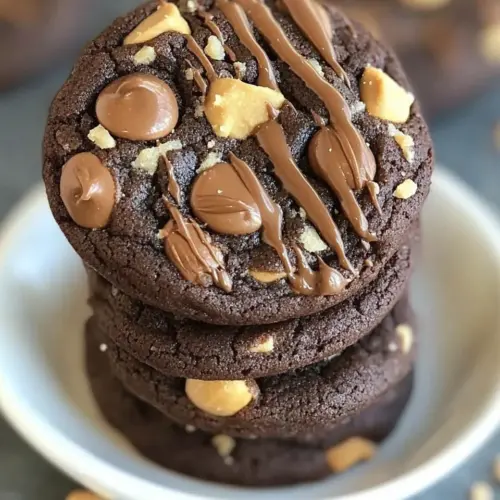
Chocolate Peanut Butter Cookies
Chocolate Peanut Butter Cookies are fudgy, chewy, and studded with chopped peanut butter cups and chips for melty pockets of peanutty sweetness. This easy cookie recipe balances deep cocoa and nutty chips for a comforting, crowd pleasing treat, perfect for bake sales or cozy afternoons. Make a batch when you want a reliably decadent dessert that everyone will ask for again.
Equipment
- Stand mixer
- Mixing Bowls
- Baking Sheet
- Parchment paper or Silpat
- Cooling rack
- Cookie Scoop
Ingredients
- 2 1/3 cups all-purpose flour Provide structure and bulk to the cookies while forming the crumb; sift or whisk before measuring to ensure even incorporation and avoid lumps. Develop gluten when mixed just enough to hold dough together without making cookies tough, and help absorb moisture from wet ingredients.
- 3/4 cup cocoa powder Contribute rich chocolate flavor and deepen color; choose unsweetened cocoa powder and sift to prevent clumps. Balance sweetness from sugars and intensify the overall chocolate profile while keeping the dough relatively dry, so adjust mixing to fully hydrate cocoa.
- 1 teaspoon baking soda Leaven the dough mildly to create a slightly tender texture; dissolve into the dry ingredients evenly for consistent rise. React with acidic components to produce small air pockets that lighten the crumb without causing excessive spread.
- 1/2 teaspoons ea salt Enhance overall flavor and balance sweetness while subtly strengthening gluten development; ensure even distribution in the dry mix. Provide necessary seasoning to highlight chocolate and peanut butter notes without overwhelming the recipe.
- 1 cup unsalted butter at room temperature Add richness and tenderness while contributing to spread and mouthfeel; use at room temperature for proper creaming with sugars. Incorporate evenly to trap air during creaming, which promotes lightness and helps dissolve sugar for smooth texture.
- 1 cup granulated sugar Supply sweetness, contribute to crisp edges, and encourage spreading during baking; cream thoroughly with butter for aeration. Caramelize slightly during baking to deepen flavor and create a satisfying contrast with the cookie interior.
- 1 cup packed light brown sugar Introduce moisture, a deeper caramel flavor, and chewiness due to its molasses content; pack firmly when measuring for accuracy. Help retain softness in the finished cookies and complement chocolate and peanut butter with warm, toasty notes.
- 2 large eggs Bind ingredients, add moisture, and provide leavening support through structure from proteins; beat until just combined for tender results. Contribute richness and help emulsify fats and dry ingredients to create a cohesive cookie dough.
- 1 1/2 teaspoons vanilla extract Deliver aromatic complexity and enhance sweetness perception; stir into wet ingredients for even flavor distribution. Provide a familiar flavor that complements both chocolate and peanut butter without dominating the profile.
- 1 1/2 cups chopped peanut butter cups Introduce concentrated pockets of peanut butter and chocolate flavor with varied texture; chop to distribute bite-sized pieces throughout the dough. Add indulgent flecks that melt slightly when baked, offering textural contrast and intense candy flavor.
- 3/4 cup peanut butter chips Reinforce peanut butter presence with small, evenly melting morsels that add creamy bursts; fold in gently to avoid overworking dough. Highlight the peanut profile and contribute to softer spots within the cookie where chips remain tender.
- 3/4 cups semi-sweet chocolate chips Boost overall chocolate intensity with semi-sweet morsels that provide gooey pockets when baked; measure accurately to maintain dough balance. Create melty swirls and chocolate bites that contrast with peanut elements and amplify richness.
- Sea salt for sprinkling on cookies Finish cookies with a bright, crunchy seasoning that enhances sweetness and deep flavors; sprinkle lightly after baking for best visual and textural effect. Provide occasional savory pops that balance richness and heighten perceived chocolate and peanut notes.
- Additional chopped peanut butter cups, peanut butter chips, and chocolate chips for garnish, optional Offer optional extra candy pieces and chips for an attractive, indulgent topping; press into dough rounds before baking for visible garnishes. Allow customization of appearance and texture by increasing crunchy or gooey elements on the cookie surface.
Instructions
- Preheat oven to 350 degrees F. Line a large baking sheet with a Silpat baking mat or parchment paper. Set aside.: As you prepare the oven it will begin to warm the kitchen with a gentle, dry heat that readies the air for baking, and you may notice a faint hum as the elements come up to temperature. This is important because an evenly preheated oven ensures the cookies spread and set predictably, creating consistent edges and centers. A common mistake is skipping the preheat, which can cause uneven spreading or underbaked middles. Make sure the rack is centered so heat circulates well and the bottoms brown evenly.
- In a medium bowl, whisk together flour, cocoa, baking soda, and salt. Set aside.: When you whisk these dry components you release the aroma of cocoa and evenly distribute the baking soda and salt , which prevents pockets of salty or bitter flavor. Visually you should see a uniform brown mixture with no streaks of flour. A typical error here is not fixing glued words from the ingredient list when measuring, so double check measurements and sift if your cocoa or flour is lumpy. Even mixing ensures predictable rise and texture in the final cookie.
- In the bowl of a stand mixer, cream together the butter and sugars until creamy and smooth, about 1 minute. Add in the eggs and vanilla extract and mix until combined.: As you cream, you will notice the butter and sugars lighten in color and form a smooth ribbon when lifted with the paddle, trapping air that contributes to a tender cookie. The aroma will shift toward warm caramel from the brown sugar. Avoid over creaming which can cause excessive spread in the oven, and be careful to scrape the bowl so everything is evenly mixed. If your butter is too cold, the mixture will not cream properly and your texture will suffer.
- Add the dry ingredients and mix on low until just combined.: At this stage the batter will darken and thicken, and you should stop mixing as soon as streaks disappear to avoid developing gluten from the all purpose flour . Over mixing makes cookies tough rather than tender. You want a cohesive dough that still looks slightly soft and pliable. If you see any dry pockets, fold them gently with a spatula rather than increasing mixer time.
- With a spatula, stir in the peanut butter cups, peanut butter chips, and chocolate chips.: Folding in the peanut butter cups and chips distributes little nests of candy through the dough, so you get melty, chewy, and crunchy elements in different bites. Use a spatula to preserve the dough texture and avoid pulverizing the chopped candies. A common oversight is adding too many mix ins which can prevent the dough from holding together, so keep the specified amounts to maintain balance.
- Form the cookie dough into balls with your hands or with a cookie scoop, about 1 1/2 tablespoons of dough per cookie. Place on prepared baking sheet, about 2 inches apart. Sprinkle cookies with sea salt.: Rolling the dough into evenly sized balls helps the cookies bake uniformly, and placing them with space allows them to spread into round shapes. You will notice a faint sheen from the butter on the surface; that is normal. The sea salt lightly sprinkled on top will create bright flavor highlights after baking. A frequent mistake is crowding the pan, leading to merged cookies, so keep that spacing consistent.
- Bake cookies for 10 to 12 minutes or until cookies are set around the edges but still soft in the center. Don't over bake.: As the cookies bake you will see the edges firm and slightly darken while the centers remain glossier; that visual cue tells you when to pull them. The kitchen will fill with a warm chocolate aroma that intensifies as the sugars caramelize. Over baking will produce dry, hard centers, so aim for that soft middle that continues to set off the hot sheet. Rotate the pan halfway through if your oven has hot spots to ensure even browning.
- Let the cookies cool on the baking sheet for 3 to 5 minutes. While cookies are cooling, gently press additional chopped peanut butter cups and chips onto the tops of the cookies. This is optional but will make the cookies extra pretty and extra delicious.: Cooling briefly on the sheet allows the cookies to finish setting without breaking apart, and pressing extra candies while they are still warm helps the pieces adhere without melting completely into runny puddles. The tactile step of pressing candies creates an appealing finished look and a textural top. A common pitfall is waiting too long to press, which may prevent the pieces from sticking properly.
- Transfer to a cooling rack and cool completely. Store the cookies in an airtight container for up to 3 days.: Moving the cookies to a rack prevents moisture buildup on the bottoms and preserves the crisp edge and soft center contrast. As they cool, you will notice the interiors shift from glossy to matte, signaling readiness to serve. For storage, an airtight container keeps them fresh but avoid stacking warm cookies which can trap steam and soften edges. If you need longer storage, freeze the baked cookies in a single layer separated by parchment.
Notes
- Room temperature butter matters Use butter that yields under gentle pressure but is not greasy. This allows it to cream with the sugars, trapping air that translates into a tender, slightly risen cookie. If your butter is too cold, it will not incorporate well, and if too warm it will make the dough greasy and cause excessive spread.
- Sift cocoa if lumpy Cocoa powder can clump, and sifting it with the flour makes incorporating the dry mix easier, preventing streaks of dry cocoa and uneven flavor pockets. If you skip sifting, take extra care to whisk thoroughly and break up lumps with a fork.
- Mix ins distribution Fold in the chopped peanut butter cups and chips gently, so the larger pieces remain intact and provide textural contrast. Over chopping or over mixing can create pockets of melted candy or a uniform interior with no surprises.
- Bake on middle rack The oven middle gives the most even heat for cookie baking, preventing bottoms from over browning while the tops remain soft. If your oven runs hot, lower the temperature by 10 to 15 degrees and check a minute or two earlier than the low end of the time window.
- Spacing on the sheet Leave about 2 inches between cookie mounds to allow for natural spread. If you want thicker cookies, chill the dough for 20 to 30 minutes before baking to slow spread and create a puffier profile.