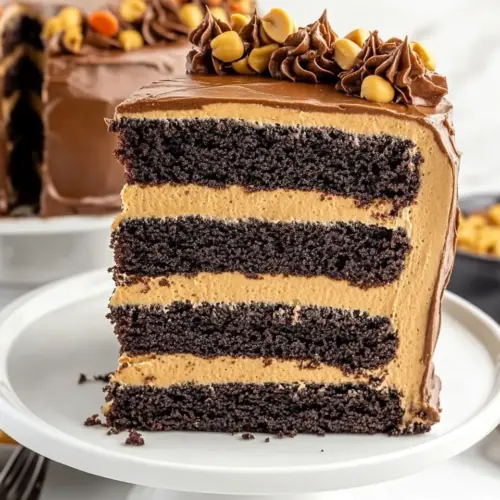
Chocolate Peanut Butter Cake
Chocolate Peanut Butter Cake blends creamy peanut butter frosting with a tender cocoa cake and glossy ganache for a rich, crowd pleasing dessert. The layers are moist and airy while the frosting is smooth and spreadable, creating a pleasing contrast of textures. Perfect for parties or a special weekend bake, this cake delivers nostalgic flavors with dependable technique, making it a must try.
Equipment
- Stand mixer
- Paddle attachment
- 3 8 inch round cake pans
- Wire Rack
- Mixing Bowls
- Offset Spatula
- Microwave-safe Bowl
- Large spoon
- Piping Bag
Ingredients
- 2 cups cake flour Sifted to ensure a light, tender crumb and combined with leaveners to form the cake's structure, cake flour produces a delicate texture ideal for layered cakes.
- 2/3 cup unsweetened cocoa powder Dissolved into the dry mix to provide rich chocolate flavor and deep color, unsweetened cocoa powder balances sweetness and contributes to the cake's chocolate intensity.
- 1 3/4 teaspoons baking powder Measured to provide controlled lift and aeration, baking powder reacts during baking to help the cake rise evenly and maintain a soft crumb.
- 3/4 teaspoon baking soda Added in a small amount to react with acidic components, baking soda boosts rise and helps achieve a tender, airy texture while aiding browning.
- 1/2 teaspoon salt Scaled precisely to enhance flavor balance and strengthen gluten structure slightly, salt elevates the chocolate and peanut butter flavors without making the cake salty.
- 1 3/4 cups granulated sugar Creamed with wet ingredients to add sweetness, moisture retention, and tenderness, granulated sugar also assists in aeration for a lighter crumb.
- 3 large eggs (room temperature) Whisked in for structure, richness, and emulsification, eggs provide binding, leavening support, and contribute to the cake's stability and moistness.
- 1 cup whole milk (room temperature) Warmed and mixed to blend smoothly with fats and dry ingredients, whole milk adds fat, moisture, and a creamy mouthfeel to the batter.
- 1/2 cup canola oil Poured in to tenderize the crumb and increase moisture, canola oil keeps the cake soft and extends shelf life without overwhelming other flavors.
- 1 1/2 teaspoons vanilla extract Stirred into wet ingredients to impart aromatic sweetness, vanilla extract rounds out flavors and enhances the perception of chocolate and peanut butter.
- 1/2 cup very hot water Added hot to bloom cocoa and dissolve coffee, very hot water intensifies chocolate flavor and helps create a smoother, more uniform batter.
- 2 teaspoons instant coffee granules Dissolved into hot water to deepen chocolate notes, instant coffee granules amplify the cocoa flavor without making the cake taste like coffee.
- 1 cup unsalted butter (room temperature) Softened and beaten for the frosting base, unsalted butter provides creamy richness and structure while allowing control over overall saltiness.
- 2 cups creamy peanut butter Stirred into frosting to deliver pronounced peanut flavor and creamy texture, creamy peanut butter creates a signature filling and icing for the cake.
- 4 cups powdered sugar (sifted) Sifted into the butter-peanut mixture to sweeten and thicken the frosting, powdered sugar stabilizes texture and achieves a pipeable consistency.
- 6 tablespoons heavy cream Poured in small amounts to adjust frosting consistency, heavy cream adds silkiness, helps achieve spreadable frosting, and contributes richness.
- 2 teaspoons vanilla extract Added to boost aroma and flavor depth in the frosting, vanilla extract complements the sweetness and enhances both chocolate and peanut notes.
- 4 ounces semi-sweet baking bar (chopped) Chopped and melted or folded to add chocolate texture and flavor, semi-sweet baking bar pieces enrich ganache or filling with bittersweet contrast.
- 1/3 cup heavy cream Heated and combined with chocolate to form a glossy ganache, heavy cream provides smoothness, shine, and a luxurious mouthfeel.
- 1 tablespoon unsalted butter Melted into ganache to add sheen and richness, unsalted butter smooths the chocolate mixture and helps it set with a satiny finish.
- Reese’s Pieces candies (optional garnish) Scattered atop the finished cake as an optional garnish to add color, crunch, and a playful peanut-flavored candy element for visual appeal.
Instructions
- Preheat oven to 350°F. Spray 3 (8-inch round) cake pans with baker’s spray and set aside.: You will notice the oven fills with a gentle warmth that prepares the air for even baking, which matters because a stable oven temperature gives you level rises and consistent crumb; ensure racks are placed in the center so heat circulates. A common misstep is not preheating long enough, leading to uneven rising or dense centers, so wait until the oven registers the full temperature. Also check that pans are greased evenly so cakes release cleanly, and avoid stacking the pans which blocks airflow.
- In a medium mixing bowl, sift together the cake flour, unsweetened cocoa powder, baking powder, baking soda, and salt.: As you sift, the dry mixture will smell faintly of chocolate and feel light, and sifting helps aerate the flour to promote tenderness; this step prevents lumps and ensures even distribution of leaveners. If you skip sifting, you risk pockets of unmixed baking powder or cocoa clumps which create uneven texture. Use a whisk after sifting to blend thoroughly, and avoid overworking the flour once liquids are added.
- In a separate, large mixing bowl, whisk together the granulated sugar, eggs, whole milk, canola oil, and vanilla extract.: The mixture should look glossy and homogenous, and whisking introduces air which helps the batter hold structure; warm room temperature ingredients emulsify more easily, producing a smooth batter. If you use cold ingredients, the batter can separate and rise poorly, so bring eggs and milk to room temperature. Watch that you do not overbeat the eggs and sugar into a foam, which could lead to collapse later.
- Add the dry ingredients to the bowl of the wet ingredients and whisk until fully combined.: You will see the batter change from streaky to even, and the spoon will move through a slightly thick but pourable mass; this blending forms the crumb framework, so fold until no dry streaks remain. Overmixing here can develop gluten and toughen the cake, so stop as soon as the flour is incorporated. If pockets of dry flour remain, use gentle strokes instead of vigorous whipping to finish combining.
- To the very hot water, add the instant coffee granules, stir to dissolve the coffee into the water, then add to the batter. Whisk until you have a smooth chocolate cake batter.: The hot coffee blooms the cocoa , deepening aroma and making the batter smell richer and more fragrant; once added, whisk to a smooth, slightly loose chocolate batter that pours easily. Adding cold liquid could affect rise, so ensure the water is hot and coffee fully dissolved. A common mistake is pouring hot liquid too quickly into a mixing bowl that contains cold eggs, which can shock the batter; add slowly while whisking.
- Evenly divide the batter between the three prepared cake pans. You can use a kitchen scale to ensure that each of the pans are approximately the same weight.: The batter should pour with a ribbon like consistency, and weighing or using a measuring cup ensures each pan bakes at the same rate for even layers; this is crucial for neat stacking. If one pan has significantly more batter, that layer will take longer and may dome. Tap pans gently on the counter to release air bubbles and smooth the tops for uniform rise.
- Bake the chocolate cakes for 20-25 minutes or until a toothpick inserted comes out clean. Allow the cakes to cool in the pans for 10 minutes before transferring them to a wire rack to cool completely before frosting them.: While baking you will notice the aroma deepen and the tops set; a clean toothpick indicates proper doneness and the cake will spring back slightly when touched. Removing pans too soon can cause collapse, while leaving too long dries them out, so follow the toothpick cue. Cooling in the pan for the short window prevents the fragile crumb from tearing during transfer, and completely cooled layers are essential for stable frosting.
- In the bowl of a stand mixer fitted with a paddle attachment, beat the unsalted butter on medium speed until light and fluffy with no lumps. Add the creamy peanut butter and beat again until fully combined and smooth.: The butter should lighten in color and look whipped, and adding peanut butter creates a creamy sheen; this step builds the frosting's structure so it holds piped shapes. If the butter is too cold you will see lumps, if too warm it will look greasy, so aim for a soft but cool texture. Scrape the bowl frequently to incorporate everything evenly.
- Add the sifted powdered sugar and mix until all the powdered sugar is fully incorporated. You will need to start on low speed and build your way up to medium-high speed. You may need to stop and scrape down the sides and bottom of your bowl when making your frosting to ensure that all the ingredients are evenly incorporated.: The frosting will initially appear powdery, then thicken into a dense paste as the sugar integrates, which is the backbone of the frosting's stability. Start on low to avoid a powdered sugar cloud, and gradually increase speed to fully incorporate without splattering. If you rush and end at high speed too quickly, you risk a gritty texture, so scrape and adjust speed slowly.
- Add the heavy cream and vanilla extract and mix again for 2-3 minutes or until your peanut butter frosting is smooth and fluffy. You want your frosting to be slightly on the thick side yet still spreadable. You can add a little extra powdered sugar to the frosting, starting with 1/2 cup at a time, to thicken the frosting if it is too thin. If it is too thick, you can add extra heavy cream, starting with 1 tablespoon at a time. Be sure to stop and scrape down the sides and bottom of the bowl with each addition to ensure your frosting is evenly mixed.: The cream lightens the texture, and the frosting should become glossy and pipeable, with a soft peak when lifted; this step balances spreadability with body. If the frosting is too thin, add more powdered sugar a half cup at a time, and if too thick, add cream tablespoon by tablespoon. Avoid adding too much liquid at once which can make it runny and require more sugar to fix.
- Remove 1 cup of the peanut butter frosting and place it into a large piping bag fitted with a decorative piping tip to pipe the decorative dollops around the edge of the cake once fully frosted.: The reserved frosting will hold shape for piping, and you should notice it keep a defined edge when tested on a plate, perfect for decorative dollops. If frosting is too soft to hold, chill briefly, but avoid over chilling which makes piping difficult. A common error is filling the bag too full, making it hard to control, so keep a manageable amount.
- Add one cooled cake layer to a serving plate or cake stand. If your cake is slightly domed from baking, you can use a large serrated knife to carefully remove the domed portion to give you a flat, even cake layer. Add approximately 1 cup of the peanut butter frosting to the top of the first cake layer and spread evenly from edge to edge with an offset spatula. Add the second cake layer, followed by more frosting, then the third cake layer. Add the remaining peanut butter frosting to the top and sides of the cake. Be sure that your frosting is evenly spread over the top and sides of your cake.: When you press the frosting it should glide smoothly and create an even bed for the next layer, and leveling domes ensures the cake stacks without wobble. Leaving domes can lead to a leaning cake, so trim carefully and keep crumbs out of the frosting. If crumbs appear, do a thin crumb coat first and chill.
- Add the chopped semi-sweet chocolate bar, heavy cream, and unsalted butter to a medium-sized microwave-safe bowl. Microwave on high for 1 minute. Allow the warmed cream and chocolate to sit for 1 minute, then whisk to completely combine the ingredients into a smooth, silky ganache. Allow the ganache to cool slightly on the counter (but still at a pourable consistency) before adding to the cake.: As you assemble, the weight of layers compresses the crumb slightly and the frosting should remain spreadable to fill gaps, creating cohesive layers. Work methodically to keep edges even, and if frosting picks up crumbs, apply a thin crumb coat and chill before finishing. Avoid over handling the sides which can create uneven thickness.
- Using a large spoon, carefully spoon the chocolate ganache onto the top of the cake, allowing it to drip down the sides. Carefully smooth the chocolate into an even layer covering the entire surface of the top and down the sides of the cake. You can use an offset spatula, or plastic bench scraper, to carefully spread the ganache into a thin, even coating on the entire surface area of the cake. Place the cake into the refrigerator to firm up the ganache layer for a minimum of 1 hour before piping the decorative dollops of peanut butter frosting around the top edge of the cake. You can add the optional Reese’s Pieces candies for garnish.: After resting you will see the chocolate melt into the cream and the mixture whisk to a glossy, velvety texture; this creates the ganache that will form a shiny shell. If the ganache appears grainy, heat gently and whisk until smooth, but do not overheat which can separate fats. Use short microwave bursts if needed rather than a single long one.
- Allow the ganache to cool slightly on the counter before adding to the cake: The ganache should be pourable but not piping hot, and as you spoon it you will hear a soft glug and see it flow into a reflective sheet that drips nicely down the sides. If it is too hot it will melt the frosting below, if too cool it will set without smoothing, so wait for that sweet spot. Test a spoonful on a plate to check viscosity before applying to the cake.
- Using a large spoon, carefully spoon the chocolate ganache onto the top of the cake, allowing it to drip down the sides. Smooth into an even layer covering the top and sides of the cake. Place the cake into the refrigerator to firm up the ganache layer for a minimum of 1 hour before piping the decorative dollops: As the ganache chills it will become shiny and slightly firm, creating clean slices later, and you should feel it set to a thin shell when touched. Rushing to pipe before it firms can cause smearing, so be patient and let it rest. After chilling, pipe the reserved dollops and add the optional candy garnish for finishing flair.
Notes
- Room temperature ingredients: Bring eggs, milk, and butter to room temperature before starting to ensure a smooth batter and even rise.
- Sift dry ingredients: Sifting cake flour and cocoa prevents lumps and promotes a tender crumb, especially important when using darker cocoa.
- Measure accurately: Use a scale or proper measuring cups to divide batter into pans evenly so layers bake uniformly and stack without tilting.
- Control frosting consistency: Adjust powdered sugar and heavy cream gradually to achieve a spreadable yet stable peanut butter frosting that will pipe well.
- Test ganache temperature: Let the ganache cool to a pourable but not hot state before adding to the cake to prevent melting the frosting beneath.
- Make ahead: Bake layers a day ahead and refrigerate wrapped tightly; assemble the next day to save time and improve flavor melding.