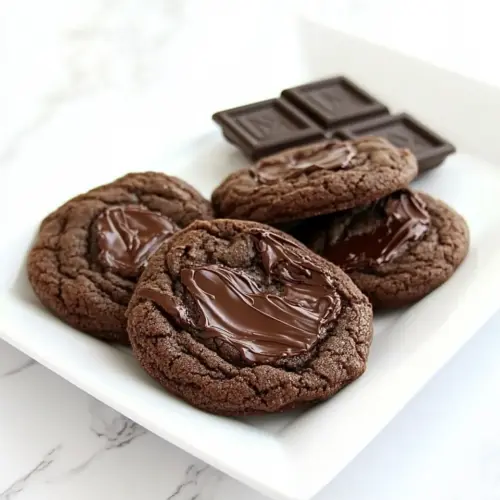
Chocolate Nutella Cookies
Chocolate Nutella Cookies are soft centered and deeply chocolatey with a hazelnut lift from Nutella. This easy cookie recipe yields tender, slightly chewy cookies that are perfect for sharing, gifting, or an easy weeknight dessert. The rich dutch process cocoa and brown sugar create a balanced sweetness, making them a must make for chocolate lovers.
Equipment
- Stand mixer
- Mixing Bowls
- Whisk
- Baking Sheets
- Parchment paper or silicone baking mat
- Cooling rack
Ingredients
- 1 1/4 cups all-purpose flour Provide structure and bulk to the cookies, forming the base of the dough and helping achieve a tender crumb when properly measured and mixed. Combine with the cocoa to balance flavor and absorb moisture from the fats and liquids. Sift before use to remove lumps and ensure an even texture.
- 1 teaspoon baking powder Leaven gently by producing small air pockets during baking, contributing to a slightly lighter texture without making the cookies cake-like. Blend evenly into the dry ingredients to ensure consistent rise across the batch. Measure precisely to avoid excessive puffing or metallic aftertastes.
- 1/2 teaspoons salt Enhance flavor balance and strengthen gluten interactions slightly while regulating yeast and structure, preventing the cookies from tasting flat. Dissolve into the dry mix to distribute evenly and control the dough's saltiness. Adjust sparingly if using salted butter to avoid over-salting.
- 2/3 cup dutch-process cocoa Provide deep chocolate flavor and color, contributing rich cocoa notes and a slightly dry texture that the fats and liquids will hydrate. Choose dutch-process for a smoother, less acidic taste that pairs well with Nutella and brown sugar. Whisk with the flour to prevent clumping and ensure even chocolate distribution.
- 1/2 cup unsalted butter at room temperature Add fat for tenderness, mouthfeel, and richness, helping create a soft, spreadable cookie while aiding in flavor release. Cream with sugars to incorporate air for gentle lift and to create a smooth, cohesive dough. Bring to room temperature to ensure proper emulsification and even mixing.
- 1/2 cup granulated sugar Sweeten and contribute to lightness by aerating with butter when creamed, promoting a soft texture and subtle crunch on the exterior. Provide neutral sweetness that lets cocoa and hazelnut notes shine through. Dissolve partially during mixing to create a smooth batter consistency.
- 1/2 cup dark brown sugar Impart deep molasses-like sweetness and moisture, enhancing chewiness and adding complex caramel notes that complement the chocolate and Nutella. Help retain moisture during baking for a softer, fudgy center. Cream with butter and granulated sugar to integrate flavor and color.
- 1 1/2 teaspoons vanilla Add aromatic sweetness and brighten the chocolate and hazelnut flavors with a familiar dessert note, enhancing overall flavor complexity. Fold into the wet ingredients to evenly distribute scent and taste without overpowering delicate extracts. Use pure vanilla for best results.
- 1/2 teaspoon hazelnut extract Introduce a concentrated nutty aroma that amplifies the hazelnut character of Nutella, lending a toasted, slightly bitter top note for depth. Use sparingly to avoid overpowering the primary chocolate flavors; a little goes a long way. Incorporate with the other extracts to achieve balanced flavor.
- 1/3 cup Nutella Contribute pronounced hazelnut-chocolate flavor and a creamy, spreadable texture that enriches the cookie interior and yields pockets of gooey filling. Swirl or fold into the dough to create melty, flavorful bites with concentrated Nutella bursts. Temper slightly if needed for easier incorporation.
- 1/3 cup milk Hydrate the dough and help dissolve sugars and cocoa, contributing to consistency and spread during baking while thinning the Nutella slightly for smoother incorporation. Provide a neutral dairy note that softens crumb and enhances mouthfeel. Warm slightly if cold to prevent chilled dough clumping during mixing.
Instructions
- Whisk together flour, salt, baking powder, and cocoa, set aside. In the bowl of a stand mixer, add the butter and sugars. Beat on medium speed until smooth and creamy, about two minutes. Add the vanilla and hazelnut extract and beat until extracts disappear. Add the Nutella and mix until batter is smooth.: The dry mix should smell faintly of cocoa with a dusty, chocolate aroma that deepens as you whisk. Combining these ingredients evenly prevents pockets of leavener or cocoa, so the final bake feels uniform. I like to whisk for about 20 to 30 seconds until everything looks homogenous and there are no lumps, because uneven mixing can lead to odd patches of taste and texture. A common mistake is skipping the sift or whisk, which can cause clumps of cocoa and uneven rise. If you notice little clumps, break them up with the back of a spoon before proceeding.
- Add the flour mixture in 2 batches, alternately with the milk in one batch, mixing well. Chill dough for at least 15 minutes before baking. You can make the dough a few days in advance, just wrap it in plastic wrap and store in the refrigerator.: When you cream the butter and both sugars, you should hear a soft whipping sound as the paddle aerates the mixture and see it lighten in color slightly. This process traps tiny air pockets that contribute to tenderness in the baked cookie. Beat on medium speed for about two minutes until the mixture looks smooth and glossy, because under-creaming can yield dense cookies and over-creaming can lead to excess spread. A frequent mistake is using cold butter, which will not cream properly, so make sure your butter is at room temperature but not oily.
- When you are ready to bake the cookies, preheat the oven to 325 degrees F. Line two baking sheets with a silicone baking mat or parchment paper. Take a tablespoon of cookie dough and roll it into a ball. Place on lined baking sheets and gently press down on the dough ball. Continue making dough balls until the cookie sheets are filled - leave two inches in between cookies.: You will notice the texture change from coarse to velvety as sugar dissolves into the butter . Visually, the mixture becomes paler and slightly fluffy, with a sheen that tells you the sugar has integrated. This step matters because it affects how the dough traps air and how the cookie bakes. If your sugars look grainy after two minutes, scrape the bowl and continue briefly to ensure even blending. The mistake to avoid here is rushing the creaming, which leaves gritty pockets and a less tender final cookie.
- Bake cookies for 10-11 minutes or until soft, but starting to set. Remove cookies from the oven and let cool on baking sheets for 2 minutes. Transfer to a cooling rack and let cool completely.: Once you add the vanilla and hazelnut extract , the batter releases a fragrant lift, a warm floral note that complements the chocolate. Beat just until the extracts are incorporated and you no longer smell distinct alcohol or synthetic notes, as overbeating will not improve flavor and can warm the mix. This step rounds the profile, and a common error is adding too much extract which can overwhelm the chocolate, so measure accurately.
- Add the Nutella and mix until batter is smooth: As the Nutella joins the bowl, the batter will take on a glossy, nutty sheen and a rich scent. Mix until the color evens out and you cannot see streaks of hazelnut spread. This contributes moisture and nut flavor, which is central to the cookie identity. If the Nutella is cool and stiff it may not blend smoothly, so warm it briefly by rubbing the jar between your hands or microwaving for a few seconds. Avoid overheating, as overly runny Nutella can make the dough too loose.
- Add the flour mixture in 2 batches, alternately with the milk in one batch, mixing well: Alternate additions ensure the batter stays cohesive and does not get overworked, which preserves tenderness. After each addition you should fold until just combined, noticing the batter thicken and the scent shift back to chocolate. Visual cues include no visible streaks of flour and a smooth, slightly dense scoopable consistency. Overmixing here will create gluten development and a tougher cookie, so stop as soon as the dry mix disappears. If the dough seems crumbly, add the remaining milk in small spoonfuls until it holds together.
- Chill dough for at least 15 minutes before baking: Chilling firms the dough so the cookies spread less and develop that slightly set edge with a soft center. You will feel the dough cool and become more manageable when you scoop it. I often chill longer for a deeper flavor and better texture, since resting allows the ingredients to meld. A common mistake is skipping the chill and ending up with flat, thin cookies, so even a brief refrigeration helps greatly. If you forget, pop the shaped dough on a tray into the freezer for five to ten minutes as a quick fix.
- You can make the dough a few days in advance, just wrap it in plastic wrap and store in the refrigerator: When you make dough ahead, the aromas deepen and the texture often improves. Stored dough will smell richer and be easier to portion, and it lets you bake fresh cookies on demand. Make sure the dough is wrapped tightly to prevent refrigeration odors from seeping in. The mistake to watch is leaving it unwrapped which can dry the exterior and affect baking. If refrigerated for longer than two days, check for any off smells before baking.
- When you are ready to bake the cookies, preheat the oven to 325 degrees F: As the oven warms you will hear a low hum and later a soft click as it reaches temperature, and preheating ensures consistent bake times and predictable spreading. A properly preheated oven delivers the right instant heat to set edges and create a tender interior. Baking in a cold oven will lengthen bake time and alter texture, so always preheat fully. If your oven runs hot or cool, use an oven thermometer to adjust and avoid over or under baking.
- Line two baking sheets with a silicone baking mat or parchment paper: Lining helps the bottoms bake evenly and prevents sticking, and you will notice a cleaner color and easier removal when you use a liner. The surface also influences how much the cookies spread, so avoid greased pans which can cause excess flattening. A frequent error is overcrowding the tray, which leads to merged cookies, so leave space according to the directions. Rotate the pans halfway through if your oven has hot spots to ensure even browning.
- Take a tablespoon of cookie dough and roll it into a ball: Rolling yields consistent portions and encourages a neat, domed shape when baked. The dough should feel slightly tacky but hold together; if it is too soft, chilling a few extra minutes helps. I like to press the tops gently to encourage even spread and a slightly flattened profile that showcases the interior. A common issue is inconsistent sizes, which results in uneven baking, so use a tablespoon or scoop for uniformity.
- Place on lined baking sheets and gently press down on the dough ball: Pressing creates a slightly flattened cookie that bakes evenly and shows off texture in the center. When you press, you should see the edges take shape while the middle remains a little taller, which will set into a soft center. Overpressing will yield thin cookies, while too little press may create too tall a dome that does not bake uniformly. Keep about two inches between cookies so they have room to spread without touching.
- Continue making dough balls until the cookie sheets are filled leave two inches in between cookies: Filling the sheets methodically helps you maximize oven space while keeping the spacing consistent. The visual cue is evenly spaced mounds across the tray, and the scent will begin to promise chocolate as the oven heat activates the ingredients. A mistake is clustering too many close together, resulting in cookies that merge; give each cookie its two inch breathing room for best results.
- Bake cookies for 10 to 11 minutes or until soft, but starting to set: During baking you will notice the aroma intensify and the edges begin to look set while the centers still appear slightly glossy, which is the perfect moment to remove them. The sound is a faint hush as moisture escapes and the exterior firms up. Baking beyond this window risks drying them out, so check visually; the centers will finish setting on the hot sheet. Overbaking is the most common mistake, so err on the side of slightly underbaked if you prefer a tender center.
- Remove cookies from the oven and let cool on baking sheets for 2 minutes: Those first two minutes allow residual heat to finish the centers without continuing to crisp the edges too much. The cookies will look slightly more set and will lift easily from the liner after this rest. Resist the urge to move them immediately as they can break when warm. A typical misstep is transferring too soon, which can cause cookies to collapse or tear.
- Transfer to a cooling rack and let cool completely: Moving cookies to a rack allows air to circulate underneath, preventing soggy bottoms and helping them reach the ideal texture. Cool completely if you plan to stack or package them, because warm cookies can create condensation. If you want a softer interior, slightly undercool before serving; for a firmer bite, wait until fully cooled. Storing warm cookies can result in stickiness, so ensure they are room temperature before packing.
Notes
- Swap cocoa for natural cocoa carefully If you use natural cocoa instead of dutch process cocoa, expect a brighter, slightly more acidic chocolate flavor. Adjusting the taste is subtle, and the texture will remain similar. I recommend testing a small batch first to ensure you like the change because the flavor shift can be noticeable.
- Make the dough ahead Refrigerate the dough for one to two days to deepen the flavor and firm the dough for more controlled shaping. I often prepare dough the night before when I need fresh baked cookies for a gathering the next day. Tightly wrap the dough to prevent it from drying out.
- Adjust sweetness with brown sugar ratio Increase the proportion of dark brown sugar slightly for a chewier, moister center and a hint of caramel. This tweak is subtle but effective if you prefer a softer texture. Do not substitute all brown sugar for granulated sugar as it will change spread and bake characteristics significantly.
- Warm Nutella slightly if stiff If your Nutella is very firm, warm it briefly to loosen for easier mixing, but do so carefully to avoid making the dough too loose. I usually rub the jar between hands or microwave in short bursts while checking. Overheating will thin the chocolate spread and affect dough consistency.
- Freeze dough balls for later baking Scoop and freeze dough balls on a tray, then transfer to a container; bake from frozen adding an extra minute or two to the bake time. This is perfect for spontaneous fresh cookies on demand. Label the container with the date and bake within one month for best quality.